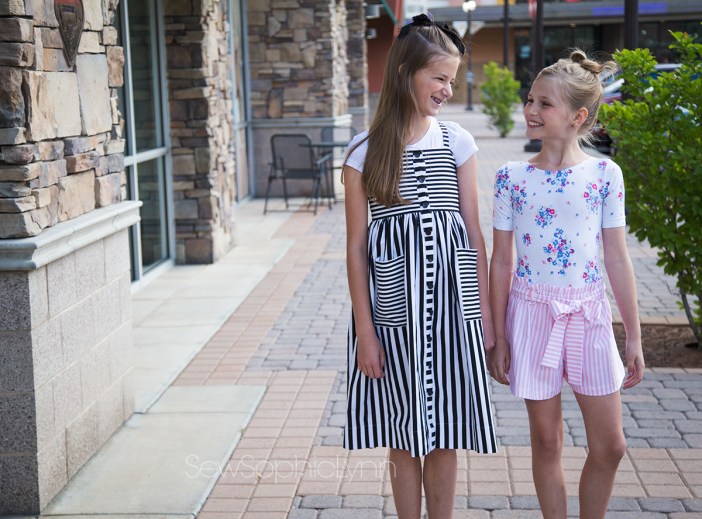
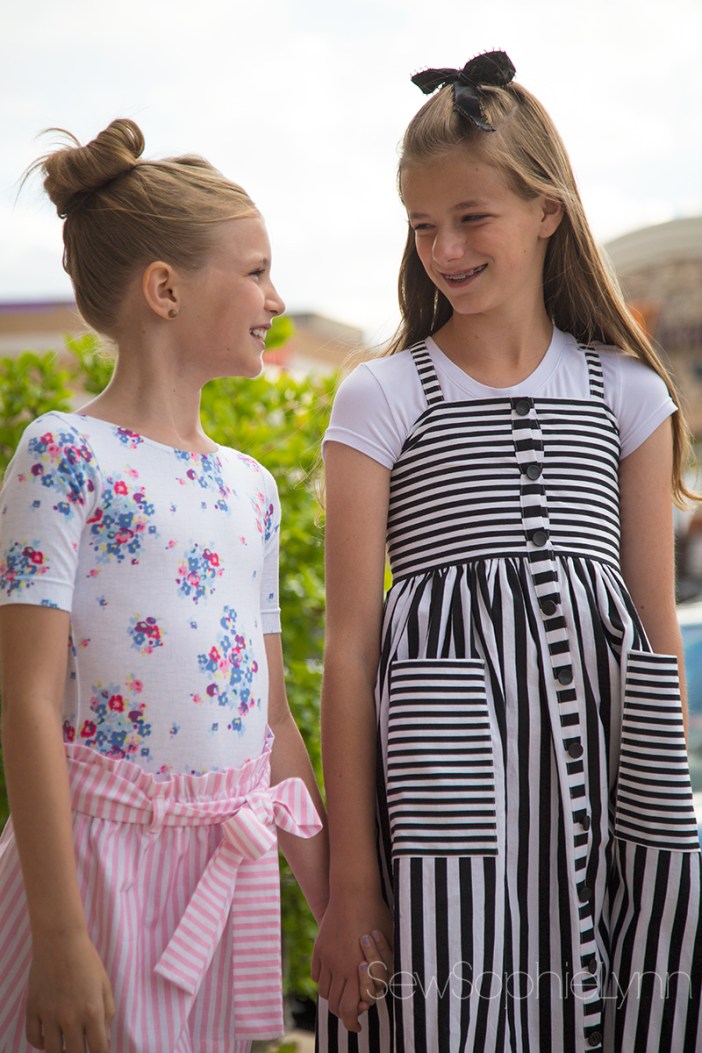
I’m not shy about my love of all things striped. I will pick striped fabric any day! Of course, I would jump at the chance to sew up some of Riley Blake Designs yummy stripes.
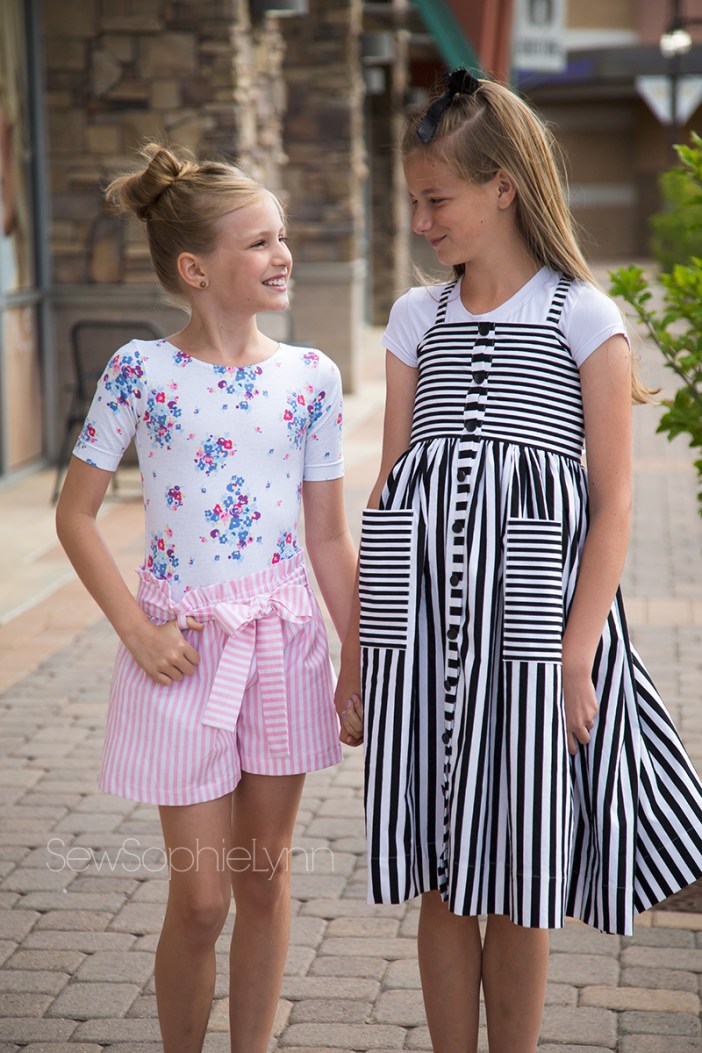
The toughest question was just which stripes to choose. With 1/8″, 1/4″, and 1/2″ widths to choose from in a wide array of colors, I was truly stumped. I love a classic black and white pairing and I knew my oldest would dig them as well. I got 1/2″ and 1/4″ so I could do a little playing around. My younger daughter is all about color and boy did I struggle to pick one. It was a tight race between mint, grey, aqua, and mustard before I finally settled on this baby pink 1/4″.
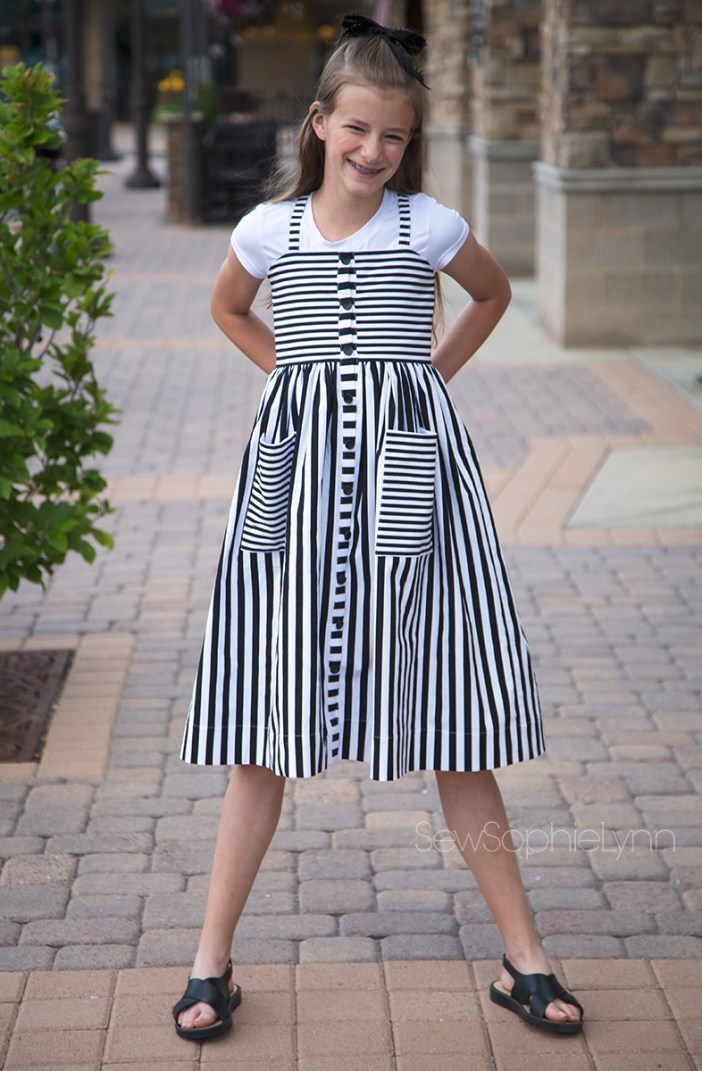
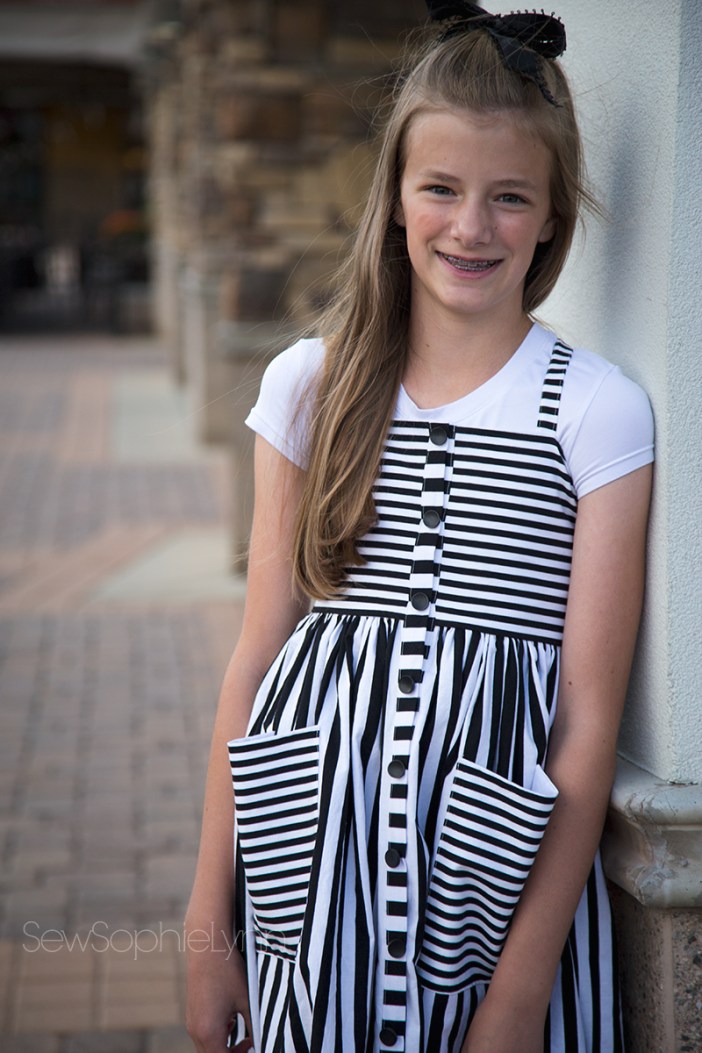
I used the Gwen Dress from Violette Fields Threads. I’ve been loving this style and went with this particular pattern because I loved the back elastic casings and nice big pockets.
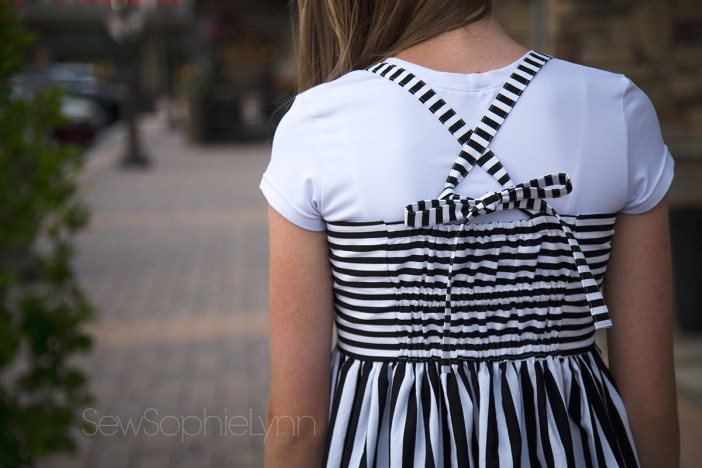
That tie back is so adorable!
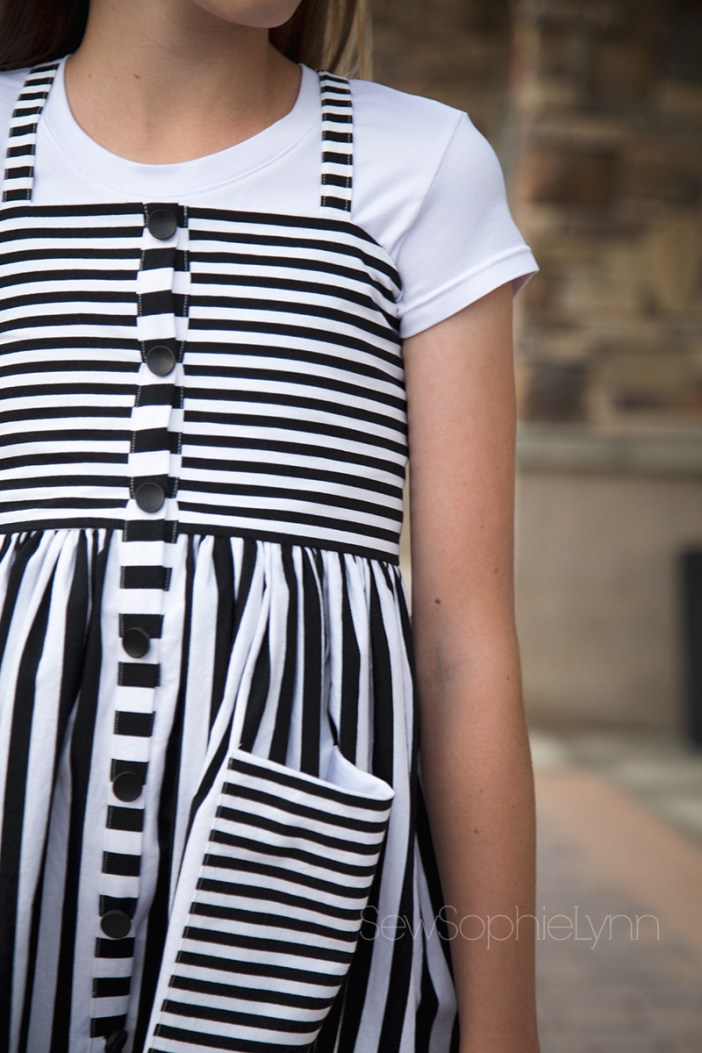
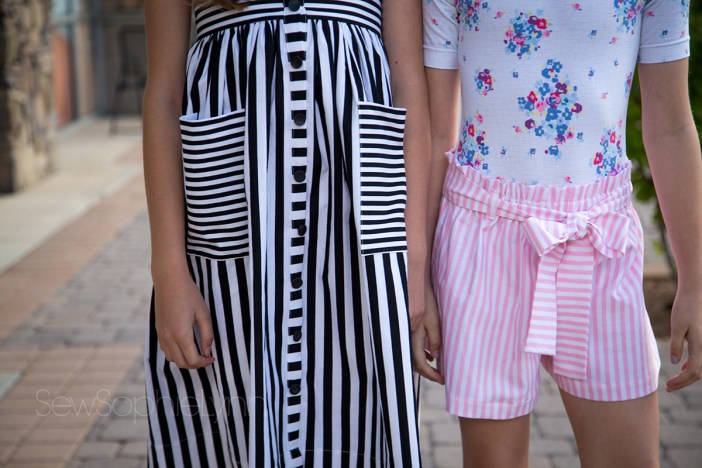
I mixed up the prints throughout the dress, playing with direction as I wanted. It made it so fun and stripe matching was a breeze.
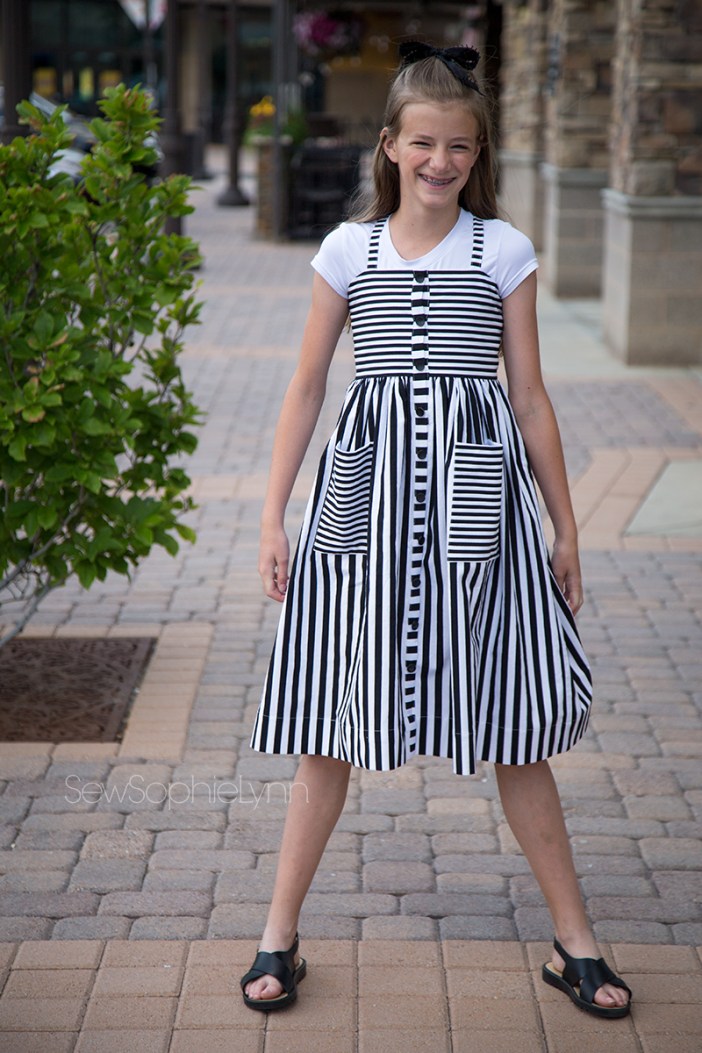
She fit the size 8 waist and chest measurements but was off the children’s size chart for height. I added length to the skirt and button placket. Next time I will size up one and add a little length to the bodice as well. Combining sizes for width and length can be tricky! You’d think after all my practice I’d have it down to an art. As is, this dress is still adorable and will get her through this summer for sure before it’s passed on to little sis.
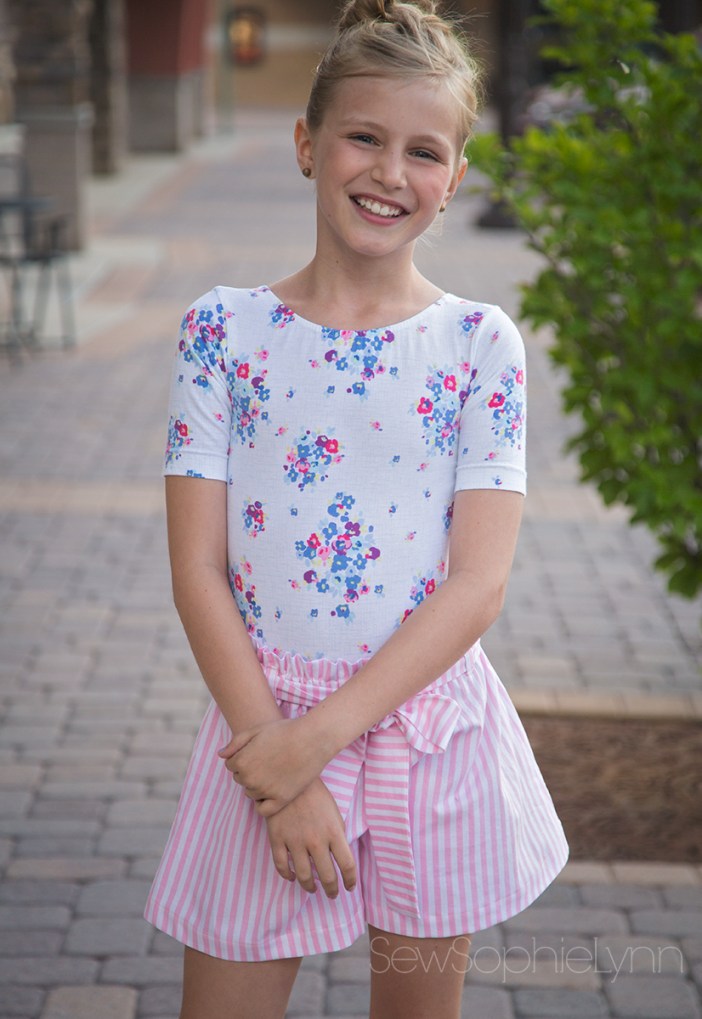
Speaking of little sis, she got a pair of paper bag waist shorts. They’re everywhere these days too and I’d been dying to hack some for ages. She got to be my guinea pig and the result is darling!
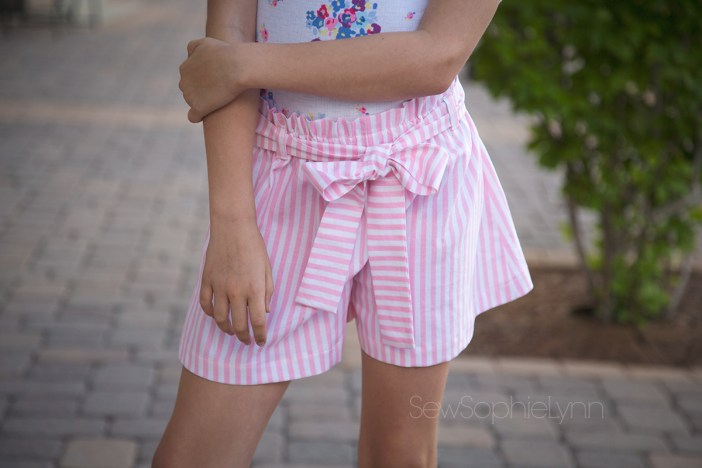
I used a shorts pattern I had handy (the Linden Romper shorts from Hey June). Since this was my first go at it I’ll tell you what I did, then tell you what I should have done. Live and learn baby!

First, I added a little width to them to make them more full using the slash and spread method. I also added length to the rise (about 1.5″). Now, this is what I’d do differently. I would actually shorten the rise and add a separate waistband. The way I did it the waist actually tapered a bit and didn’t want to fold down the full 2″. With a separate waistband you wouldn’t have that problem. No brainer for most of you I’m sure but I was flying by the seat of my pants as I sewed these up. Up until the moment I cut into them I had planned to do a button-front midi skirt but realized shorts would be way more practical. So I grabbed the nearest shorts pattern and went with it! Anyone else experience that rush of creativity and joy just letting go?!
For the paperbag style, I couldn’t believe how simple it was. I folded over the waistband an extra inch, creating a two-inch casing, leaving a small opening to insert your elastic. Then I sewed another row of stitching 1″ down from the top of the waistband. This creates the ruffle top. Insert your elastic into the bottom casing and finish your seam. I added a wide fabric sash and two small belt loops. The sash totally completes the look!
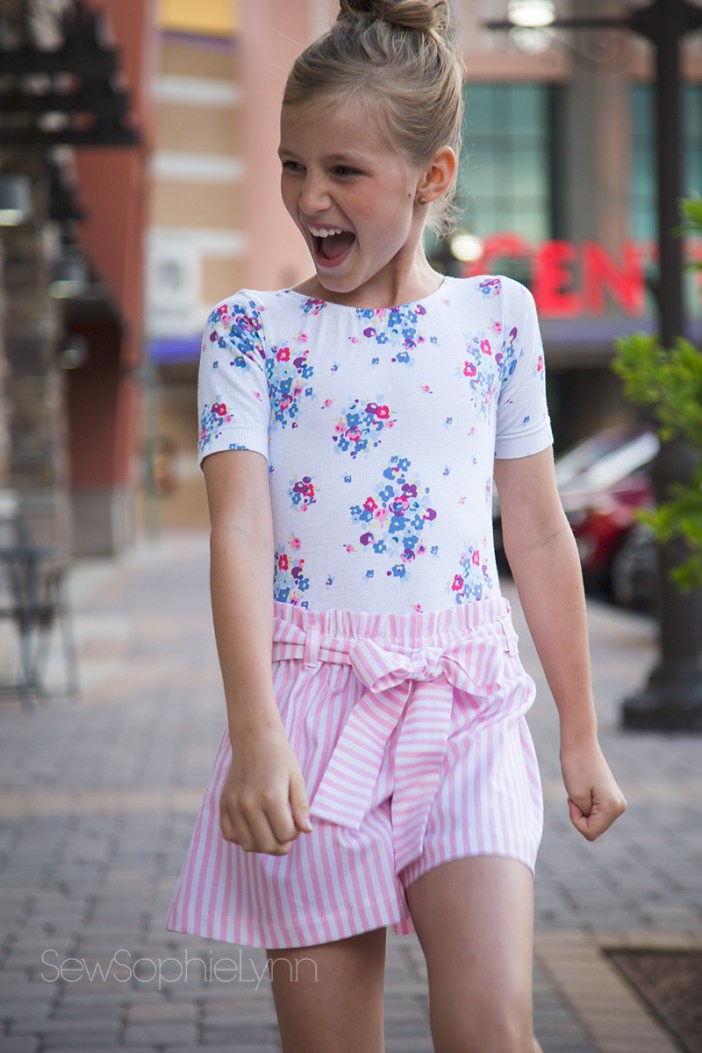
I’d say it was a great call! She loves them almost as much as I do and now I know just how to make my own pair!

A huge thank you to Riley Blake for providing the fabric for this post.

#teamsewallthestripes
These outfits are so cute though
LikeLike