Project Run and Play Week Two: Charlotte’s Web

Charlotte's-main

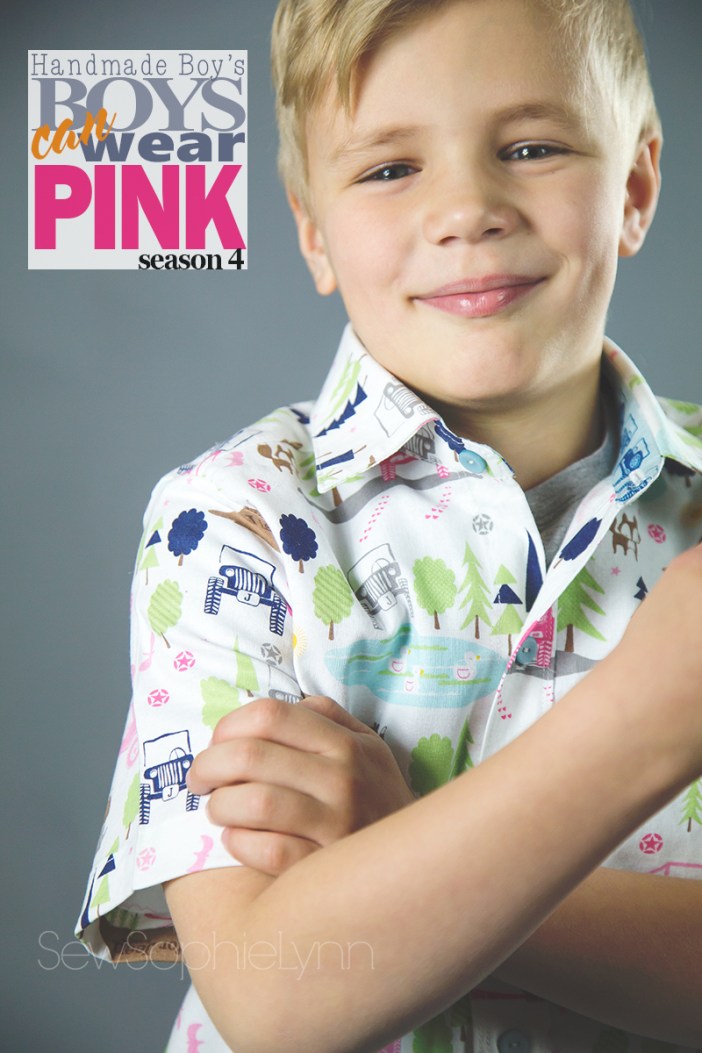
Week two is here and I’m so thrilled to be back again.  I can’t thank you guys enough for all the love and support last week!  What an amazing week it was and I know you’re going to be amazed at what my competitors have to offer this week as well.  So much crazy talent! Make sure you head over to Project Run and Play to vote!

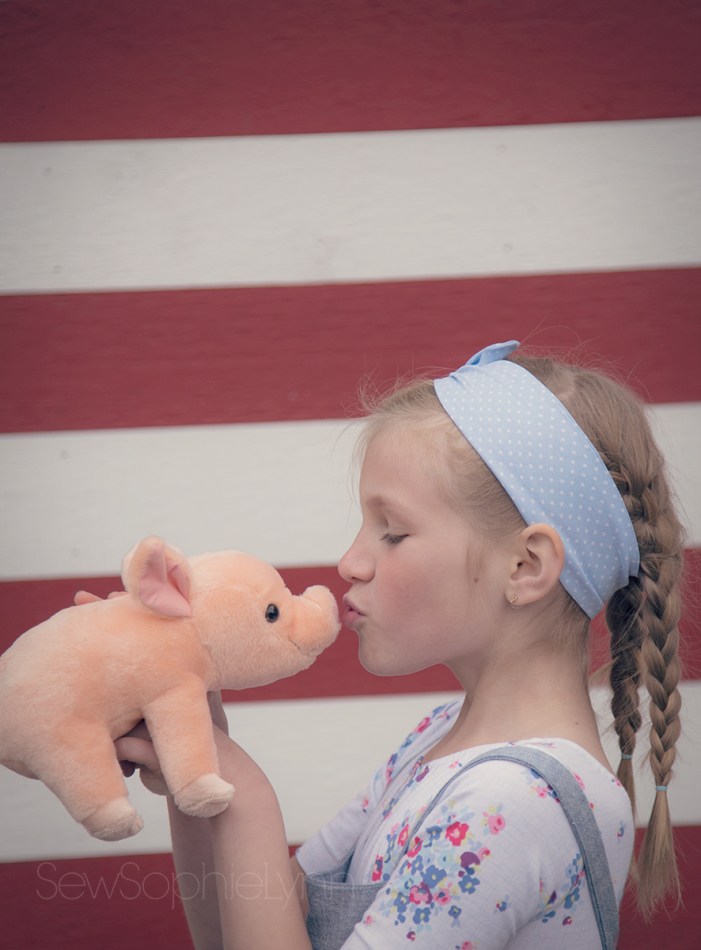
The theme this week is Crafting a Story, weaving elements of your favorite story book into this weeks project.  So fun, right?!!  My kids and I sat down and came up with a huge list of all of our favorite books and characters.  We kept coming back to Charlotte’s Web, a book I’d read as a child and read to my oldest boys years ago and again just last summer to these two cuties.  We loved it a ton and so much of the story resonated with us.  The character’s friendship is inspiring and teaches us to look past our physical differences.   The message that a tiny spider can bring about great things is so important for our kids to hear.  I want them to know that they can do anything and that simply being a good friend can make all the difference in the world.

pair1.1

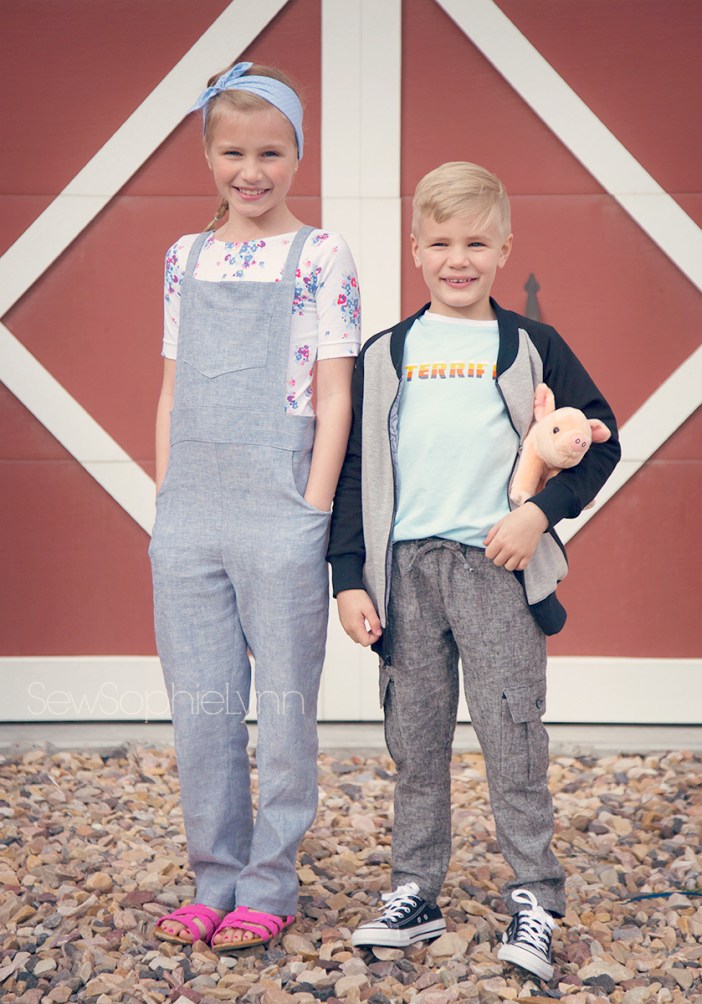
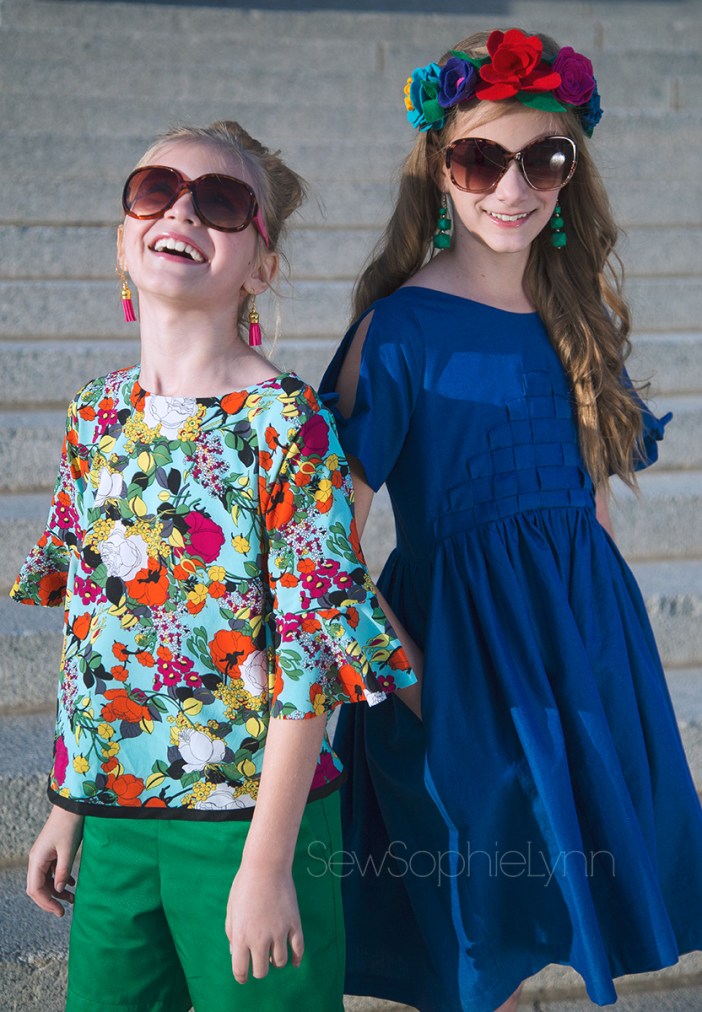
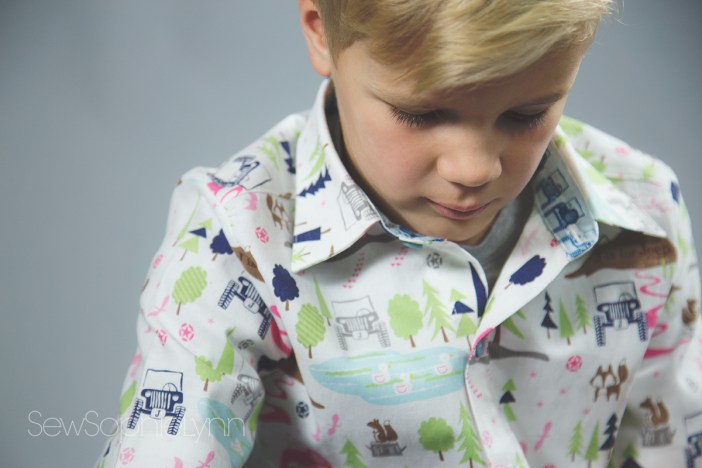
For our looks this week, I really wanted something classic and keeping with the charm of the book.  I used a ton of our favorite patterns and created looks that are reminiscent of Charlotte and her friends but that will also get worn in heavy rotation long after the competition is over.

pair4.1

All of my fabric this week was provided by Raspberry Creek Fabrics.  I love that I was able to grab the linen for the overalls and pants and the perfect knit solids and prints all in one stop.  I knew I wanted to use the spider-web print from their CLUB line and built the rest of the look around that.  The fabrics were so perfect for creating just the look I was after!

payton2.1

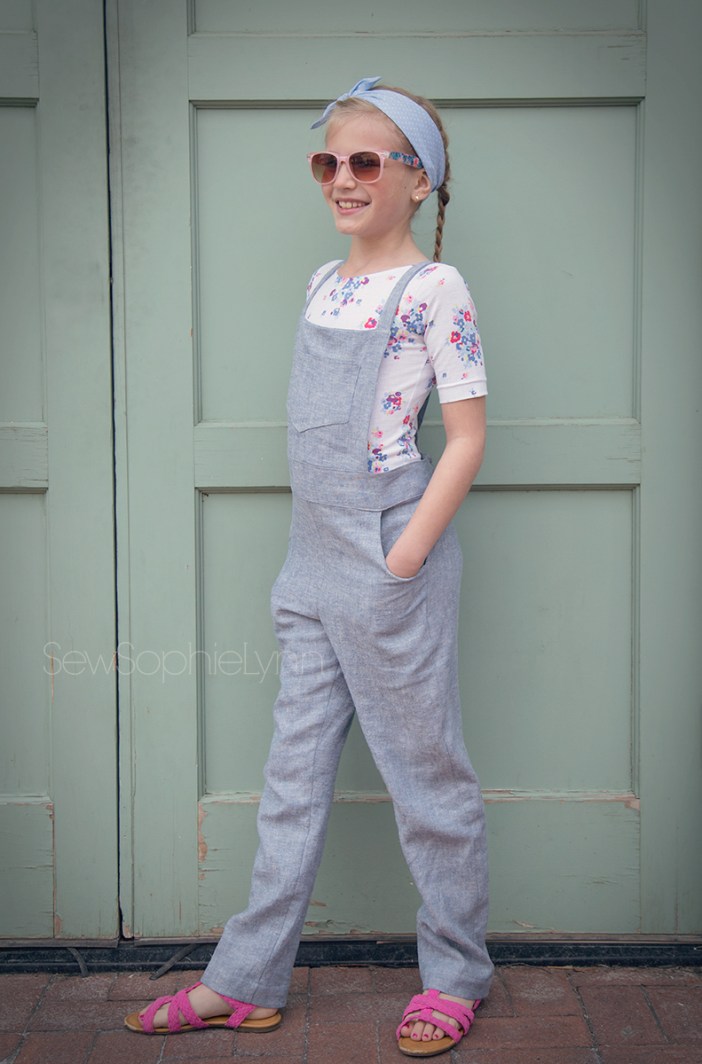
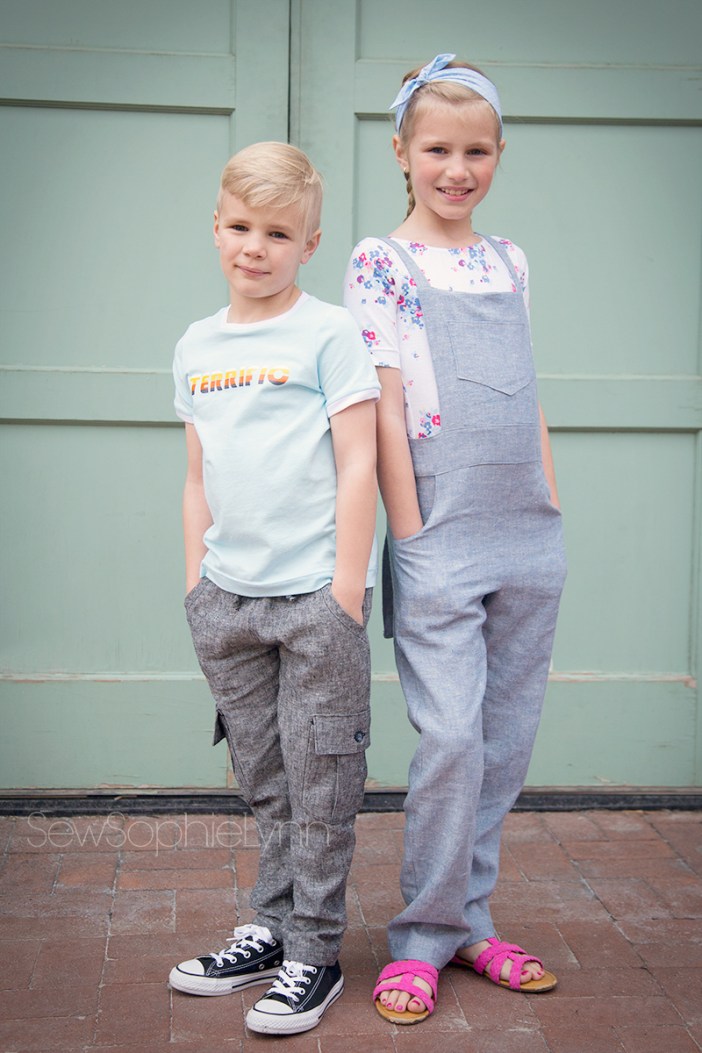
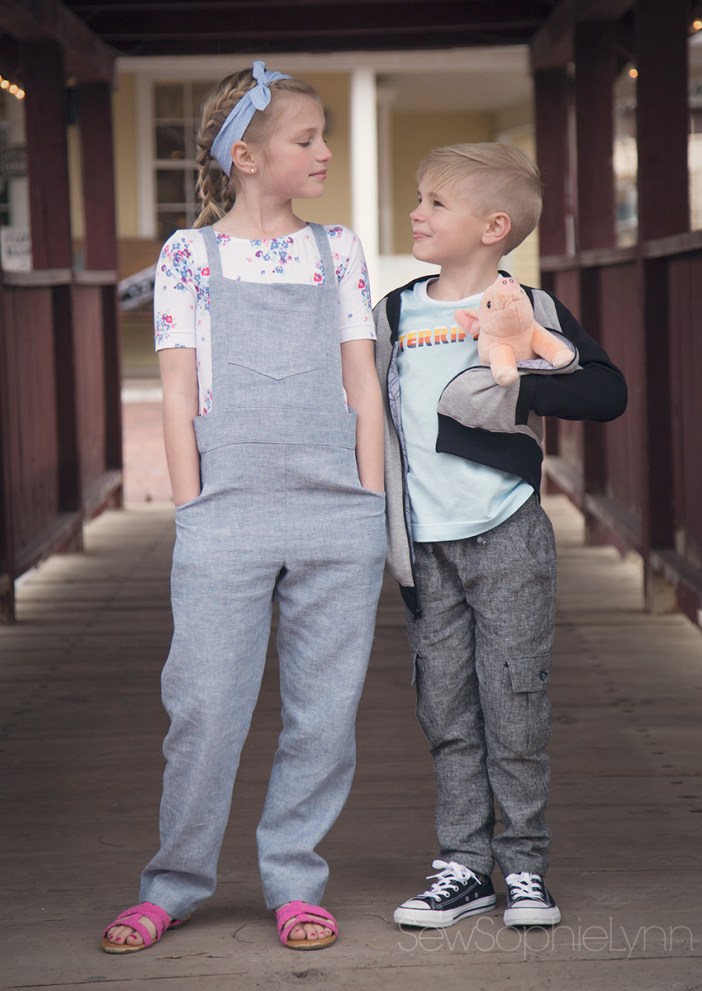
I knew we needed to do overalls but wanted to do a little twist on the classic denim pair.  I used a soft rayon linen blend for a modern take.  I used the Linville Romper pants from Hey June Handmade.  I went down a size and slimmed them a bit more for a straight leg fit.  I trimmed the waist to hit at her hips and added a wide waistband.  The pockets are lined in the same fun polka dot print used for her headband.  We played around with the bib to get just the size we both liked and added a pocket to the front.

backshot1.1

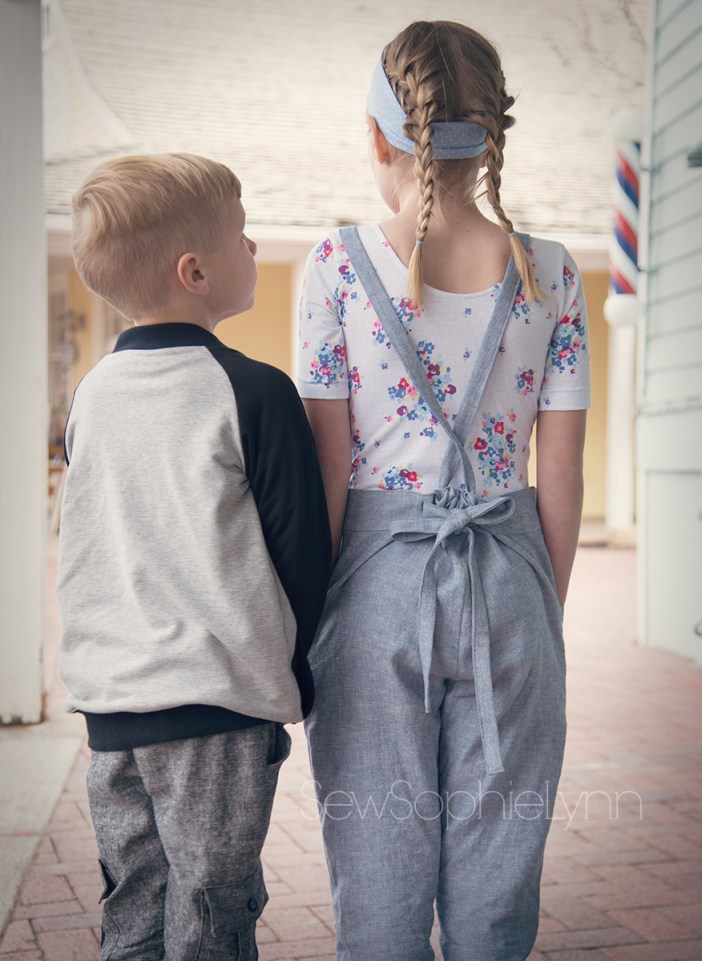
My favorite feature of the overalls is the drawstring tie in the back.  I did buttonholes on the inside of the waistband and a pair of buttonholes on the outside as well.  The straps go in through the inside holes, crossover and come out the outside to be tied in a bow.  It was a fun construction element that will also let these grow with her since they’re so easy to adjust.

payton7.1

The clean lines and topstitching make me so happy.  She needed a slim, simple top to wear underneath so we did a sleek bodysuit to layer under.

payton4.1

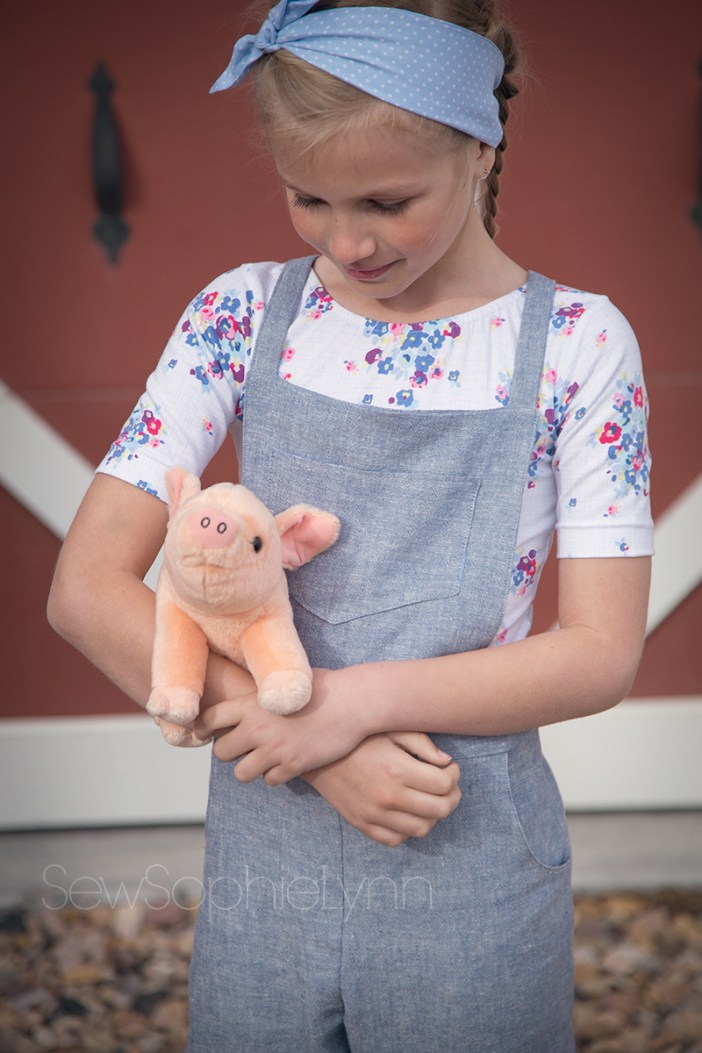
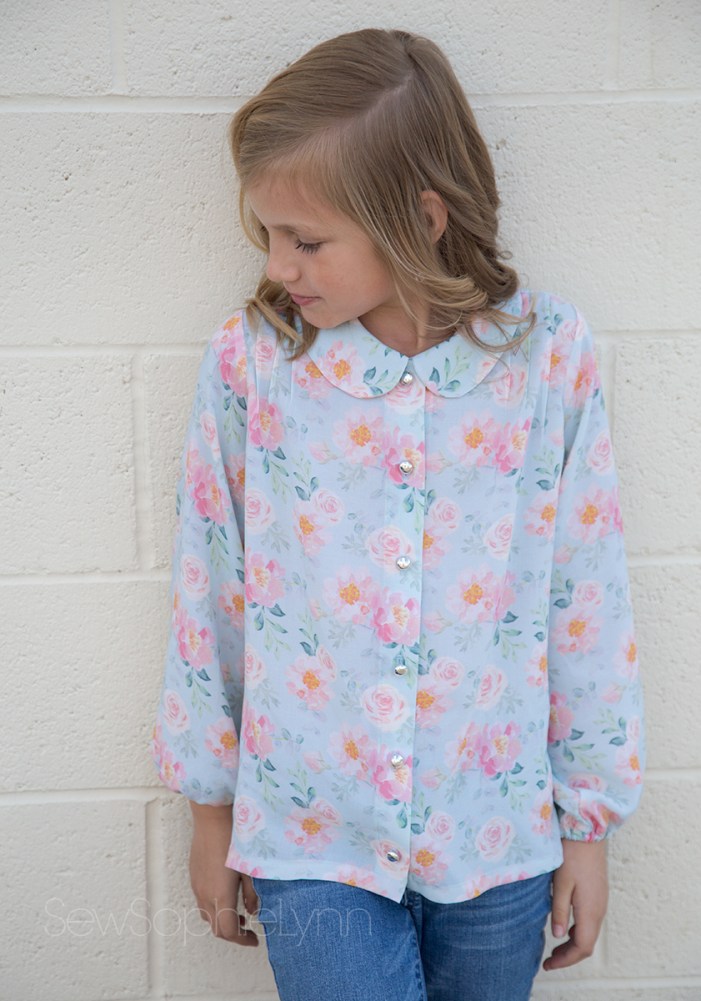
This pretty Riley Blake print just ties the looks together and is reminiscent of spring- when Wilbur was born!

payton3.1

For the bodysuit I mashed two patterns- the Camilla Swimsuit from Made for Mermaids with the Boo! Designs Sleeved Leotard.  I love the modest cut of the legs and fit through the body of the Camilla.  Combined with the sleeves and neckline of the Boo! leotard it’s the perfect fit!  I did knit bands instead of elastic in the legs for comfort.

paytonflat

payton5.1

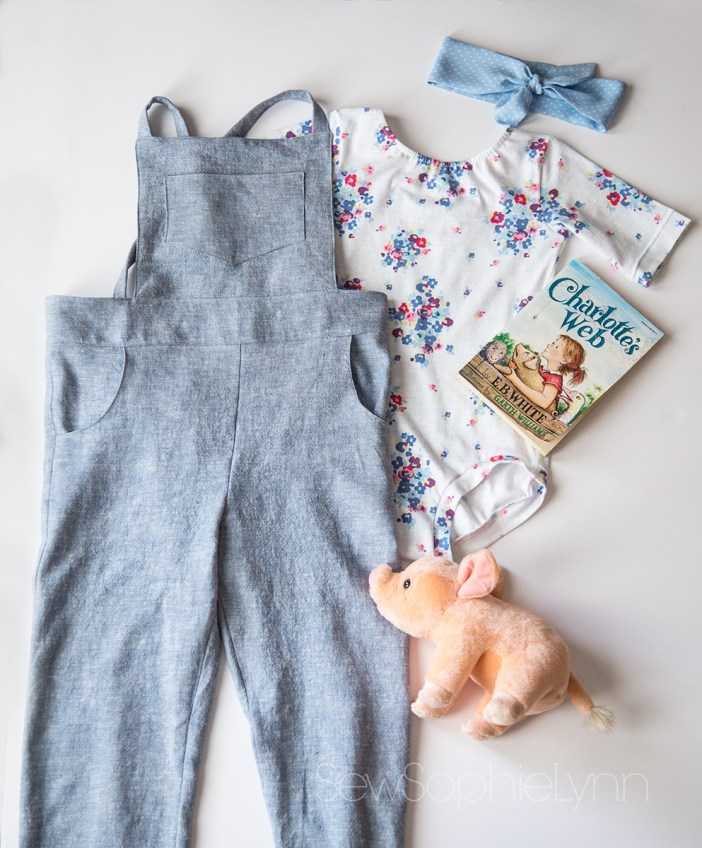
I finished off the look with a self drafted knotted headband.  The perfect accessory for this vintage inspired outfit.

charlie7.1

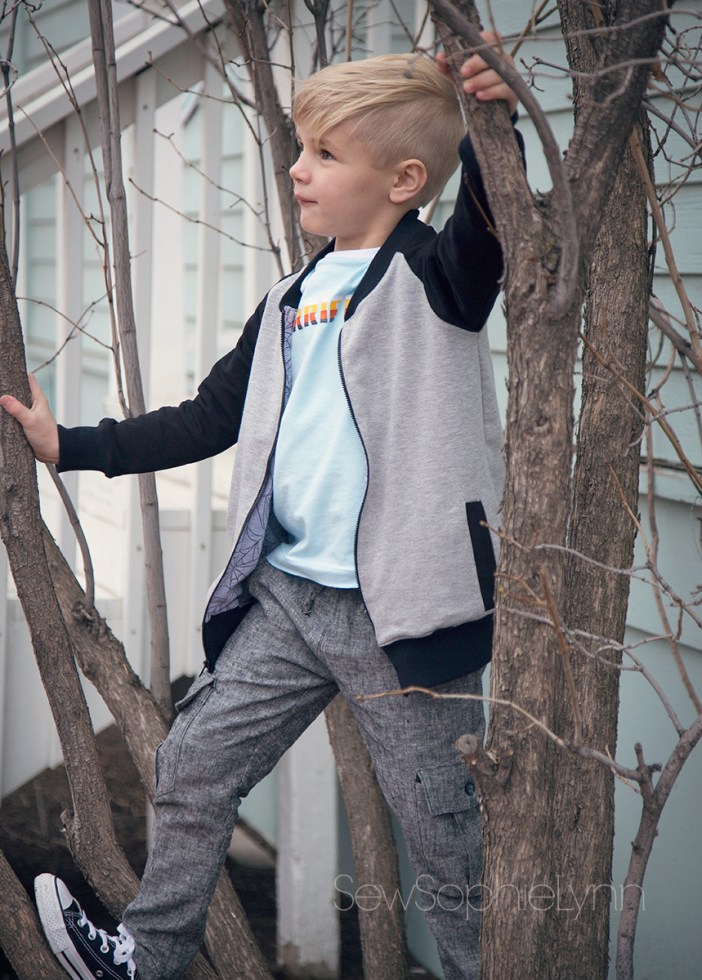
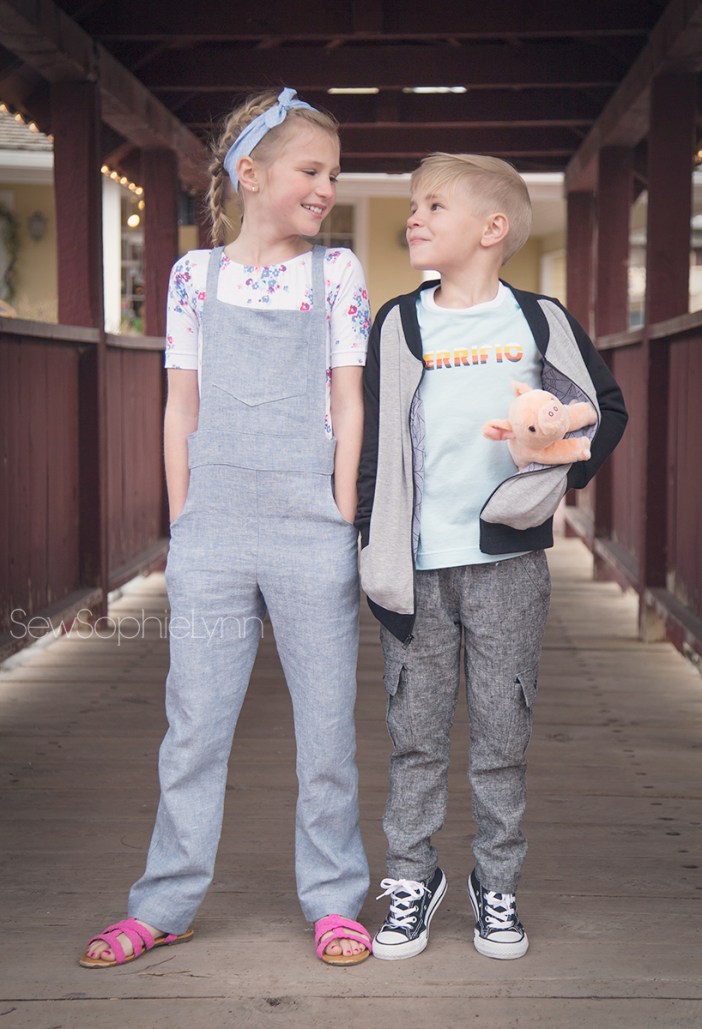
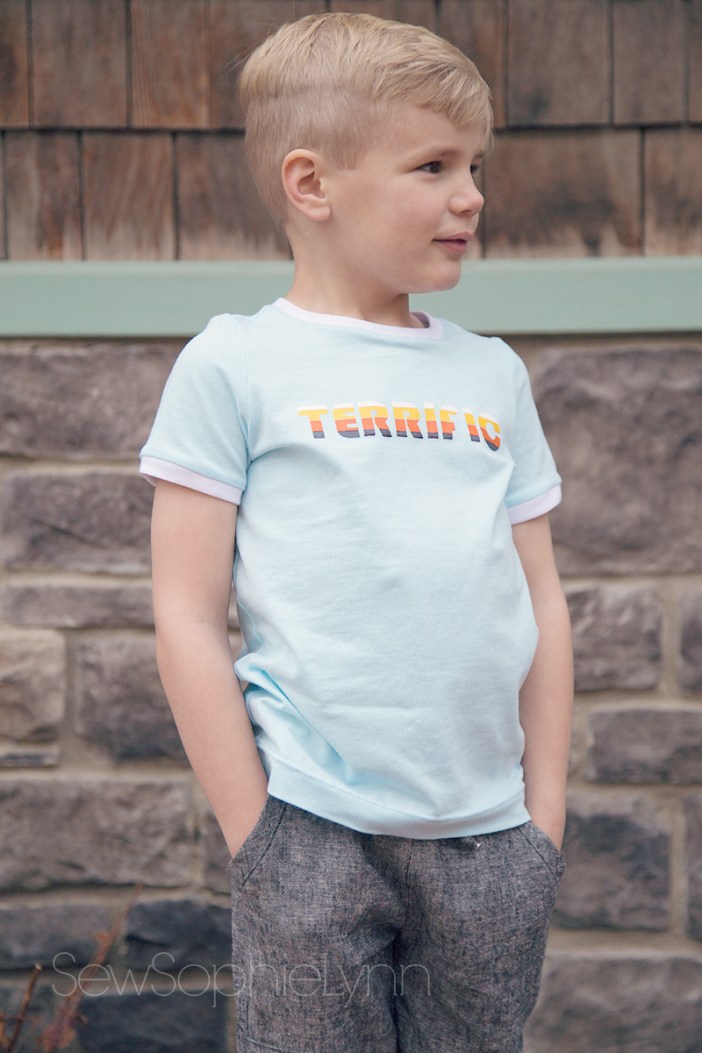
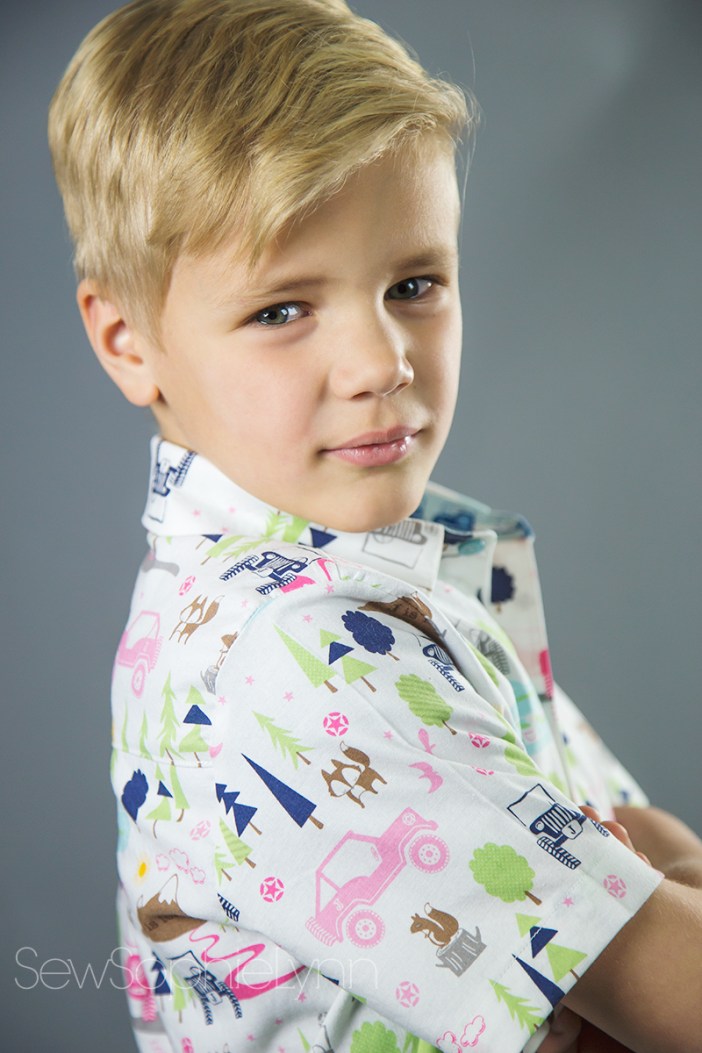
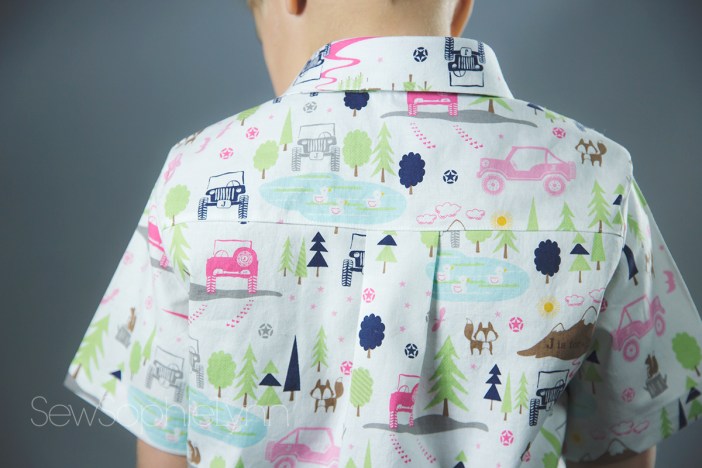
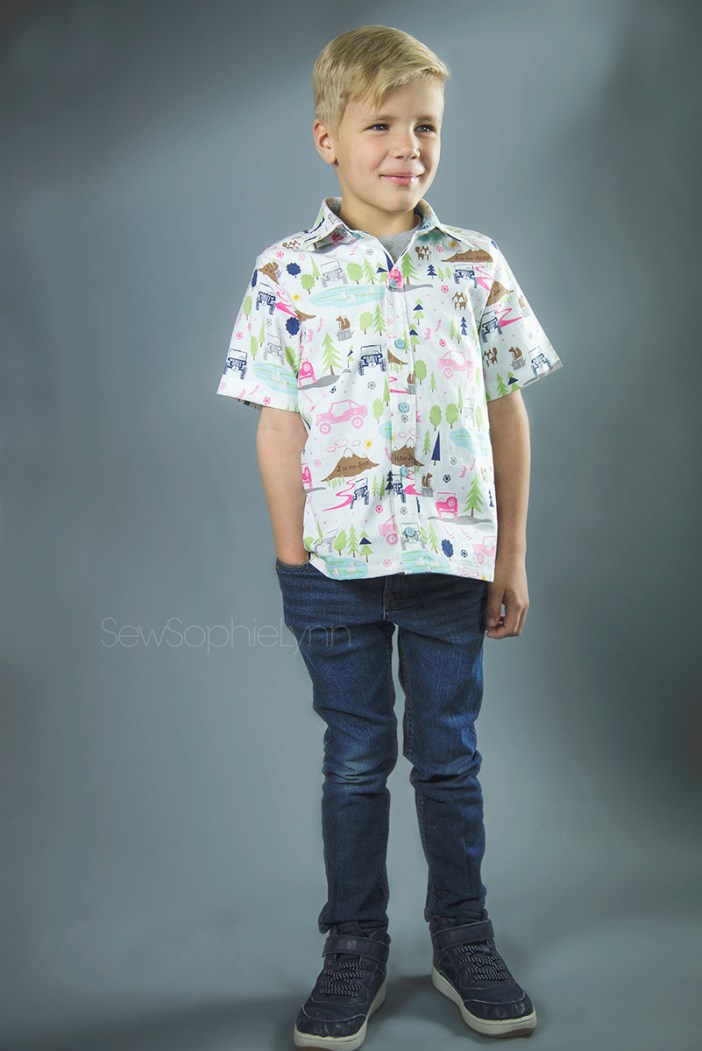
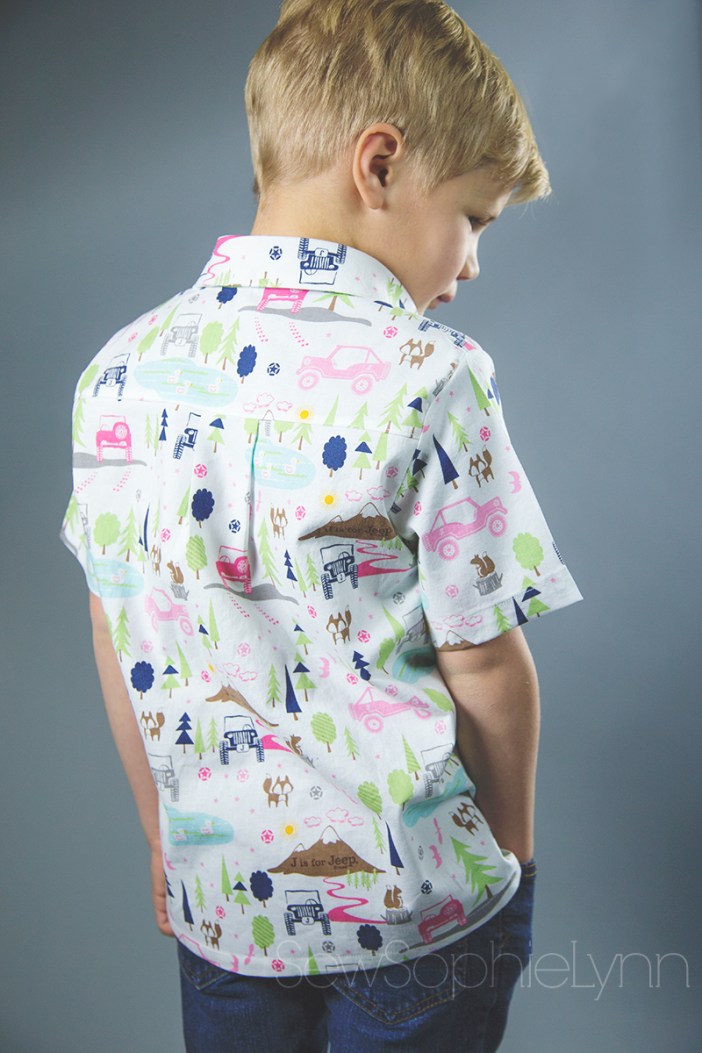
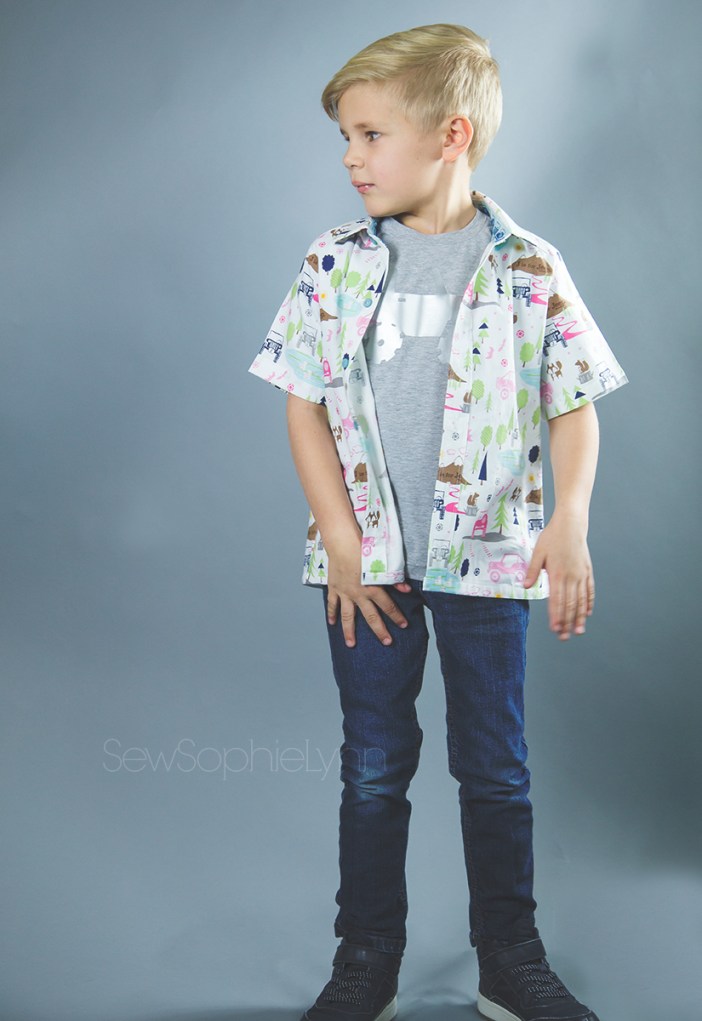
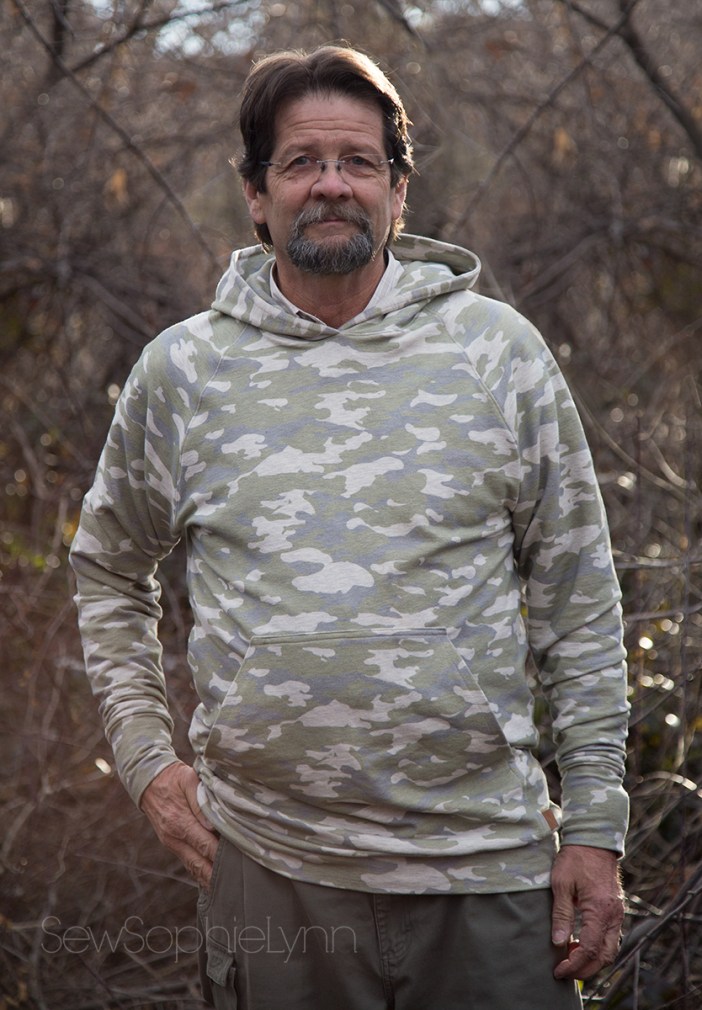
My little guy got an outfit just perfect for him!  I went with clean lines and colors so the pieces will get worn easily with the rest of his wardrobe.  I tried to stick with the old fashioned vibe with a bit of a modern feel.  His look features a bomber jacket, ringer tee, and woven joggers in comfortable fabrics like jersey, french terry, and rayon linen.

charlie8.1

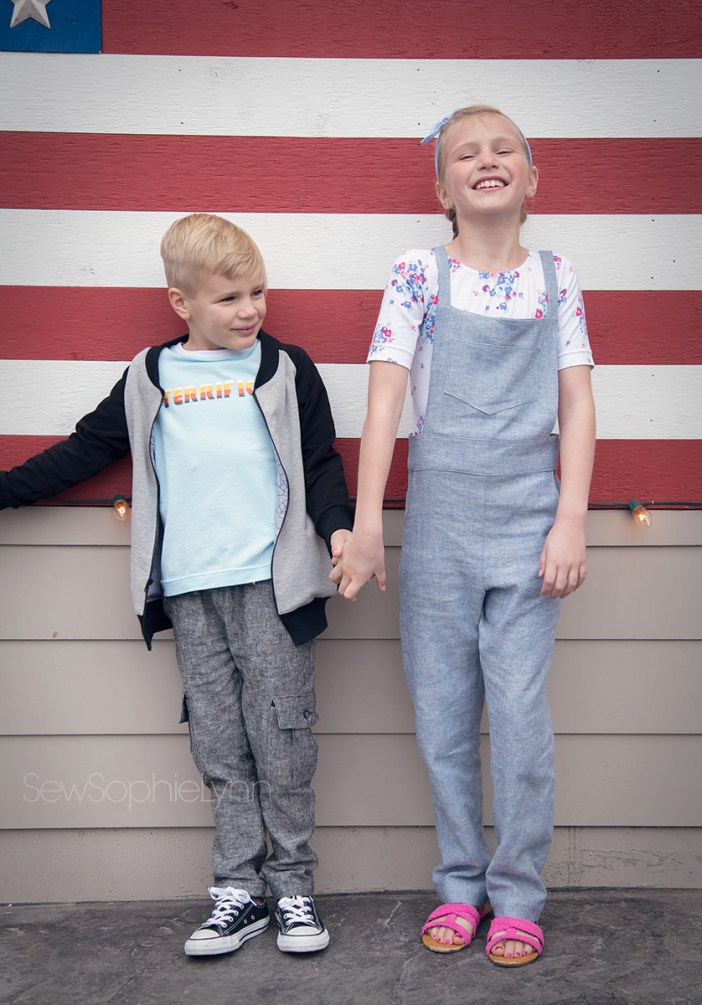
For the jacket I used my favorite raglan sweatshirt pattern, the Samson Sweater from Love Notions.  I used the construction techniques from the Ollie Bomber jacket from Sew A Little Seam to create this fully lined, cozy layering piece.  Those welt pockets are a must and I love how this turned out!

jacket1.1

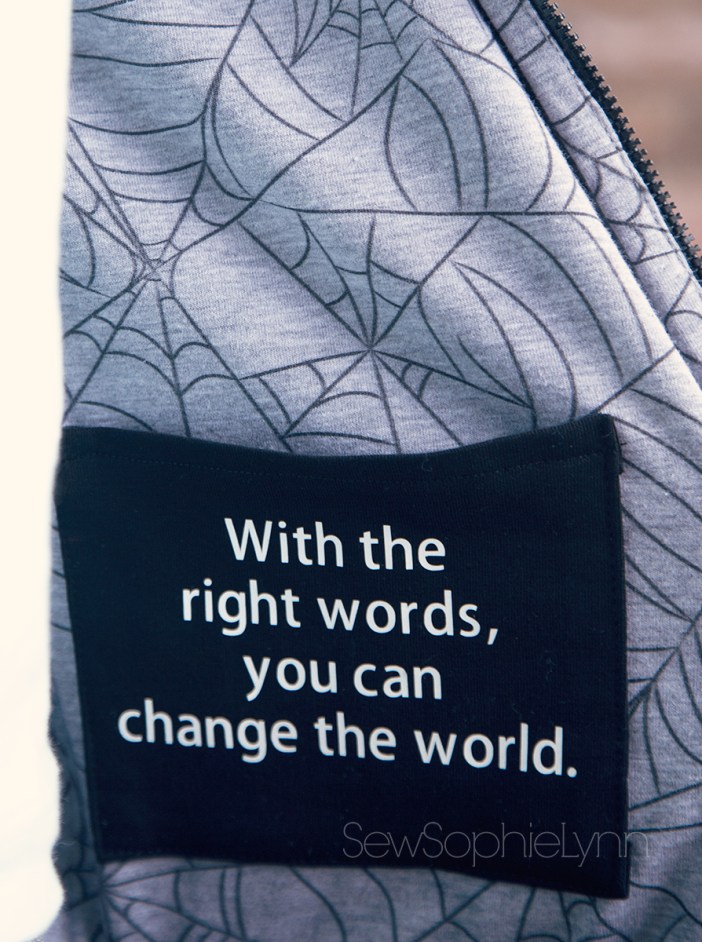
The inside is lined in a spider web print jersey and I couldn’t help but add a little secret pocket with the saying, “With the right words, you can change the world.”  Charlotte sure taught us that!

charlie2.1

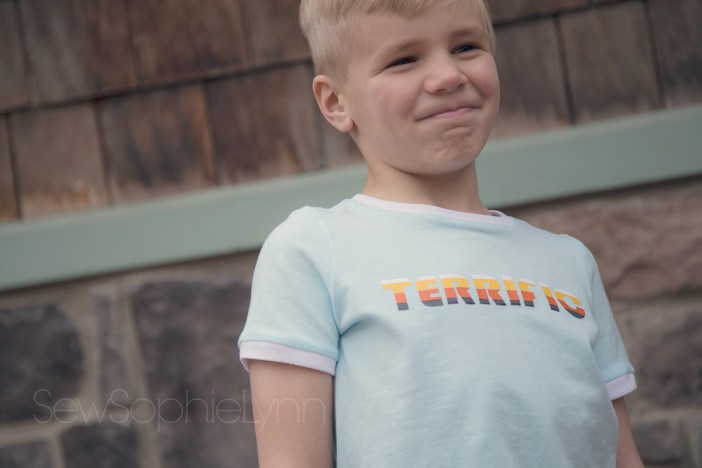
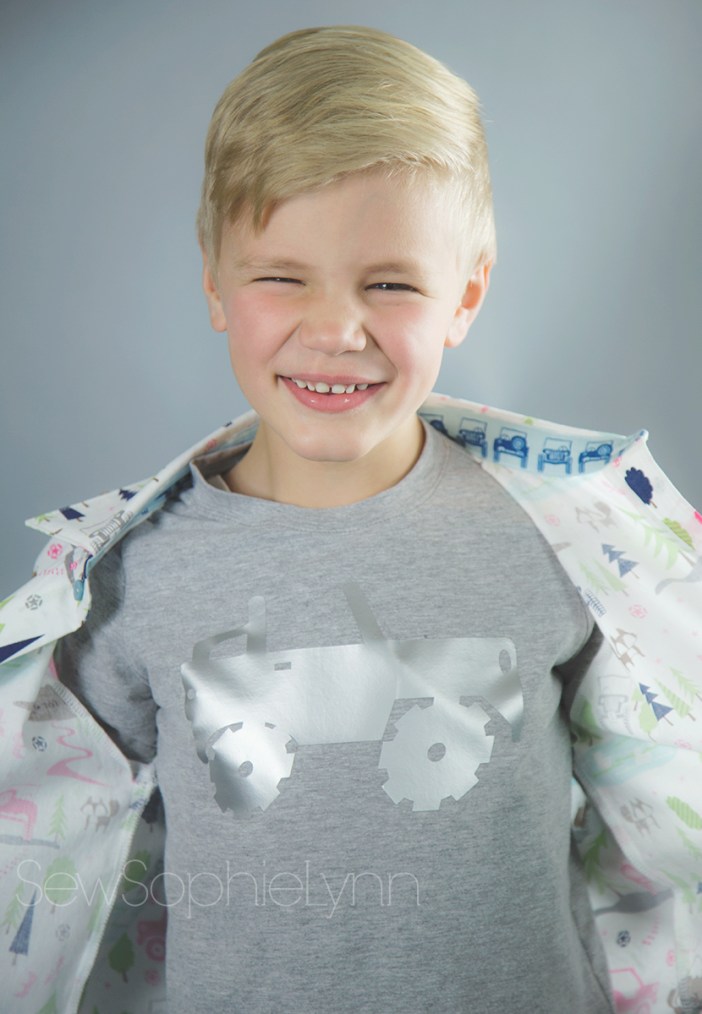
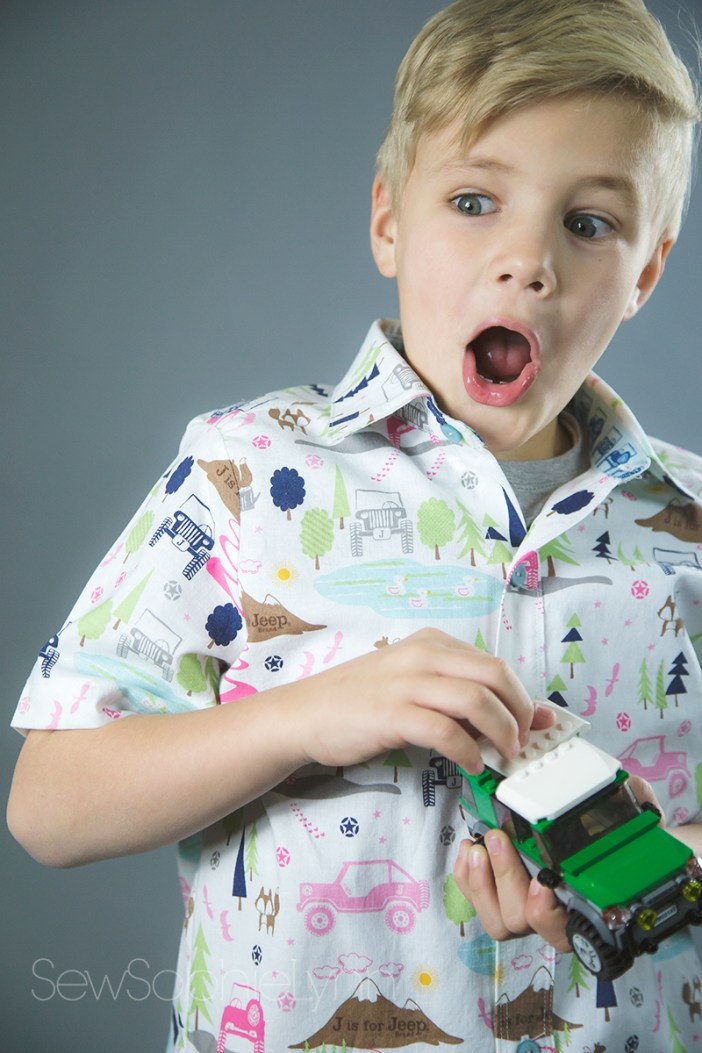
I used the Oliver + S School Bus tee pattern for his shirt.  I love the slim fit and it was super easy to modify for this retro look.  I added white rib knit to the neckline and sleeves (I trimmed off a couple inches for this sleeve length).

charlie6.1

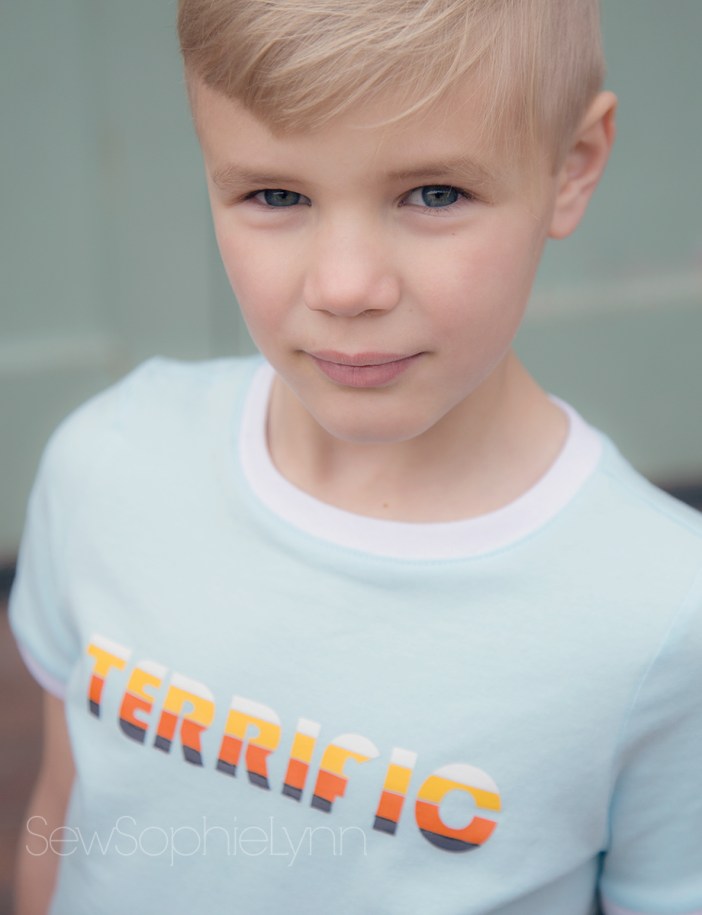
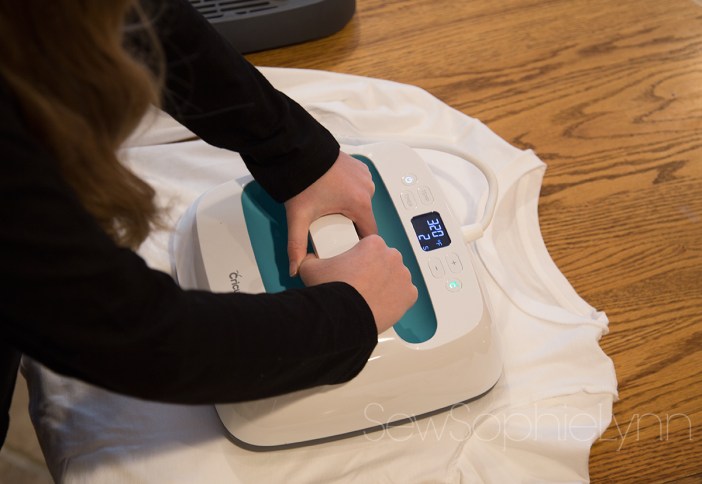
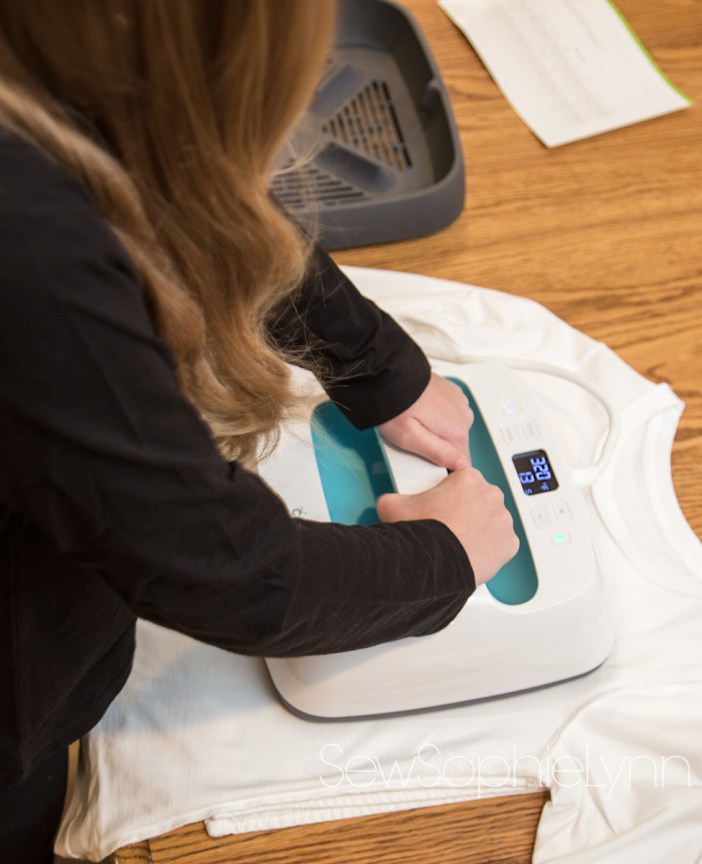
I wanted a 70’s feel for the graphic and created that by using strips of vinyl in white, goldenrod, orange, and charcoal and cutting it with my Cricut.  We did ‘Terrific”, one of the words Charlotte wrote in her web, because this kid is pretty terrific in my book!

charlie5.1

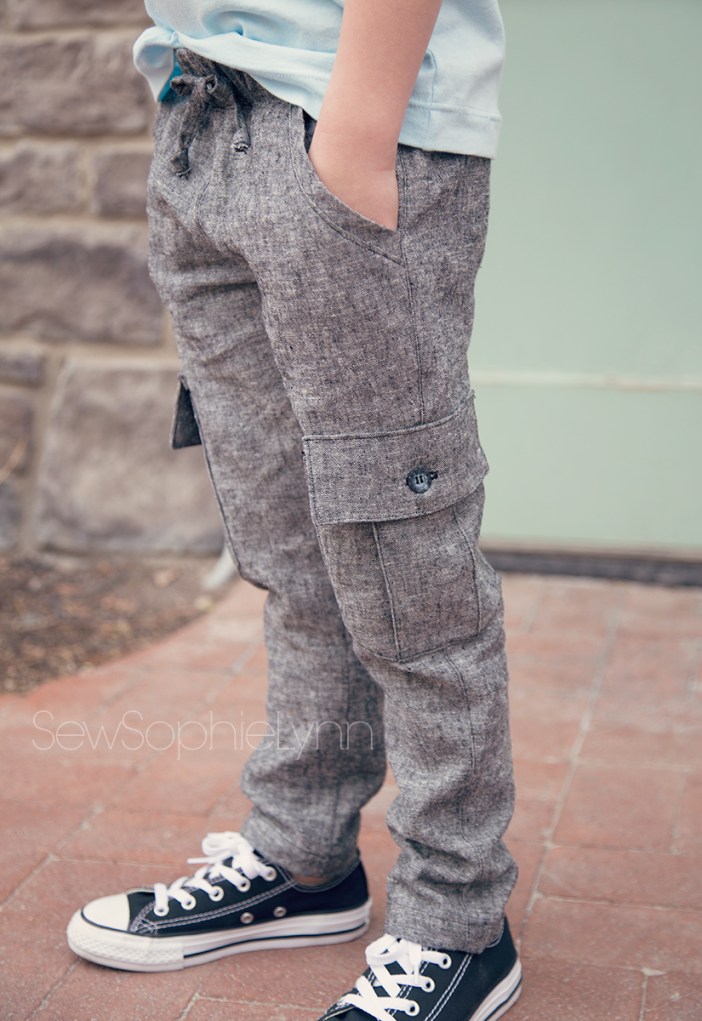
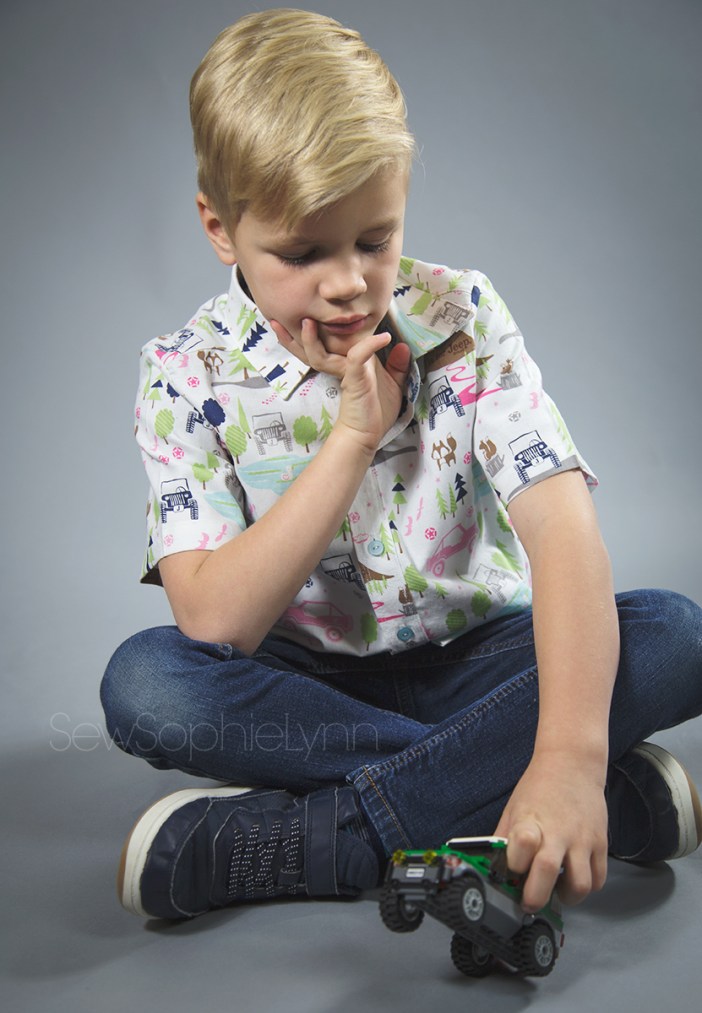
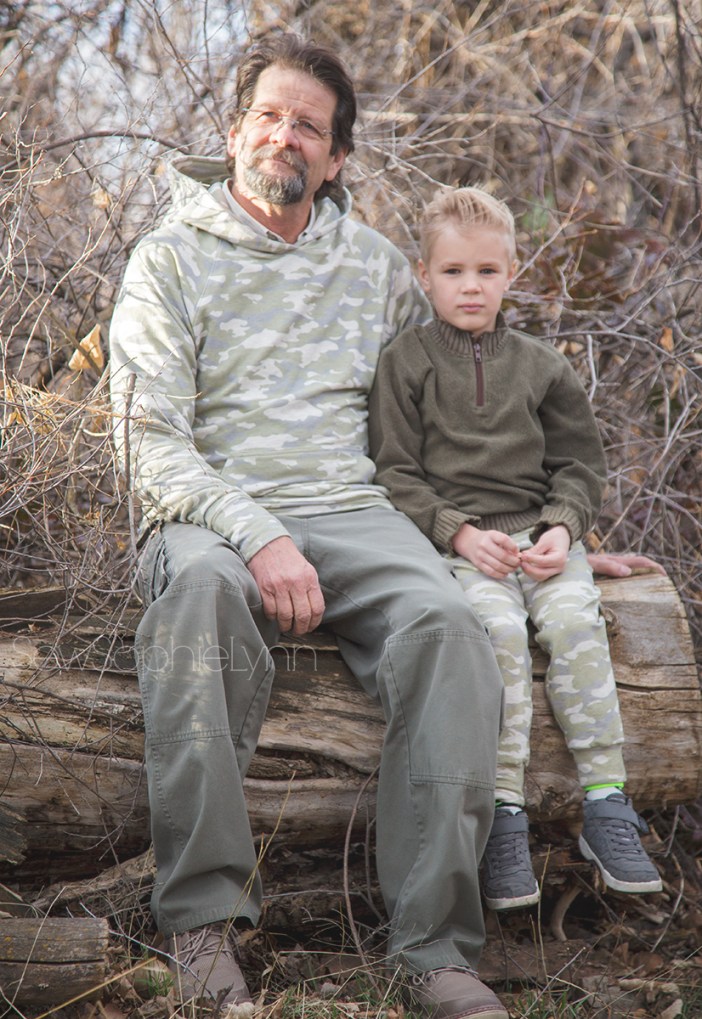
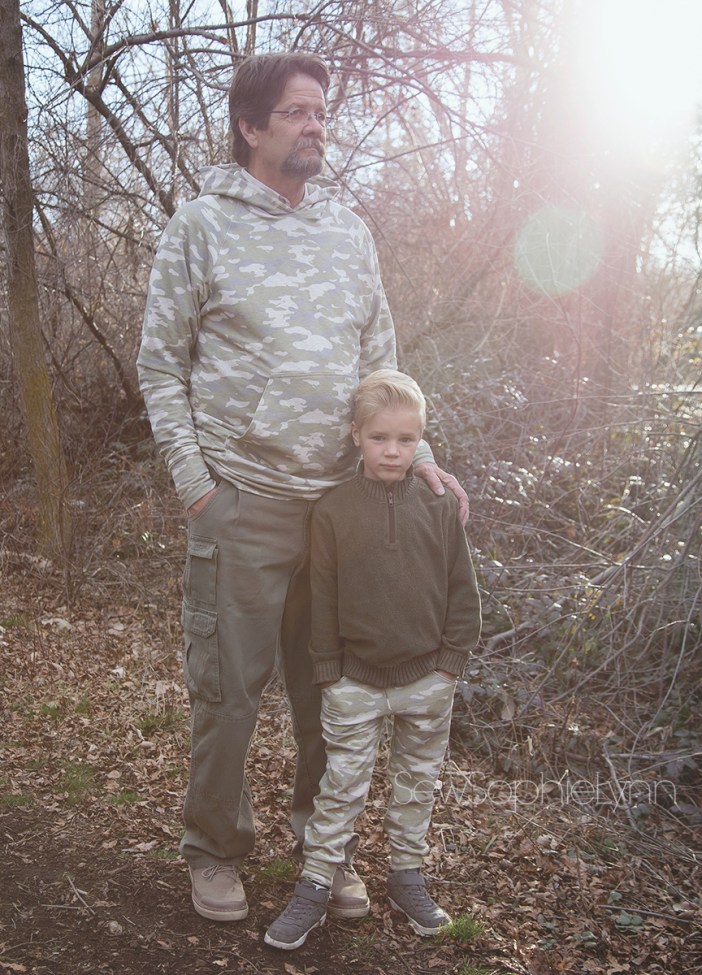
These pants are seriously my favorite thing I’ve made him!  So simple but so him too!  He HATES jeans and only wear ‘soft pants’ if he can help it so these are just too perfect for him.  I used the True Bias Hudson pants with just a few modifications since they’re made for knit fabrics.

charlie3.1

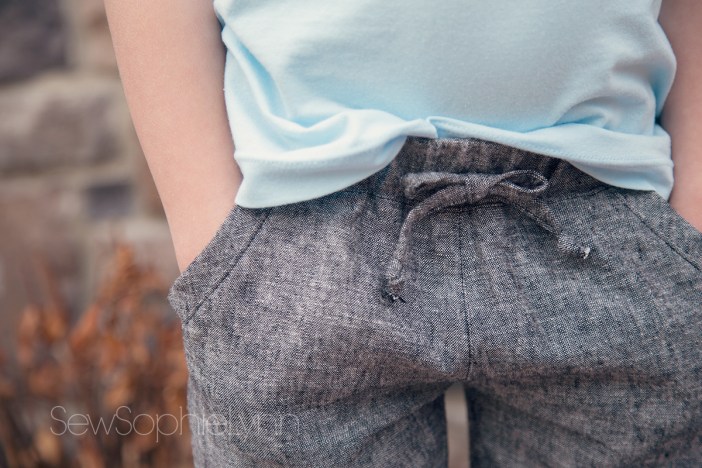
I sized up one size but took in the crotch area quite a bit to keep the slim look.  I love the pocket detail the pattern uses and used a longer piece cut on the bias to get it to fit.  I skipped the real drawstring but added a faux piece that won’t come out in the wash (seriously, why does that happen EVERY time!).

charlie4.1

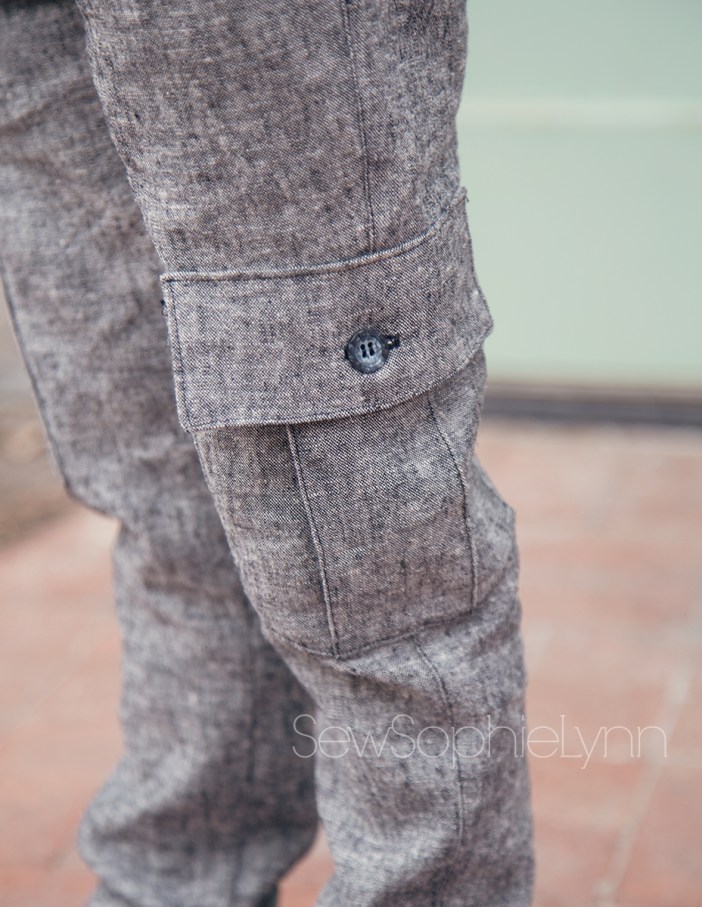
I drafted cargo pockets to hold even more treasures.    The topstitching on these pants really helps these pants feel more ready-to-wear.  I’m adding a version of these pants to my selfish sewing list because I know I’d wear them just as much as he does!

pair3.1pair10.1pair5.1pair9.1pair8.1pair2.1charlie1.1payton6.1

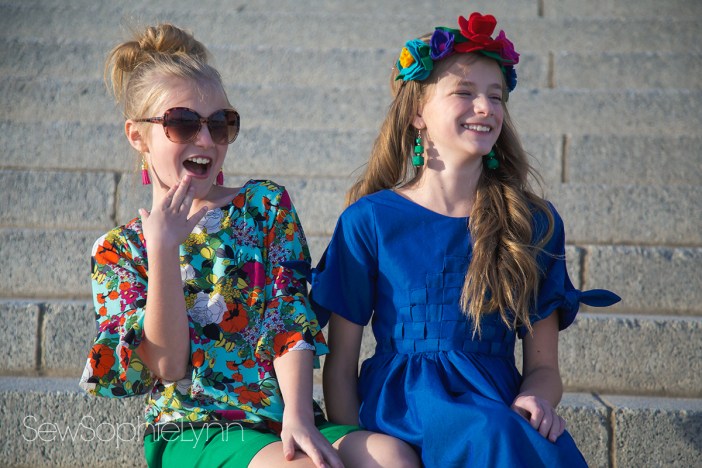
These kiddos were troopers again, braving the chilly Utah temperatures for this fun photo shoot.  We have to plan around snowstorms and they are so good at humoring their mama as I try to get ‘the shot’.  My girly cracked me up as I told her to do a closed mouth smile and she replied, “Hashtag Mona Lisa!”.  These shoots are my favorite part of the competition as we laugh and I get to see their cute personalities shine through.  Thanks so much for stopping by and don’t forget to head back to vote for your favorite look at Project Run and Play!

This is a sponsored conversation written by me on behalf of Cricut. The opinions and text are all mine.

http://influencers.tapinfluence.com/assets/cogs/core-v4.js var ts=document.getElementById(‘ti-pixel-tracker’); var axel = Math.random() + “”; var num = axel * 1000000000000000000; var ti=document.createElement(“img”); ti.style.display=”none”; ti.src=”http://tracking.tapinfluence.com/trk/5ckXD/DATzX/p.png?p=YdiSv” + String.fromCharCode(38) + “i=9W3yX” + String.fromCharCode(38) + “ord=”+ num + String.fromCharCode(38) + “s=” + encodeURIComponent(document.referrer); ts.parentNode.replaceChild(ti,ts); JSON.stringify({“program_id”:”8b1a7330-fcc6-11e7-b475-22000af436a0″,”post_id”:”7cfad122-0708-11e8-9267-22000af436a0″});
 

Project Run and Play Week One: Modern Mayan

main

It’s week one of Season 15 of Project Run and Play and I’m thrilled to be back!  I had so much fun last time and learned so much.  This go around I’m so happy to be joining some of my favorite seamstresses and know you’re going to be blown away by their creations.

payton12.1

The theme for this week is the 7 Wonders of the World.  I hit the internet and was immediately drawn to one of our favorite sites we’ve ever visited- Chichen Itza, Mexico.  If you’ve followed me for very long you know we have a huge place in our hearts for Mexico and love our vacations there.  We love learning about the culture and people and I wanted to celebrate that in our look this week.

family

Our first vacation post kids was with my husband’s family to Cancun, Mexico (that’s me with the bob kneeling in front- we were so young!).  We toured the Mayan ruins of Tulum and Chichen Itza and it was such an amazing experience.  Back then you could climb to the top of El Castillo, the iconic pyramid.  It was at the top that my fear of heights kicked in and I seriously contemplated what life would be like living in that big stone room since there was no way in the world I was going back down those steeeeeeeeep stairs!  Lucky for you I conquered my fears so I could be here today to share with you our first look!

pair1.1

I love the bright colors of Mexico, from the turquoise ocean waters, to the lush green jungles and the clear blue skies.  The vibrant colors really bring our look to life.  I did three different pieces and topped it all off with a fun felt floral headband.

sophie9.1

My main piece is a woven front bodice dress, designed to mimic the stairs of El Castillo.  To create this look I used a reverse applique technique and fabric weaving.  A little geometry came in handy to get this just right.  I love that this dress is perfect for the theme but also totally wearable and not too costume-y.

sophie4.1

I brought the same staircase look to the back of the bodice too.  I love the subtle detail!

sophie2.1

I did a split sleeve with a built in bow because I simply can’t get enough of the statement sleeves!

sophie11

A hi-low hemmed skirt and pockets finish off the dress.  I used the Lil Luxe Collection Lil Luxe Dress as a base for the bodice then drafted a new neckline, sleeve, skirt and pockets.  The fabric for this dress came from our sponsor CaliFabrics.  This ocean blue chambray was just perfect for this dress.

Payton4.1

Little sis is rocking my take on tourist chic.  I wanted to bring in the vibrant greens of the jungles that surround Chichen Itza and also wanted to use a print that would be reminiscent of the gorgeous flowers that you find there too.  This floral was a LA find and the twill for the shorts was a Joann’s score.  I really want this outfit for myself!

payton1.1

I used the Nina Blouse from Coffee + Thread as my base for the top.  I cut the front on the fold and added facings instead of the collar and bias binding.  I added a flounce to the sleeve and chose to keep the hem raw to preserve the movement of the fabric.  This fabric is pure heaven- it has the drape of a rayon with quite a bit of stretch and doesn’t fray when cut.  I’d buy a million more yards if I could!

payton9.1

I added a big bold exposed zipper to the back.  I’m always drawn to exposed zippers and try to keep a bunch of pretty ones on hand just so I can bring a bit of drama to a garment.  The bias bound hem adds a little stability to the hem and I love the contrast it gives too.

payton8.1

I used the Linden Shorts from Sew A Little Seam for the shorts.  I drafted a new waistband and added a ruffle to the top.  I also used a side invisible zipper as closure.

payton3

I drafted new, longer and wider pockets and brought the angle closer to the side seam.  I lined the pockets with sarape stripe fabric that I wanted to incorporate into our look somehow.

payton11.1

I did a longer gaucho style length so hopefully she’ll get to wear these to school and through the summer.  My kids and their crazy long legs make buying shorts near impossible so I know I’ll be making many more of these this year!

pair5

The felt floral headband was just the right finishing touch.  I used wool felt from Etsy and had a blast trying out different flowers.  The bold colors and big flowers are such a fun addition to this look.  Their shoes were Target finds and couldn’t be more perfect!

pair2.1

These girls made this shoot so much fun!  It wasn’t easy to find a ‘Mayan-looking’ backdrop in the middle of a Utah winter.  We headed to our State Capital Building and these girls did their best pretending it was a balmy 80 degrees instead of the frigid 30 degrees it was the evening of our pictures.

pair6.1

payton2.1pair3

sophie10payton10.1sophie7pair7payton5.1sophie5.1

Thanks for stopping by and make sure you head back to Project Run and Play to check out the other looks and to vote for your favorite!  Voting ends Thursday at 8pm EST so run on over!


Monaluna Journey Fabric Tour

sneakpeek

When I heard Monaluna had a new fabric line coming out I had to jump on the tour as fast as I could!  Monaluna fabric is some of the best quality I have ever worked with and I couldn’t wait to get my hands on some more!

IMG_8968

I love the new Journey Line and picked the Dry Garden Lawn and Paintbrush Lawn for our projects.  The Lawn is such a great weight.  It has structure but is so soft and works great for so many projects.

journey12

These prints just needed to be blouses and I love a good peasant style top.  I used the Driftwood Blouse pattern from Twig and Tale available in both women’s and girl’s.

journey15

The construction is so quick and there are so many options with this pattern!  There are multiple neck closures.  I did a tie neckline for my daughter and chose a button closure for me.  Add in multiple sleeve lengths and dress or tunic lengths and you could sew up a slew of new garments with all the options.

journey8

I love this cactus print.  It’s all my favorite colors and this print feels subtle and perfect for spring and summer.  I’m always worried with light background fabrics being too sheer but it’s definitely not an issue with this fabric.   I know I’ll wear this top a TON this summer!

journey5

This Paintbrush print is so simple and cute.  I love it so much I almost stole it for myself.  It’s a great basic print that will go so well with everything in her closet.  She’s already worn it multiple times despite our cold temps!

This line just screams warm weather and sunshine!

Now if only Utah would get on that!  We’re ready for spring!

Make sure you check out all the other great bloggers joining in the tour.  I’ve decided I need ALL the prints after seeing their creations!  If you want to grab some fabric of your own head to Phat Quarters for all the pretties!

a Rafflecopter giveaway

Boys Can Wear Pink Blog Tour 2018

pink5.1

It’s season 4 of Boys Can Wear Pink and we’re excited to be joining in for our second year.

pink6

This kiddo rocked his look last year but then refused to wear it.  The whole point of this blog tour is to bridge gender stereotypes and encourage our boys to embrace what they love, no matter what society deems boyish or girlish.  I felt like a failure and reevaluated what we’re teaching our kids in our home.  He has two older brothers who are a huge influence on him and we are working as a family to help blur the lines of gender stereotypes.  My boys sew, bake, and help with all the household chores and my girls are tough amazing athletes.  Not ground breaking but a start I hope in raising little humans who can make a difference in this world.

pink7

For this look we headed to our local fabric shop with his best buddy in tow.  They oohed and awed over all the fun prints and settled on this cool Jeep print from Riley Blake.  He loves cars and trucks and this was just perfect for him.  His little BFF is a snappy dresser and loves to wear suits and ties to school.  Charlie has picked up on his style and will usually reach for a button up and tie a few days a week now.  It’s too cute and I love letting him explore his style and try to find his own along the way.  A Jeep print button-up is just the perfect blend of all his current obsessions.

pink10

pink8

I used the ever versatile Birch Button Up from Sew A Little Seam.  If you want a big bang for your buck then you NEED to check out Kelly’s patterns.  They are all loaded with options and so many of them are unisex making them even more of a steal.  I love when I can use a pattern for multiple kids!

pink11

I did the basic collar, full placket, short sleeve version and it was about as easy as a woven top can be.  I love the placket construction- quick and painless 😉

pink1

pink2

We just HAD to do a tee for underneath too.  I used the Oliver and S School Bus Tee pattern.  The fit just can’t be beat.  We did a Jeep iron-on because you know we can’t have any boring, plain tees in our house.  I love the tone on tone look of the silver on grey- sleek and simple!

pink9

A huge shout out to Kelly of Handmade Boy for hosting the tour.  She’s one crazy busy, amazing lady!

pink3

He’s just blown away by the other cute boys and their mama’s joining us this season.  Make sure to check out all their stories and handsome boys in their new pink clothes!


The New Cricut Maker

maker1

If you’ve been a follower for very long you know I love my Cricut.  I recently upgraded from the Explore Air 2 to a Cricut Maker and I’m here to answer any questions you might have about the two.

This post is sponsored by Cricut.  I received the Cricut Maker, Easy Press, and Bright Pad in exchange for promotion.  While I received these products for free all thoughts and reviews on these products are my own.  I’ll do my best to highlight the pros and cons of all these products.


First, let me say that I’m a sucker for heat transfer vinyl or as Cricut calls it Iron On.  I’d say that’s what I use my machine for 90% of the time.  As a sewist, I’m all about personalizing our wardrobe.  That’s part of why I sew, to create unique, one of a kind clothing for me and my children.  The skies the limit with what we can design and iron on and the fact that it takes just minutes makes it so fun and easy.

If you’re like me and use your cutting machine primarily for vinyl then honestly the Maker just isn’t necessary.   It has lots of bells and whistles that I’ll address further down this post and the potential it has is huge.  I’m excited by what I can create knowing all the possibilities this machine has but if I was sticking with vinyl my Explore Air 2 was amazing too.

The biggest game changer for me was getting an Easy Press.

easypress1

I have a normal inexpensive iron that I was using to iron on my projects.  While it worked fine I would notice peeling after a couple of washes every now and then.  It was frustrating and always made me nervous to gift personalized tees because I was worried about the quality.  I never considered a heat press- too big and bulky, expensive, and unsafe.  My craft space is small and open so my kids are always in and out of it, just not ideal for a heat press.

The Easy Press has seriously been such a huge upgrade.  It’s so portable and easy to use.  The surface heats quickly and evenly and the temperature control and timer take all the guess-work out of it.  It comes with a handy Quick Reference Chart that I keep with it that details the exact temperature and time for your vinyl/fabric combination.


The weekend I got my Easy Press we set to work making some quick, cute Christmas presents for my daughter’s and their bff’s.  They helped me design their projects in Design Space then I had them do the rest.  They quickly weeded their sheets using the Bright Pad and I supervised as they pressed the designs to the tees.

easypress2

The Easy Press is easy to handle and the flat design makes it easy to slide from the cradle to the project.   We picked up a few tips along the way (most of these are mentioned in the user manual but I think they’re essential to getting a good result).  First, use a towel between your project and the hard surface beneath it.  The towel will absorb any moisture and protects your surface.  Second, preheat your area where you’ll be placing your vinyl with a quick press.  This will get rid of any lingering moisture and help the vinyl adhere best.  And lastly, make sure to flip your project inside out and iron from the backside as well.  This just makes it adhere even better!  Even following all these steps, you’ll have a great finished product in minutes!  I can’t say enough good things about the Easy Press and the great results you get when using it.

maker2

Let’s talk about the Maker.  It gets ALOT of use in our house.  We use our cutting machine a few times a week.  We have a big built-in desk in our main living space that the Maker sits on next to our computer making it convenient to use.  We use it for school projects, bulletin boards, Valentine’s boxes, decorations, and more, using it to cut all kinds of paper and fabric.


The Maker has so many unique features.  It is heavy-duty, with up to 10x more cutting power than other machines.  It has an Adaptive Tool System that allows you to switch between blades easily and has the potential for more tools to be added.  The Rotary Blade is what sets this machine apart from others on the market.  The Rotary Blade acts just like a rotary cutter, gliding over the surface and pivoting to make even the most intricate cuts.  It can cut anything from thin, delicate tissue paper to thick denim.  It’s amazing to watch and I was in awe as it easily cut through thick glittered felt.  My son is so excited for the knife blade to hit the market.  He had the idea to make a chipboard puzzle as a gift this Christmas and I had to tell him that the Maker would soon be able to make it happen for him.  The possibilities of this machine are what sold me.  I hate getting a product only to feel like it’s ‘old technology’ within months (hello- how many gaming consoles have we gone through?!).  The fact that this machine can grow and expand is a huge selling point.

As an apparel sewist, I have yet to really use my Maker for garment sewing.  The small cutting space (you can use a 12×24 mat) just doesn’t make it practical.  BUT I can think of a ton of small projects that will be great for it.  My daughters have been sewing and enjoy quick little makes.  Design Space is full of projects that will be perfect for them.  I know when spring break and summer vacation roll around our Maker will be busy.  They love doll clothes, small bags, hair bows, accessories, and decorations.  Design Space continues to add more of these type of projects and I’m excited to get my craft on with them!

Our Cricut products are well-loved and have become a natural part of our lives.  We love to create and are grateful to have our Maker, Easy Press, and Bright Pad to help our dreams come to live.

This is a sponsored conversation written by me on behalf of Cricut. The opinions and text are all mine.

http://influencers.tapinfluence.com/assets/cogs/core-v4.js var ts=document.getElementById(‘ti-pixel-tracker’); var axel = Math.random() + “”; var num = axel * 1000000000000000000; var ti=document.createElement(“img”); ti.style.display=”none”; ti.src=”http://tracking.tapinfluence.com/trk/5ckXD/DATzX/p.png?p=b5EIz” + String.fromCharCode(38) + “i=9W3yX” + String.fromCharCode(38) + “ord=”+ num + String.fromCharCode(38) + “s=” + encodeURIComponent(document.referrer); ts.parentNode.replaceChild(ti,ts); JSON.stringify({“program_id”:”8b1a7330-fcc6-11e7-b475-22000af436a0″,”post_id”:”7cf18a68-0708-11e8-9267-22000af436a0″});

Greenstyle Hudson Hoodie for my Dad

papa11

When I saw this camo print from Raspberry Creek I knew immediately I needed to sew it up for my dad.  I rarely sew for gifts (my perfectionism kicks in and I stress way too much about it) but I just knew this would be a great Christmas present for him.  He loves the outdoors and hunting so this print was just meant for him.

papa3

The muted colors in this print are my favorite and that oatmeal french terry base is just amazingly soft.  (The oatmeal base has sold out repeatedly and is not currently available, huge bummer, but I’ll update this when it’s back in stock.)

papa5

I had a tiny bit of the print left and just had to make Charlie a matching pair of joggers.  These pictures of Papa and his buddy are just priceless to me.  Seriously, my heart just might burst!

papa10

I used the Greenstyle Hudson Hoodie with little modification (I had to cut my hood in two pieces to make it fit on my fabric).  The fit is great and it comes together quickly and smoothly (if you’re not stressing over all the little details ;).  My dad is 6’1″ and I didn’t need to add any length.  It helps that my oldest son is almost the same height so he was a great test model.  I think that’s the other hard thing about sewing for gifts.  Picking a size and hoping it fits is a pretty nerve wracking thing!  Luckily I think it worked out well this time.

papa9

I added a tiny leather tag and one of my favorite metal tags to the band as well.  I really appreciate little details and hope they make the sweatshirt look less ‘homemade’.

charlie1

Charlie’s pants are the new Lexi and Lou Loungers from Made for Mermaids.  I did the jogger version and love them so much!  They come together so quickly.  I needed to print a new size for him anyways so I thought I’d give a new pattern a try.  Since he lives in his joggers, I think a variety of patterns is great to have.

charlie3

He was instantly in love with these pants and refused to take them off after.  I’m pretty sure he’d still be wearing them, five days later, if I’d let him!

papa8

This shoot was a lot of fun.  My dad is an excellent photographer and I think my love for photography comes from him.  He was interested to see how these shoots go and what I do with my camera settings and such.  Little did he know I’m just about clueless when it comes to my camera and I just shoot and shoot and hope for some good ones.  We hit golden hour at one of my favorite spots.  Between great models, beautiful location, and gorgeous light this shoot turned out to be a favorite for sure!

papa4

papa1charlie2papa2

My dad has convinced me to get out of my comfort zone and sew more for others.  I love how happy (and handsome!) he looks in this!  That’s the best reward ever!

papa7

I’ll leave you with this pic- straight out of a fashion magazine 😉  I love how they’re channeling their inner super models.  Perfection!


Joy Jacket from Chalk and Notch

joy6

It’s not often that you sew up a challenging, time-consuming project then immediately start dreaming up your next one.  The Joy Jacket from Chalk and Notch has left me wanting more!  It’s such a versatile, lightweight jacket that will get so much love.   Read to the end so you can win your own copy too to make your jacket fantasies come true!

joy1

With Spring on my mind, I knew I wanted a pretty pink jacket.   I ordered a fancy gold zipper and blush fabric only to not have my intended fabric ship on time.  In stepped Diana at Raspberry Creek Fabrics to rescue me!  A few days later this gorgeous blush peach lightweight twill was in my hands and my jacket dreams were a reality.

joy5

All I can think is “Man, that’s a pur-ty jacket!”  I love how it turned out and think it will be a great date night layer.

joy9

The story behind this pattern is a touching one.  Emily of Enjoyful Makes has a much beloved jacket of her late mother’s and searched high and low for a similar one.  In stepped Gabriela of Chalk and Notch.  She took the jacket and drafted a pattern even better than the original.  The pattern is named after Emily’s mom, Joy.  Such a sweet story and I knew I needed one of my own.

joy11

There are multiple options with this pattern.  I chose the wide collar version but there is also a hood option.  I did the square patch pocket but there are cute angled pockets as well.  I did a drawstring at the neck but you can add one at the hem as well.

joy10

The jacket is also fully lined and beautifully finished.  I used this gorgeous rayon challis also from Raspberry Creek.

joy3

With my fabric mix up I was terribly behind in the testing.  We had arranged studio time on a Friday morning and I picked up my fabric that Wednesday morning.  Totally enough time to sew up a jacket, right?!!  I had my pattern prepped and waiting so by the time my fabric came out of the dryer I was ready to roll.  After putting kids to bed, I was able to sew uninterrupted until about midnight and had my jacket almost finished except for topstitching.  I would call myself a timid intermediate sewist and feel like if I could sew this jacket any adventurous beginner could tackle this.  You’ll learn new skills and with a sew-along planned Gabriela will walk you through all the difficult steps too.  I love the feeling you get from a well finished, challenging sew and this jacket is right up there.

joy2

While I absolutely love this jacket, I think this fabric is a bit too light colored and sheer to be practical for daily wear.  There are other colors of this fabric in stock that would work fantastic though.  The Heathered Grey Twill is this same fabric content and would make the best everyday choice.  I’m hoping to make another that I can throw on for errands and soccer games.   Raspberry Creek has stocked fabrics just perfect for this pattern.  There are multiple colors of Tencel Twill that would be beautiful and lots of pretty lining choices too.

group1.1

I was so lucky to get together with my sewing buddies for pics.  I love how our jackets all suit us to a tee.  Tiahna of Ammon Lane, Rachel of Little Fish, and Nicole of Merritts Makes are sewing rockstars.  I always love their style and take on patterns.

group2

Ready to win your own copy?!  Just comment on this post (make sure to leave your email address)- that’s it!  I’ll pick a random winner on Monday February 26th.  I can’t wait to see everyone living in their Joy Jackets!

Toaster Sweater from Sew House 7

toaster4

I’ve got a new addiction this winter.  The Toaster Sweater patterns from Sew House 7 have become favorites to sew and wear.  They check all the right boxes for me- comfortable, loose fitting, quick sews, and stylish.

toaster12

I shared my first two over on the Cali Fabrics blog.  I made this green one out of a mid weight sweatshirt fleece and it’s the ultimate in warmth and comfort.  This particular sweatshirting has a bit of two way stretch that makes it easy to wear.  It’s the first thing I grab on a snowy day.

toaster8

The tall neckline of #1 is so cozy and I love the boxy fit of this version.  The topstitching details add such a professional finish.  I added length to this version to provide optimum coverage!

toaster2

After sewing a version #1, I just had to try sewing #2.  I used a luxurious stretch velvet and had the perfect holiday party top.

toaster3

It’s loose and chic and I get compliments every time I wear it.  I love that it looks dressy while still feeling like I’m wearing next to nothing.  I think I’d wear velvet all day every day if I could.

toaster3

So after those first two sweater all I could think about was sewing up another.  When I laid eyes on this amazing quilted knit from Raspberry Creek Fabrics I knew it had to be a boxy sweater and the Toaster #1 was just what I was after.

toaster1

I lined the body and sleeves in a lightweight double brushed poly and kept the length I added to the pattern previously.  This fabric is a bit less stiff than my first version and the neck line has a slouchy effect.  This top is incredibly warm and just about as pretty as a sweatshirt can get.

toaster2

I found these darling tags at Hobby Lobby (in the yarn section) and like to add them to those special things I know will get extra love.  Just a tiny detail that I adore that looks upscale from afar but only I know the care that went into this piece.

toaster5

My latest Toaster just might be my favorite.  This beauty happened when I stumbled across this fabric in my stash and realized I had just enough to make the cutest Toaster ever.  This fabric is a remnant from Girl Charlee years ago, a sweatshirt fleece with absolutely no stretch.  I literally could hold the leftover scraps in one hand when I was done cutting this out- totally meant to be!

toaster2

I used the original cropped length and cropped the cuffs a bit also.  Because of the lack of stretch in this fabric this top is a cinch to get on but man, oh man do I have to Houdini myself out of it.  If I had thought through this sew a bit more I may have sized up to account for the lack of stretch but I sewed this on a whim from finding the fabric to sewn in under an hour.  No time for actually thinking about it- just a quick, rewarding sew!

I really love how different fabrics take to this pattern.  I’m thinking next fall I’d love a chunky sweater knit version of either pattern.  I think a light jersey knit would look cute as a version 2 for spring or a drapier french terry for that matter.

toaster4

Have you sewn up a Toaster?  Any favorite fabrics you loved for yours?  I might have sewn my last version this season (no guarantees 😉 but know it will be at the top of my list when cooler temps hit again this fall.

Simple Life Pattern Co. Aria

aria1.1

Raspberry Creek Fabrics has just released their newest Spring CLUB line and it’s absolutely amazing.   My kids instantly claimed their favorite prints and I fell madly in love with these Coral Umbrella Flowers and knew I had to sew it up stat.  Corinne Wells, the designer behind this line, just nails it every…single…time.

aria5rain

I knew I wanted a pattern that would really let this fabric shine and the new Aria Dress from Simple Life Pattern Co. was just what I was after.  It’s a classic silhouette with a sweet bow back.  I had to run it by this cutie and she was as smitten as I was.

aria6.1

We chose to do the full back coverage so she could wear it to school.  The bows made it so fun to throw in a coordinating fabric, navy polka dots.  Nothing like a little party in the back!

aria2.1

I love sewing for this girl because she’s so hard to fit in ready-to-wear.  I did an 8 chest graded to a 10 waist with a 12 length.  Talk about a custom fit!  We chose a half sleeve hack to hopefully make this wearable now and then well into spring and summer.

aria4rain

We did the full circle skirt option for maximum twirl factor.  I don’t think a good twirl ever gets old!

aria8.1

She’s been wanting rain boots forever and these vibrant, fun yellow ones were just made for this fabric.  They will surely brighten even the gloomiest of rainy days!

aria3.1

The Aria features a darling neckline that I managed to botch.  Yep, sometimes you just gotta make do and this was one of those times.  Just means I’ll need to make another one to redeem myself 😉  Good thing little sis is already in line for her version!

aria7rain

After a couple of intense sews, this was my reward.  A quick, fun beautiful knit sew always cleanses the palate and gets me ready for the next big project!  Make sure you head over to Raspberry Creek Fabrics and check out the newest prints- they’re on sale through 2/14 for $1 off/yard.  Simple Life Pattern Company is celebrating three years of business with one of the biggest sales ever.  Head over to shop all the darling patterns for 40% off!  We’re big SLPCo fans around here and they pair fabulously with our favorite RCF fabrics!


Nina Blouse from Coffee + Thread

nina7

I’ve been trying to cut back on pattern testing and it takes something pretty special to pull me into a test.  The Nina Blouse from Coffee + Thread was one of those patterns!

nina16

A sweet peter pan collar, shoulder pleats and multiple sleeve options make this a classic pattern that can work year round.  It’s so feminine and sweet!

nina1

nina5

The optional neck ties add such a charming touch.

nina14

This pattern is beginner friendly and is great for those like me that are a bit timid when it comes to sewing button-up shirts.  I’m always nervous to tackle what I think are intimidating projects but this pattern really was a fun sew.  Not too difficult and the tutorial was excellent.  There’s nothing better than the feeling of accomplishing something that scares you!  These tops are some of my favorite makes because I pushed myself a bit out of my comfort zone.  Easy knit projects are great but these blouses took just a little longer and the reward is so satisfying!

The list of recommended fabrics for this top is long.  Light to mid weight woven fabric such as lawn, rayon, linen, and quilting cotton are all great choices.  I used a pretty rayon challis from Raspberry Creek Fabrics for the long sleeve version and a light swiss dot from LA for the cap sleeve blouse.  Different looks to bring us into spring.  I’m excited to use my favorite quilting cotton prints too!

nina8

You’ll also be happy to know that the size range is amazing! 12 months to 12 years- hallelujah!   It’s absolutely adorable on the littlest ones and still chic and classic on the oldest girls.  It’s such a timeless pattern you’ll turn to again and again.

nina15

My biggest critic absolutely loves her new tops!  She was so excited to wear it to school the next day.  It looked great with jeans and know it will be darling paired with a skirt and knee highs for church too.

nina11nina4nina17nina6

The pattern is on sale through Tuesday, February 13th for $6.50.  I know you’ll love it as much as we do!