Raspberry Creek Fabrics Suit Up For Summer 2022

Have you been following along with the Suit Up for Summer tour this week? It’s been so incredible! So many new techniques to try, genius tips, and can we talk about all of the gorgeous swimsuits?! Hello! This year’s bloggers really blew me away. What a privilege it’s been to get to know them a little bit and to witness their amazing talent.

In years past, this week has been a bit crazy for me. I LOVE LOVE LOVE to sew swimwear and usually have about a dozen to share with you (you can find all of our past swimsuits here.) This year I scaled back for multiple reasons but I still couldn’t wait to sew a few new suits. The new Raspberry Creek Fabrics swim collection is just way too hard to resist!

I always love RCF florals and this swim collection is just full of so many good ones. My girls and I don’t tend to gravitate to red but this print jumped out to all of us. My younger daughter requested it, I stole it and sewed it for myself, then my older daughter modeled it and has now claimed the suit for herself!

For this suit I used the Petite Stitchery Colby Bralette and Patterns for Pirates Busy Bee Bottoms. The top is not intended for use as a swimsuit but it worked out great. I did add cups between the lining and main fabrics for a little more coverage. I think next time I use this pattern for swim I will add elastic to the neckline and armscye as well. It’s extra comfortable without it and has plenty of negative ease to stay in place but I think it would lie better. Remember, I made this top for me, using my measurements but it fits my teen surprisingly well. I’m in love with this bottom pattern. My all-time favorite bottom pattern is the P4P Hello Sailors but this one just might be the new go-to. It’s very similar to the Hello Sailors (high-waist, great coverage) but has so many other options as well. The leg line is a little higher and feels more flattering but still is comfortable and modest. I sewed up a size small graded to a medium in the waist. My daughter measures into an XS but these fit great as well.

This is the Petite Stitchery Brooklyn– SO CUTE, right?!! This is another pattern so full of options. I sewed up this swimsuit in a small (again according to MY measurements). When I tried it on though the fabric design was very stretched and distorted so this little miss got another swimsuit! I think in a solid fabric, I’d stick with a small but I hated losing the details of these amazing prints. For the top I did the optional shelf bra and added cups. I also cut it at the longer cut line and added the band for a little more length. The bottoms have real pockets! While I loved this detail, they kept poking out so I sewed them down after these pics were taken. I love the idea of them but they just weren’t practical. I do keep seeing bottoms with pockets and might need to hack another pattern to have them (just big enough for a hotel key while on vacation!).

The colors in these prints are what sold me. The peachy foliage and teal geometric just remind me of our favorite vacation spot in Cancun. I paired these prints with solid peacock teal and tangerine for a little pop!

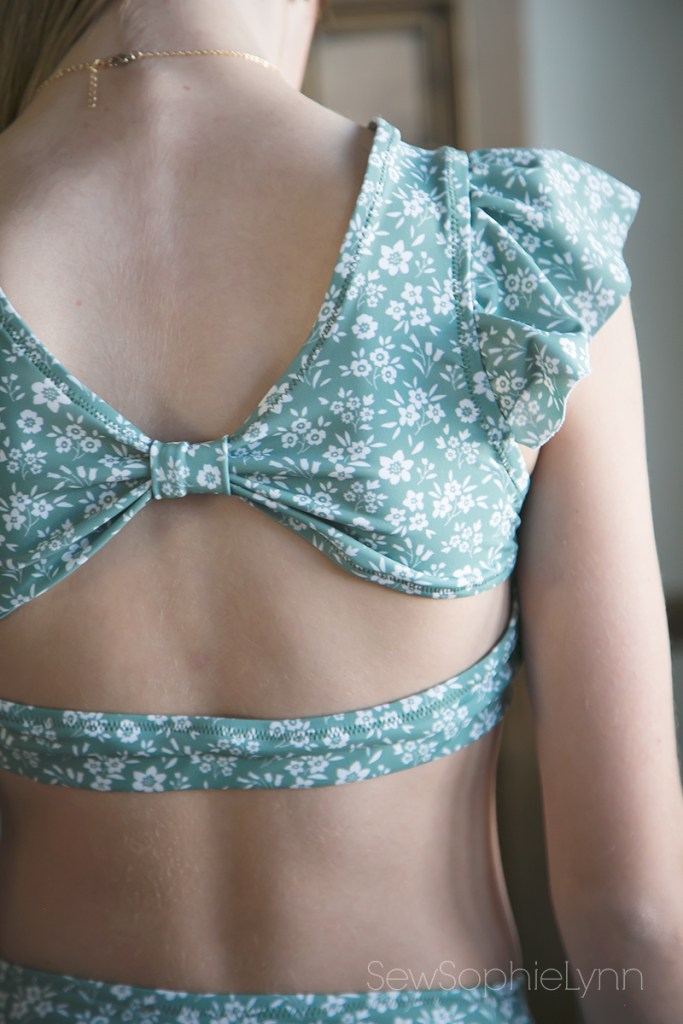
This girl had a very specific request for me. A ditsy floral swimsuit with flutter sleeves. Done and done!

The Little Lizard King Maui swimsuit seems to be a favorite of the RCF team this year and it’s no wonder! It’s really so, so cute! There are one piece and two piece options and the bow back is to die for. She picked the two piece and I slightly altered the flutter sleeve piece to give her the look she wanted. I extended the curved side of the pattern piece about an inch and then didn’t gather it as much as the pattern intended, starting and stopping the sleeve just under the arm. It gives it a little more of a grown up look than the typical flutter sleeve.

This Sage and White Ditsy Floral print was just what she dreamed. She really wanted a white floral and I love that Diana was able to make that happen! It’s so classic and sweet without being babyish. Just perfect for this almost teenager.

My swim wardrobe is pretty chock full but I really wanted another one-piece. I tend to shy away from them. Store bought suits rarely fit because of my long torso and I’ve yet to get a great fit when I’ve sewed one. I mentioned negative ease a bit before but let’s talk a little more about it. I think it plays such a huge part in how your finished garment looks and feels. Some patterns will have a lot of negative ease, meaning your fabric will be stretched to fit your body. This can be great to hold you in and keep things snug BUT it can also make your prints stretch out and make it uncomfortable to wear. I sewed a fantastic one-piece a couple of years ago but the negative ease really flattened me out (another con if you’re not working with a lot in the bust area like me!) and kept riding up in the length. You can solve this problem by sewing a bigger size (but I’d keep the elastic the same as your true measurements) or adding length.

So it was with a little trepidation that I sewed up this suit but boy am I thrilled! I sewed up the Clara from Swim Style Patterns. Swim Style is a new to me company based out of Australia. I stumbled upon them last year and immediately feel in love with all of their suits. They are so on trend and I initially thought of my girls with all of the adorable two piece options. But when searching for a one-piece with great coverage but a little extra ooomph, the Clara jumped out to me.

I love the leg line and the deep v-neckline really helps add to my (lack-of) curves. I sewed up a size small graded to a medium in the waist. I’m a rectangle with my current measurements being 34-30-38.

This pattern came together sooo easily! I loved the tutorial- not too lengthy but also had all of the information needed. The finish is nice and clean on the inside too making it sooo comfortable to wear. There are pockets to add cups and the option to add elastic to the under bust seam which really gives it that extra support. I chose to do a little gathering instead of the bust pleat since my bust is smaller. I was worried a pleat would be too big and the gathering turned out to be a great call. For my next version (which I seriously can’t wait to make), I’ll shorten the shoulder straps a bit to give even more lift and add power mesh to the stomach area between the lining and main fabric. Remember my rant about negative ease, the Clara seems to have the perfect amount for me! It’s not so tight that the print is distorted and doesn’t feel restrictive at all.

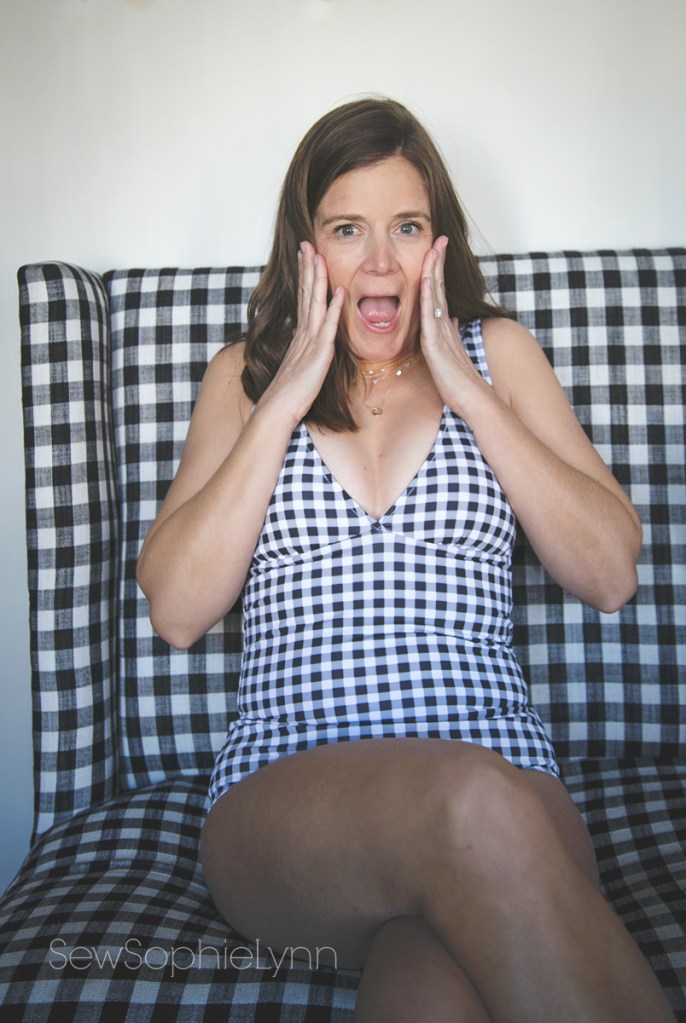
To say I have a thing for black and white prints is an understatement. I love me a good black and white stripe and gingham is right up there with that. This little bench is in our entry way and I was cracking up that I matched it!

I think the RCF CLUB basics don’t get enough love. They work great as coordinates but also stand on their own. This black and white gingham is so classy and timeless. Gingham is still everywhere in stores and will be around forever, just like this swimsuit! I can’t wait to wear it all summer long.

Thank you to all of our amazing sewists who joined in the tour this week! It’s been such a pleasure to sew along side them.

Hosted by SewSophieLynn and Paisley Roots

Sew Hard of Hearing, I Em Sew Happy, Zaji-Kali Makes, Sewing with CWay

Sew Mary Mac, Lorelei Caroline, Sew With Summer, All My Spare Time

Made By Kates, The Imperfect Sewist, Intensely Distracted, Lovely for Life

Sew Whit Designs, Sew What with Afton, It’s Liesel, Clothed in Vermillion

Kainara Stitches, Stacey Durant, Desert Blooms, That’s Sew Kari

Suit Up for Summer 2021 Day Four- Tween Girl Fashion

We’re almost to the end of our week ‘o fun! I’m pretty sure I’ll go into swimsuit withdrawals when the tour ends. Good thing for you, you can still pick up Raspberry Creek Fabrics swim fabrics at 15% off with code SWIMTOUR.

Every year my girls and I go swimsuit shopping and every year we leave empty handed. We struggle so much trying to find suits that both fit their personalities and just plain FIT! My oldest daughter is now in junior sizing and somehow that means that their are even less options that work for her. It makes me so happy that I can sew both of my girls suits that really work for them.

This year I tried a few new to us patterns. The first is the Hibiscus pattern from Honeydew Kisses.

I think my girls have been a part of the design process for so long that when I asked for swimsuit ideas this year, I should not have been surprised to get this drawing from Payton. She really wanted the cutouts on the side and a fun strappy back. She was thrilled when I pulled up the Hibiscus pattern and it matched up with her vision!

I sewed up view B in a 9/10 with added length. We skipped all the ruffles to get as close to her inspiration as possible.

When I was her age, I had a very similar suit that I thought was THE COOLEST! My mom loved it because it was a one-piece and I loved it because the little cutouts seemed so grown up to me. This tie dye print just ups the rad factor!

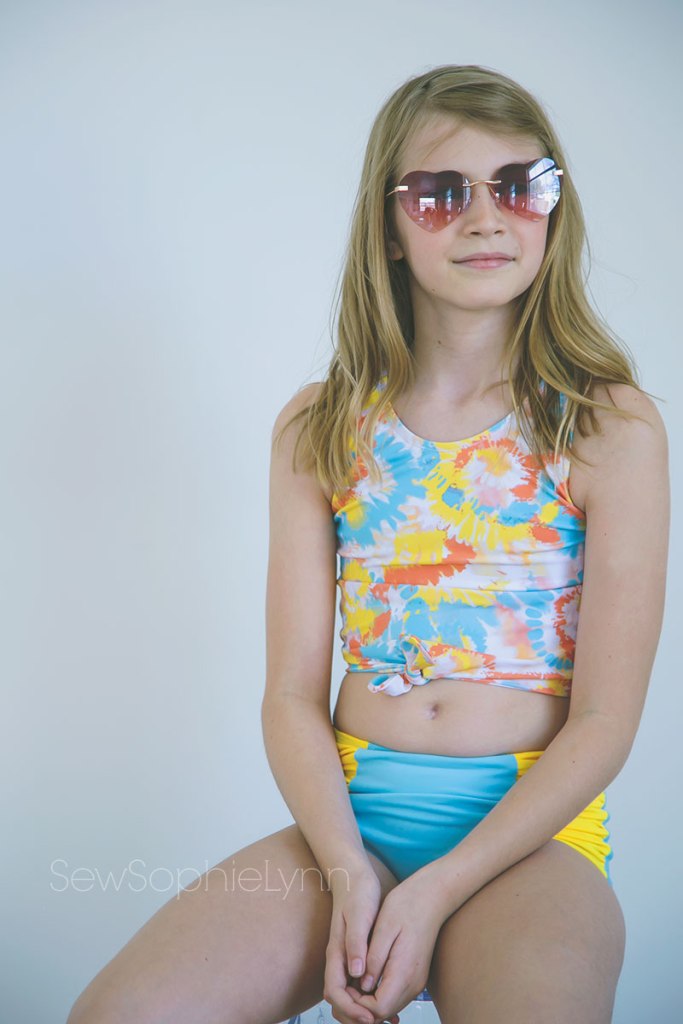
For her second suit I used the Little Lizard King Sanibel. She loves all the little tie front tops in the shops and the Sanibel is absolutely adorable! I love all of the Little Lizard King swim line and plan to work our way through them all.

We used another fun tie dye and paired it with the light blue and yellow swim solids. The colors are just so cheerful and scream summer to me!

I sewed up a size 10 classic neck tankini length top with tie and the gathered side panel bottoms. This pattern had multiple options for the top and you can add lots of little extras like flutters and ruffles too. It’s no surprise that we skipped most of those. I love that this suit feels sporty but also a little feminine with the side gathers on the bottoms and tie on the top.

Big sis picked out fabrics and had ideas too but I steered her towards the Xfactor top after sewing my own. She was super easy to persuade and picked out the long sleeves for her version.

I added the same bra cups and shelf bra lining to hers that I did to mine and it gives just the right support for her.

She picked out this Dash Dot Abstract print and then we struggled with what to pair it with. It looked great with the black and white micro stripe as well as the bright yellow solid we had too. We settled on this vibrant lipstick pink and I love the pop of color it brings. We used the Calypso bottoms (they’re her most worn from previous years) and I did the same modification from the past, cutting them at the non-banded line but still adding the band. This gives them a little more height and she likes that her top and bottoms just meet.

Sophie has had this inspiration pic saved and wanted to recreate it. The Viridian from Jennuine Design was perfect with it’s separate panel pieces.

She loved this bold leopard print and then pairing it with black really made it suitable for her. She loves fashion but doesn’t like to draw too much attention to herself so this is the perfect way to wear a bold print like this.

For her top, I lined it in a lightweight techno scuba fabric instead of adding cups. This added a bit of smoothness and was a great solution. I sewed up a straight size 12 with the racer-back and she has a teeny bit of growing room so hopefully this will last all summer.

While getting ideas this year we came across this unique top from Albion Fit. She loved it and I immediately started looking for ways to recreate it. It’s a simple peasant style and searched my pattern stash to no luck. I asked in our swim tour group and they were so helpful and I landed on the Gypsy Top from Striped Swallow Designs.

I sewed up a size 12 crop length with short sleeves. We made it so she can wear her Viridian top underneath so this is just like a little coverup top. I made casings instead of following the pattern instructions since she wanted it to look more like the inspiration.

I like the higher neckline but could see her wanting a wider, lower neck in the future. This was a fun, creative make that isn’t your typical swim top and that’s what we love about sewing our own swimwear! It allows you to dream big and try new things.

My girls are loving their new suits and we’re dying for warm weather to break them in! Sewing for tweens and teens can be tricky but I love the collaborative process with my girls. It’s so fun to bring an idea to live and to create suits that fit them so perfectly!

Make sure to check out the other amazing blogger this week! Today’s sewists are bringing it big time!


Made by Kates  Violet and Jewels  Sweet Mama Life  All Things Katy!

Intensely Distracted  Pins & Pinot  My Heart Will Sew On  The Petite Sewist

All My Spare Time  Kara Metta  Handcrafted by RED  Sincerely, Shantelle

Replicate Then Deviate  That’s Sew Kari  Desert Blooms  Boo + Lu


A huge thank you to our sponsors and don’t forget to check out today’s giveaway!!
Again, you can find the tour on Instagram with the hashtag: #suitupforsummer2021


Lowland Kids  Gingham Hive  Striped Swallow Designs  Honeydew Kisses  Little Lizard King  

Jennuine Designs  Greenstyle Creations  Made for Mermaids  Call Ajaire  Hey June  Boo Designs! 

  Sofiona Designs  Love Notions  Lil Luxe Collection  Jalie  Sweet Red Poppy


Suit Up For Summer 2021 Day Three- Sewing for ME!

We’re halfway through this year’s tour and I hope you’re learning lots! I’ve learned we need more swimsuits, lol! I’ve been so inspired by the other bloggers and my sewing list keeps growing with each new make I see. Luckily we can still get 15% off all swim at Raspberry Creek with code SWIMTOUR through Friday.

Every year I try to sew a couple of suits for me but then I get so wrapped up in sewing for all my kids that my own sewing often gets rushed or doesn’t happen at all. This year I was determined to change that! I sewed all of my suits first, even snagging some of the prints my daughter requested for myself, such a bad mom, lol! I know they have PLENTY of suits and she got over it real fast when she saw her own new suits. Plus, the swim season is young and I’m sure she’ll get even more suits by the time the summer is over.

Part of my struggle in sewing for myself is that I have a hard time settling on patterns for me. This year I tried a new to me swim pattern, used my tried and true bottoms pattern, and used a couple of regular top patterns for swim tops that I adore! After seeing what the other bloggers on the tour have sewn up, I think there are a few more adult swim patterns I’d like to try too.

This is the first suit I sewed up this season because I was dying to try this pattern and this print is my absolute favorite from the new RCF swim collection. The colors in this print are so gorgeous and muted and it comes in both swim knit and boardshort fabric. I think it’d make darling little boy swimmers too! This is one of the prints both of my girls were fighting over too but mama won for now.

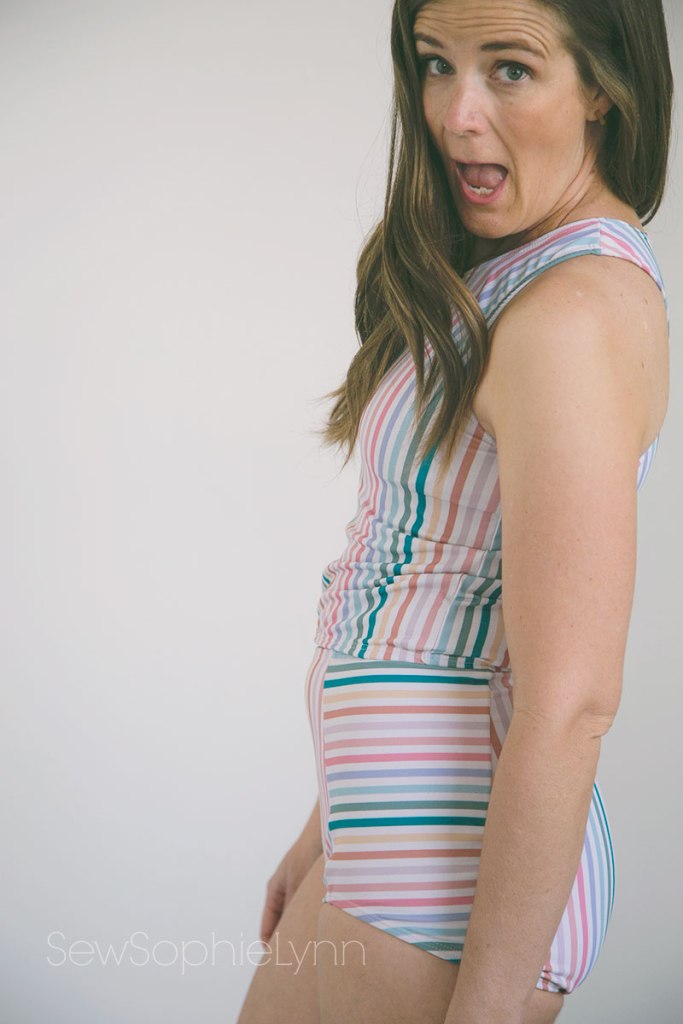
I sewed up the Midline Swimsuit from Gingham Hive. Ashley is a local friend and has amazing style (check out her Instagram for the proof!). I knew anything coming from her would be well done and this suit pattern is no exception. She has a sewalong on her blog that really helps walk you through anything that might be tricky.

There are multiple support options and you can use this pattern to create a super supportive sports bra as well. I did the shelf bra option and added bra cups. I skipped the extra lining since RCF swim is pretty substantial and the part that really needs it (the bust) has the shelf bra. The bottoms have a genius construction method that leaves you with pretty insides and no exposed seams. I used swim fabric to line my bottoms. I usually use power mesh in the front of my bottoms and didn’t on these. They still feel pretty supportive but I may add it to the front middle piece in the future (I just really love that extra bit of structure it gives). The multiple pattern pieces on the bottom make them fun for color blocking or playing with pattern too.

I am super happy with the coverage of this suit and love that I can mix and match it with the other pieces I sewed up. I’m pretty positive that there will be more Midline Suits in my wardrobe.

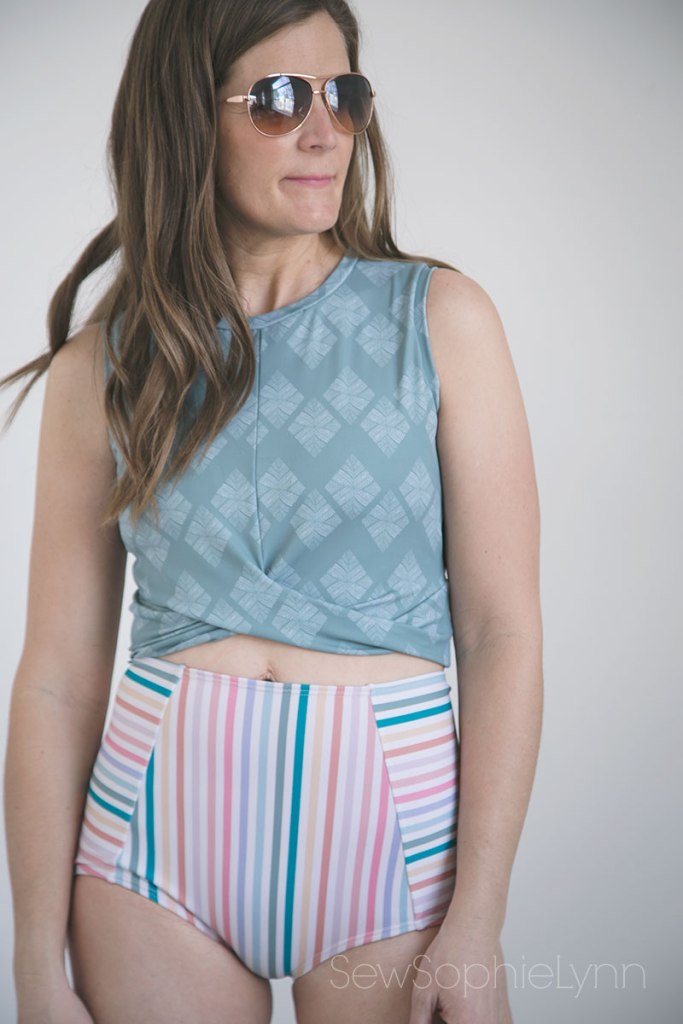
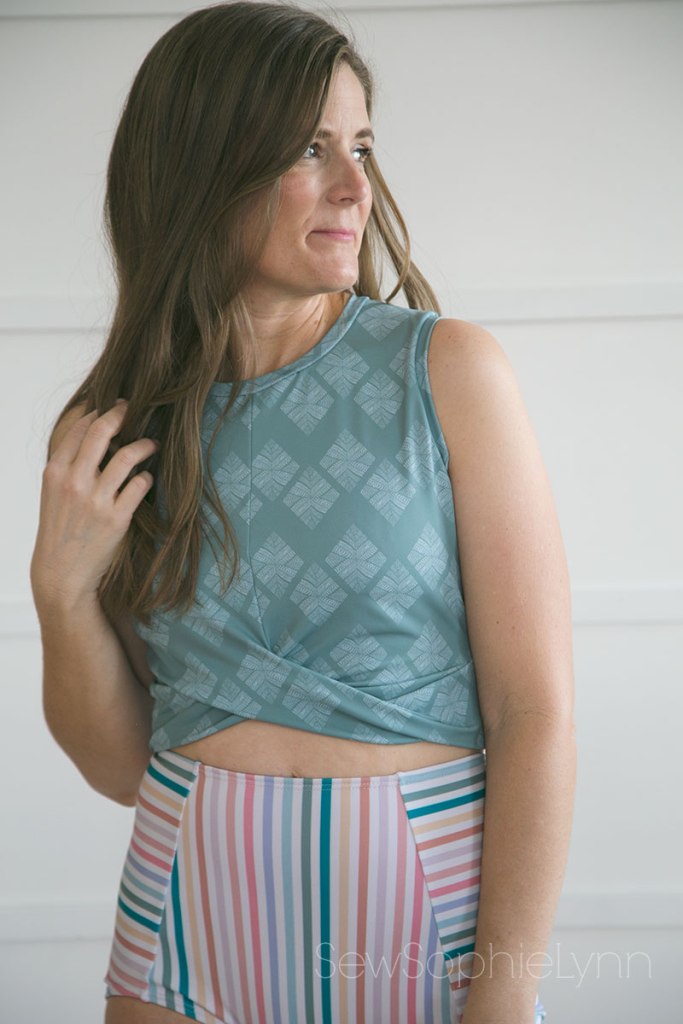
Can we talk about this top?!!! This is my absolute favorite piece I made for myself. I love the sportiness of it and the coverage is awesome. I used the Xfactor Top and Dress from Patterns for Pirates. It’s technically not a swim pattern but with a couple of simple alterations it works so well. The pattern has multiple sleeve options and a dress version too. I’m sure I’ll eventually get to all of the options but for now I just want to sew up a million JUST LIKE THIS! I want a couple in my workout wardrobe for summer too.

To make this more practical for swimming, I added a front lining and shelf bra. I cut the lining on the fold (I folded over the front pattern piece on the notch marking) and cut it just under the bust. I added cups to the lining and a taught 1 inch elastic strip near the hem of the lining. The elastic adds support and also keeps the lining in place next to my skin. The rest of the top is a little loose making it comfortable and flattering. That twist in the front is my favorite detail! I sewed up a size small, according to my measurements. If you preferred a tighter fit, you could try sizing down a size.

This pretty sage and white diamond print is such a gorgeous color and pairs so well with so many of the new spring prints as well. It also comes in boardshort fabric and I’m dying to make Charlie a suit out of it.

The bottoms I’ve paired with it are Hello Sailor bottoms, also from Patterns for Pirates. I turn to this pattern year after year for so many reasons. I absolutely love the fit of these bottoms. I sew up a size small and there is quite a bit of negative ease, sucking things in where I need them! I like to use power mesh in between the lining and main fabric on the front from the top of the leg seam to the waist. For these, I used power mesh on the green and brown pair but skipped it on this pair simply because I forgot. I also like to do the waistband slightly wider and add one inch elastic to it but alas I forgot on these ones too (I think I was just too excited to be sewing for myself again!). It doesn’t necessarily need it but when editing these pics I noticed the waistband is rolled in many of the photos. Adding elastic eliminates the rolling and also adds just a little more support too.

I used this green sage cream and brown stripe and also this teal sage deep peach and yellow stripe. With the 4-way stretch these stripes are great to use either horizontally or vertically. I personally love the vertical stripe on my bottom half.

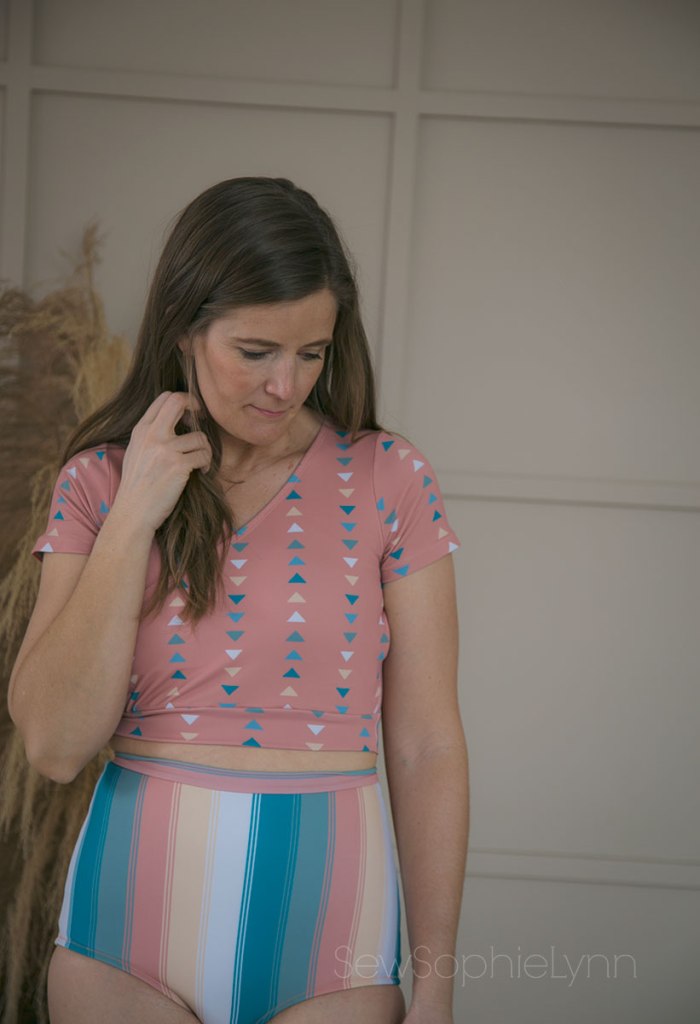
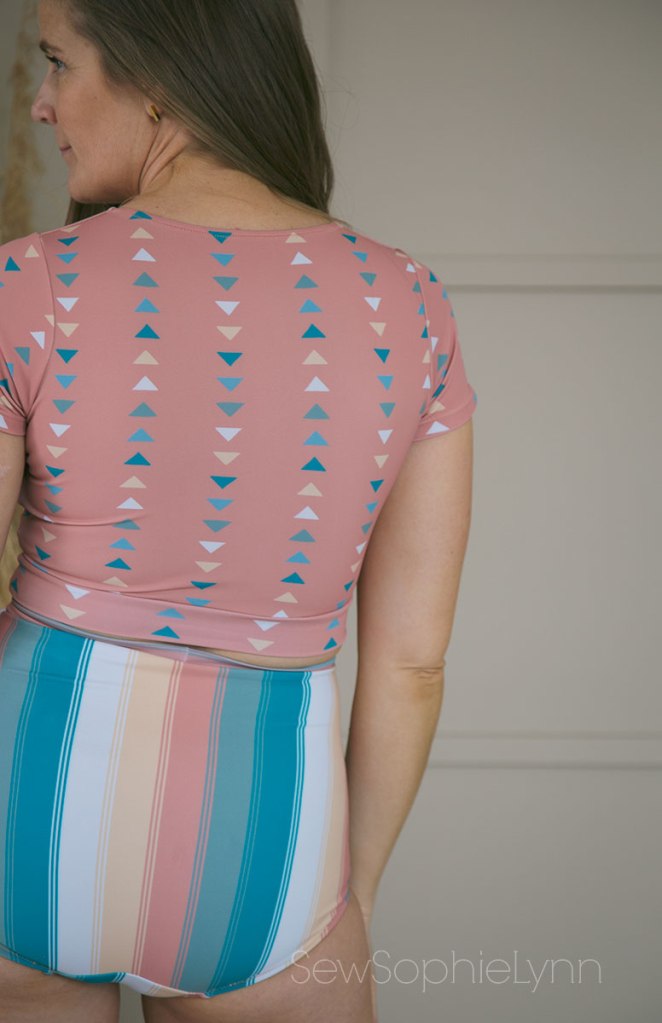
I sewed up one more top and I’m in love! I purchased this top for a vacation earlier this year and loved it so much I wanted to recreate it. I turned to my trusty Willow Wrap Dress pattern from Love Notions. It had the perfect cross front and sleeve options like the inspiration. I wanted to add a little more length than the original and while it did complicate things a bit, it was easy to get the length I wanted starting with the Willow Wrap bodice. For this top, I used the dark peach triangle stripe. I love that this print coordinates with so many prints too and it looks darling with the multi stripe from my Midline Suit too.

I’ll tell you what I did and also what I’d do differently next time. Something about swim makes me less nervous to try new things. Maybe it’s the fact that it takes much less fabric or maybe it’s just a chance to be a little more adventurous. For this top, I cut my pattern pieces out per the instructions, cutting the bodice pieces at the shorten/lengthen line. I also cut two front lining pieces out of white swim fabric. I’m really leaning towards lining all of our suits in swim fabric instead of actual swim lining. It’s softer against the skin and doesn’t get snagged or stretched out with wear. Ok, now we’re going to get a little crazy. I layered my bodice pieces at the shoulder like this- front lining, back bodice right side up, front bodice right side down, and sewed the shoulder seams. This gives you a hidden shoulder seam. Next I sewed 3/8″ swim elastic to the inside of the whole neckline. I used my serger and just pulled it tight as I sewed, not stretching it too much but just enough to help it lay snug against the body. Now flip it to the inside to cover the elastic and secure with a zig zag or coverstitch. Now this is where I’d do things a little differently. I basted my sides and then determined where my cups should go. Then pulled out the basting stitches, sewed my cups in and proceeded to sew the rest of the top. I think it’d be genius if you left a small opening in the lining to add removable cups after constructing the top. This is what my RTW version has and then you can adjust the cups to be exactly where you want them.

After sewing on my cups, I basted the front bodice pieces together, leaving off the main front bodice piece that is on the outside. I sewed a plush 1.5 inch elastic across the underbust for support through the three layers of bodice pieces. Again, I would change that up and sew it just to the side of the bodice that will be on the inside next to your skin. If you didn’t want the longer top length, you could omit this all together. My rtw version just has elastic in the bottom band and it hits right under the bust so it’s very supportive. After you finish the front bodice construction you will sew the sleeves and side seams according to the pattern. To finish it off I sewed a band to the bottom of the bodice.

Did I thoroughly confuse you?! There’s a reason I don’t write tutorials, lol! When I do stray from the pattern, I usually wing it and hope it all works out. If you do feel like giving this a try, don’t hesitate to reach out to me and hopefully I can help you out. More than likely, you all have a better, easier way to do it and you can pass those tips along to me!

I did my pictures after grabbing my kids photos and I couldn’t get my remote to work right so my youngest two got to man the camera. I set up the tripod to make it as easy as possible for them and all they had to do was hit the button. I’d ask if I was in the frame and they said yes every.single.time! And guess what, most of the pics I am in the frame even if just barely, lol! I laughed and laughed as I scrolled through the hundreds of pictures they took and this gem right here is me taking tips from my sassy tween.

I’m so excited to have a new set up suits for summer! I’m so looking forward to pool days (even if they’re kiddie pool in the backyard days like last year!). I want the warmth and lazy days right about now.

I hope you’re following along this week as we showcase all of the amazing swim fabrics Raspberry Creek Fabrics has to offer. A huge thank you to all of our sponsors for donating patterns to our team of bloggers as well as patterns and shop credits to our daily giveaways. This sewing community is really the best!

Please stop by all of the other stops on the tour this week. Today’s bloggers have more cute adults suits as well as some darling little girls suits!

Sew Mary Mac  Merritts Makes  Wild + Wanderful  Call Ajaire

Made by Kates  Violet and Jewels  Sweet Mama Life  All Things Katy!

Intensely Distracted  Pins & Pinot  My Heart Will Sew On  The Petite Sewist

All My Spare Time  Kara Metta  Handcrafted by RED  Sincerely, Shantelle

Replicate Then Deviate  That’s Sew Kari  Desert Blooms  Boo + Lu


Titchy Threads  Sew A Little Seam  Simple Life Pattern Co.  Pattern for Pirates  Ellie and Mac  

Lowland Kids  Gingham Hive  Striped Swallow Designs  Honeydew Kisses  Little Lizard King  

Jennuine Designs  Greenstyle Creations  Made for Mermaids  Call Ajaire  Hey June  Boo Designs! 

  Sofiona Designs  Love Notions  Lil Luxe Collection  Jalie  Sweet Red Poppy


Christmas Gifts with Riley Blake Sparkle

Sparkle2.1

It’s that time of year to do ALL the gift sewing.  I sat down with my oldest daughter and we had a little sewing afternoon and whipped up some cute, quick presents using FREE patterns from some of our favorite designers.  This fabric from Riley Blake Designs was perfect for accessories that will match everything!

Sparkle4.1

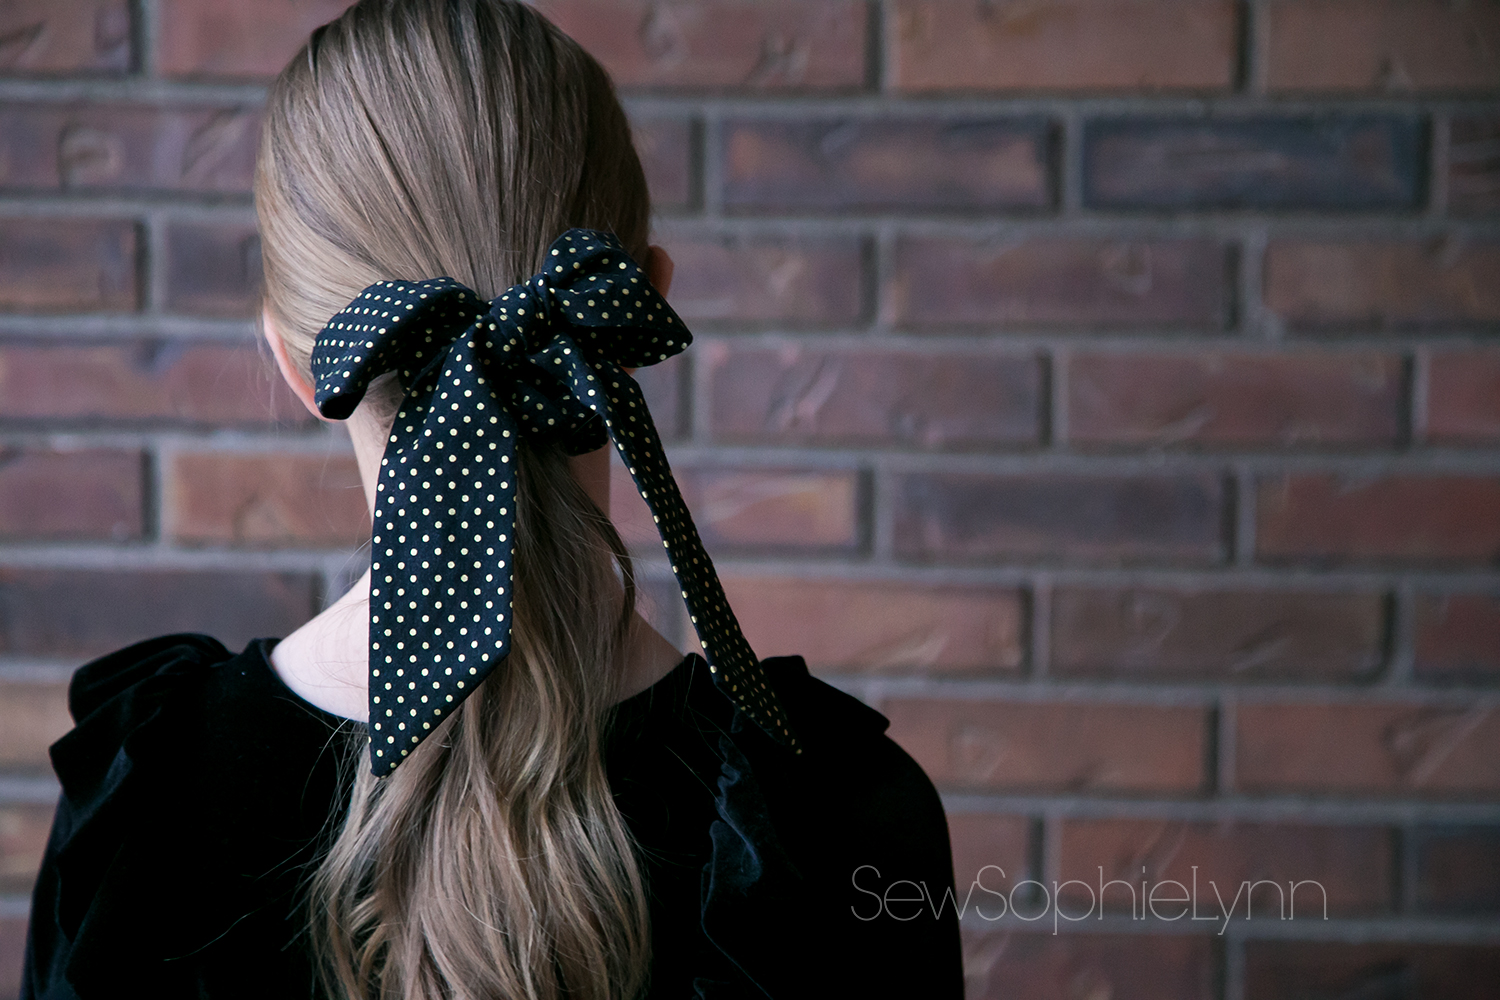
We used a Swiss Dot on Black Gold Sparkle from Riley Blake.  This fabric would make a darling dress, skirt, pillows, or quilt… there are loads of possibilities!  I love the classic dots and the sparkle of the gold.  There’s just something about a good black and gold combination!

Sparkle6.1

Our first project was one that has been all over the sewing community since it debuted last year- a hidden pocket infinity scarf.  We followed this tutorial from Patterns for Pirates.  It was easy to follow and so fun!  That hidden pocket is perfect for holding your cell phone, keys, mints, etc. and is such a genius idea.

Sparkle5.1

She plans on gifting this one to her favorite teacher with a gift card snuck inside the pocket.  I think we’ll have to make a few more for teachers, neighbors, and friends.

Sparkle7.1

We turned to Made for Mermaids for our other two projects.  Both M4M and P4P do a fun 12 Days of Christmas each year and offer free patterns and projects.  I don’t know how they continue to come up with them year after year but I always look forward to them.

Sparkle8.1

My girls still love a good simple bow so we just had to make the new Hadley Hand-Tied Bow.  We did the largest size and I think it works great for tweens and teens.  I’m glad they even included a little tutorial on how to tie it up just right.

Sparkle3.1

We also sewed up the Bow Scrunchie pattern.   My daughter has made dozens of scrunchies and I love the bow addition on this one.  She was easily able to sew up both of these hair accessories (I manned the iron while she sewed!).  I love seeing her sewing confidence grow with each project!

Sparkle1.1

We had to throw in a Flower Market version with the little scraps we had leftover from this jacket.  These hair things are perfect for all those precious scraps!  She’s planning to gift these to her little sis which is fantastic because that means they’ll stay in the family and I can steal them!

Are you sewing handmade gifts this year?  Do you wait until the last minute or are you already done with your crafting?  I usually think I’m done and then like to cram in some last-minute gift sewing in the final days before Christmas.  Doesn’t that make me a true sewist?!

Personalized Christmas Jammies with Cricut Maker, EasyPress 2, and EasyPress Mini

This is a sponsored conversation written by me on behalf of Cricut. The opinions and text are all mine.


Main1

How many of you have the tradition of fresh new pajamas for Christmas morning?  It was a tradition in my home growing up and one that I’ve loved carrying on with my own kids.  Some years we all sport matching sets, sometimes they’re a mix of store-bought and handmade, and sometimes the littles get cozy footie pajamas while the rest of us are happy with new flannel pj pants.  This year I’m excited to be ahead of the game and my kids are thrilled with their new jammies that match their personalities to a tee.  This post is sponsored by both Cricut and Raspberry Creek Fabrics to really bring their visions to life.

Kids4

We broke out all things Cricut for this post and I can’t wait to share all about them.  We used the new Infusible Ink products, some fun Iron-On Designs, Everyday Iron-On with my Cricut Maker, EasyPress 2, and EasyPress Mini.  Having the right products and materials made it so easy to create looks that this crew really loves.

Kids3

The first thing we did was head to Raspberry Creek to pick their fabric.  My younger three are all about the CLUB fabrics.  I try to keep them in CLUB pajamas for every season.  The CLUB fabric bases are so soft and comfortable and are their absolute favorites.  I loved that they immediately found prints they loved and that they went for three different base fabrics- the famous cotton lycra, double brushed polyester, and the new sweatshirt fleece.  My big boys wanted flannel bottoms and you can’t go wrong with any of the Robert Kaufman flannels in the shop.  They are so soft and fluffy and wash up better and softer with each wash.  I have a pair from many years ago that still look brand new even after constant washing during the colder months.

With their fabrics picked, we found the perfect matches for their personalized tops.  My big boys wanted simple designs so we tried out a couple of Infusible Ink papers.  My oldest daughter loves buffalo plaid and we just had to do the matching Infusible Ink.  My spunky younger daughter fell for the perfect Iron-On Design and my little man went with easy Everyday Iron-On.

Charlie2

My littlest was very insistent he needed this adorable Christmas Cactus print for his pj’s.  He sat on my lap and scrolled through DesignSpace with me and just cracked up at this design he picked.  Boy, does it suit him!  He’s sweet to the bone but his curiosity can get the best of him.  We used Kelly Green Everyday Iron-On for a simple tee that we both love!  I used the Titchy Threads Rowan tee for his top and Sew A Little Seam (free) Movie Night Pj’s for his bottoms.

Payton1

This little miss loved this bright and fun Iron-On Design.  I let her cut it all out and place it on her tee how she wanted.  We used our favorite raglan pattern, Hey June’s Camden, and leggings pattern, Love Notions free Leggins’ to create an easy set.  I wouldn’t be surprised if these pieces made their way into her everyday wardrobe too.  This striped double brushed polyester is one of my favorites from the fall collection and I can always count on my go-to mustard dots to coordinate with just about everything.

Sophie3

It’s no surprise that this daughter of mine picked something I totally want for myself!  I would live in those cozy fleece joggers!  We used this buffalo plaid sweatshirt fleece for a pair of Made for Mermaids Lexi and Lou Loungers (with added elastic in the waist) that I’m sure she’ll wear every chance she gets.  How fun is it that this Infusible Ink matches so good?!! Perfection!  She picked this darling deer head from DesignSpace for a look that is so on trend.  We used a Cricut blank tee as the base and we were both in awe as we watched the Infusible Ink melt into it.  It was shocking to see how bright and smooth it came out!  We were both mesmerized by it and are already planning more projects with it so we can see the magic again.

Alex2

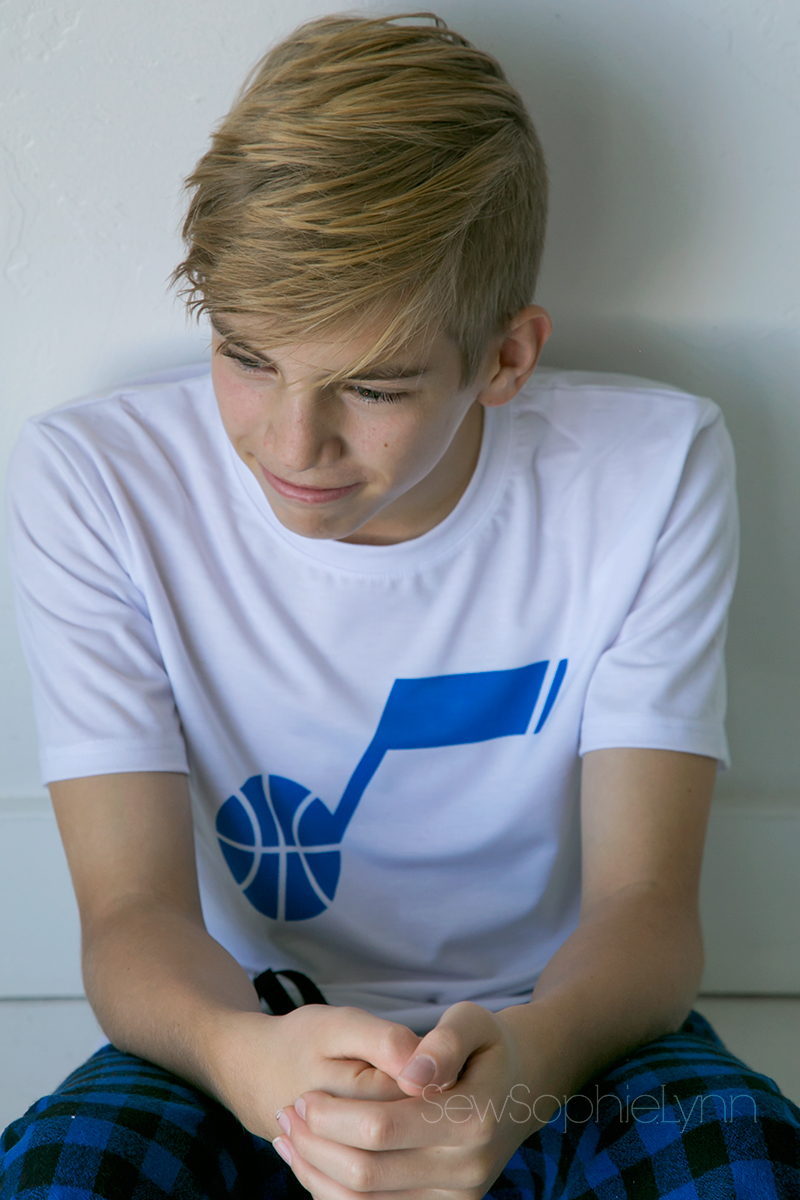
This kid is the ultimate sports fan.  His room is decorated floor to ceiling with all things Broncos, Jazz, Yankees, and soccer.  It was no surprise he wanted a simple Utah Jazz note on his tee.  We used Infusible Ink and a Cricut blank tee paired with his cozy Patterns for Pirates Walk the Plank pj pants (another free pattern!).

Tanner3

My oldest is a senior this year and spends all his free time playing soccer.  We found this cool silhouette in Design Space that looks soooo much like him- it was perfect!  I added his school name and graduation year to really personalize it.  He also got a pair of Walk the Plank bottoms.

GirlsEasyPressMini1

For the front designs, I used my big EasyPress 2.  I love the even, smooth results I get every time!  I couldn’t live without my EasyPress!  I was so excited to get the EasyPress Mini.  I used iron-on size tags in almost all our handmades (it makes hand-me-downs easier and also helps my kiddos find the back, lol!).  The EasyPress Mini is going to live in my sewing space and makes adding those little tags so.dang.easy.  It heats up fast and is the perfect size to get in the neckline.  My mind was blown!

Pin1Pin2Pin3Pin4

A HUGE thank you to Cricut and Raspberry Creek Fabrics for providing all the supplies for this post.  I love that we were able to spend time together creating the perfect jammies for each of my kiddos.  The memories of that day are just as special as the pj’s!  That’s what the holidays are all about!

Easy Halloween Costume featuring Riley Blake Stripes

wenda2

Halloween around these parts is pretty low-key.  I’m not the mom that loves to spend hours creating masterpieces.  I adore seeing other amazing handmade costumes but for me, I’m all about keeping things simple.  My little man wanted to be Captain America this year and I almost danced to the register to spring the $20 on a store-bought costume- done and done!  When Sophie said she wanted to be Wenda from the Where’s Waldo books we love, I was all on board.  I knew I could whip up a tee and beanie in no time.  My kinda costume!

wenda1

I reached out to Riley Blake and they generously sent over these perfect red and white stripes.  After searching the net for the perfect fabric I was happy to see that Riley Blake’s stripes were the best match for what we needed.  It’s a bonus that they’re soft and comfy too!

wenda3

I used the Love Notions Girl’s Classic Tee (affiliate link) for a simple silhouette that fits Wenda’s style.  Throw in the free Patterns for Pirates Slouchy Beanie with a couple of mods and Wenda is complete.  I added length to the beanie and lined it so she could flip up the bottom and made a pom-pom for the finishing touch.

wenda4

I love that she can wear this costume to school and be comfortable and not too flashy.  Perfect for a middle schooler!  What are your favorite quick costumes?  I’ve got one more to share this year that the whole family is loving!

Riley Blake Sharks Novelty

blue5

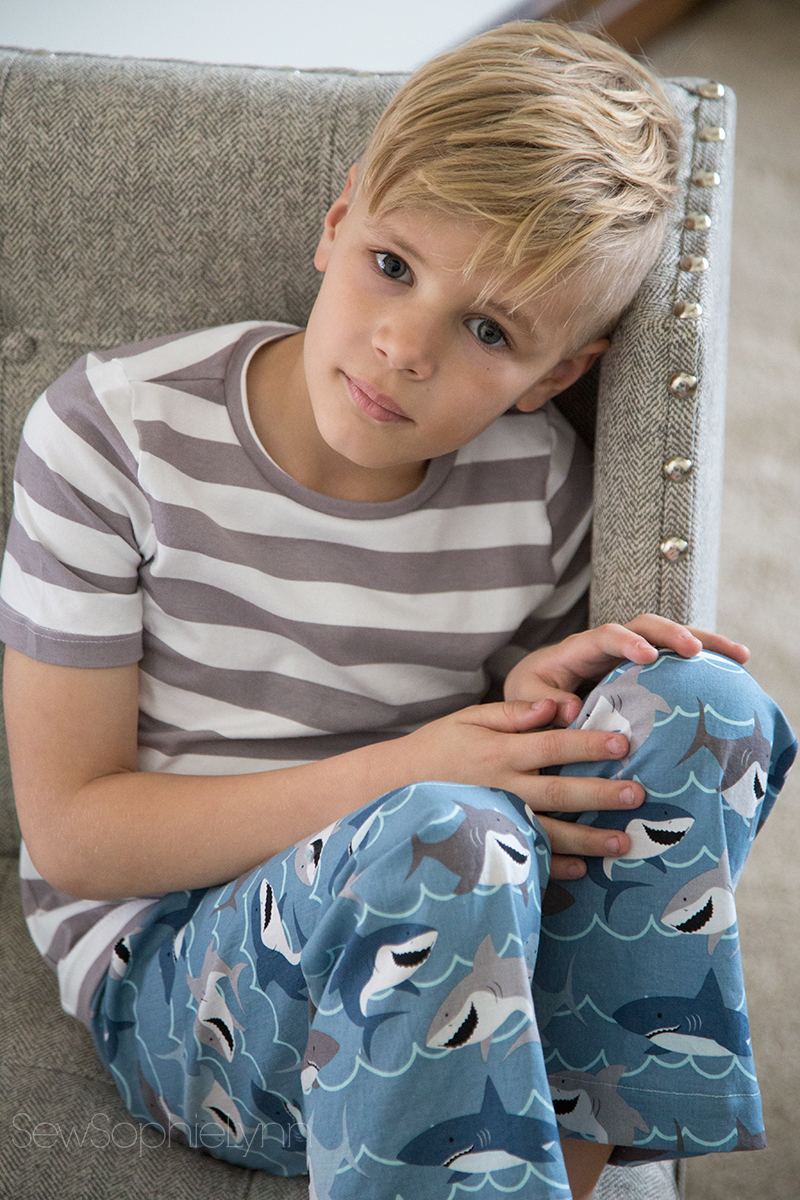
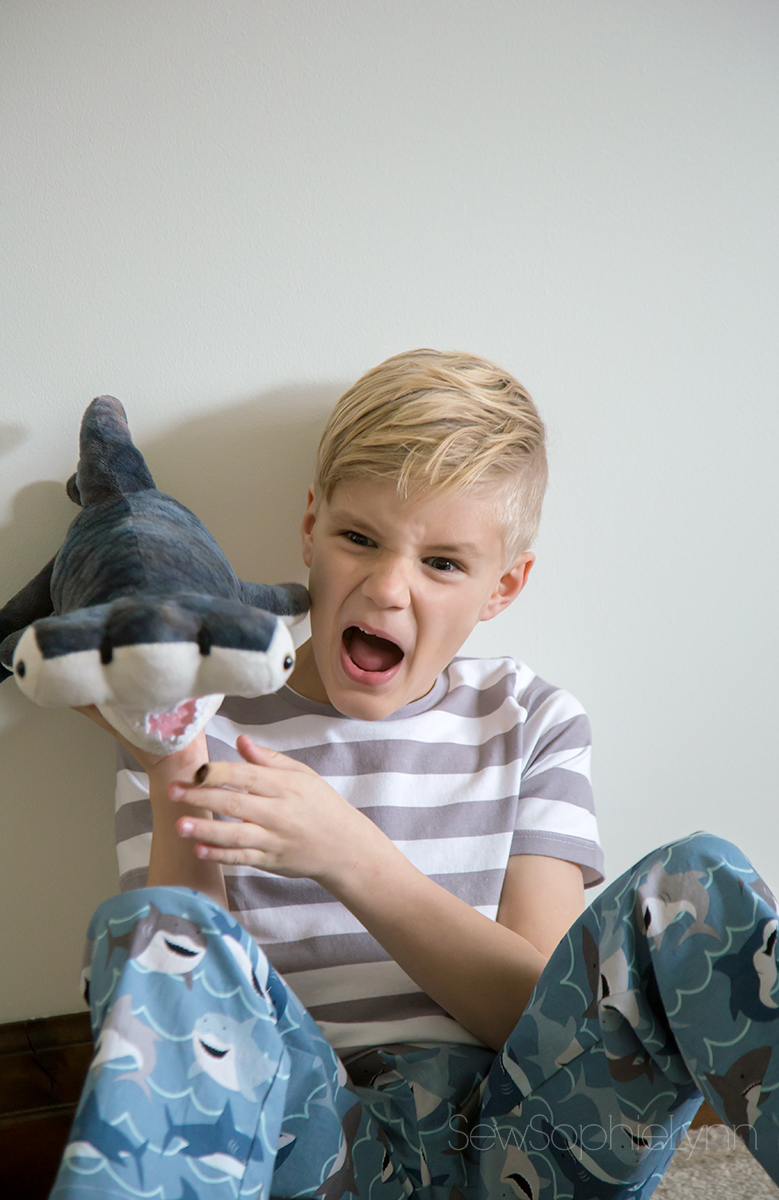
Sometimes a quick sew can be so, so rewarding.  Like sewing up a set up shark pj’s for my shark-obsessed kiddo.  His reaction when he came home from school to hot off the machine pajamas was priceless!  Bonus, it’s pajama day at school today so this kid is set!

light1

He was all in for taking photos too!  He excitedly ratteled off fact after fact about sharks.  Did you know that the Bull Shark can kill a person in the least amount of bites?  Or that the Whale Shark is the biggest shark?  As he read this book to me he kept telling me little bits of info followed by “But I already knew that”.  I love that he is so passionate about learning all that he can!

blue1

On our trip to Monterey last summer, he was in awe of all the sharks at the aquarium and used his precious souvenier money for this giant hammerhead shark.  His big brothers continue to tease him to this day about his splurge but let me tell you, that shark is one of his most prized possessions.  It was well worth it and has been so well-loved.  (Here he’s telling me all about how the hammerhead can see in all directions to look for food and how there are plates in it’s head for ramming into predators.)

blue2light2

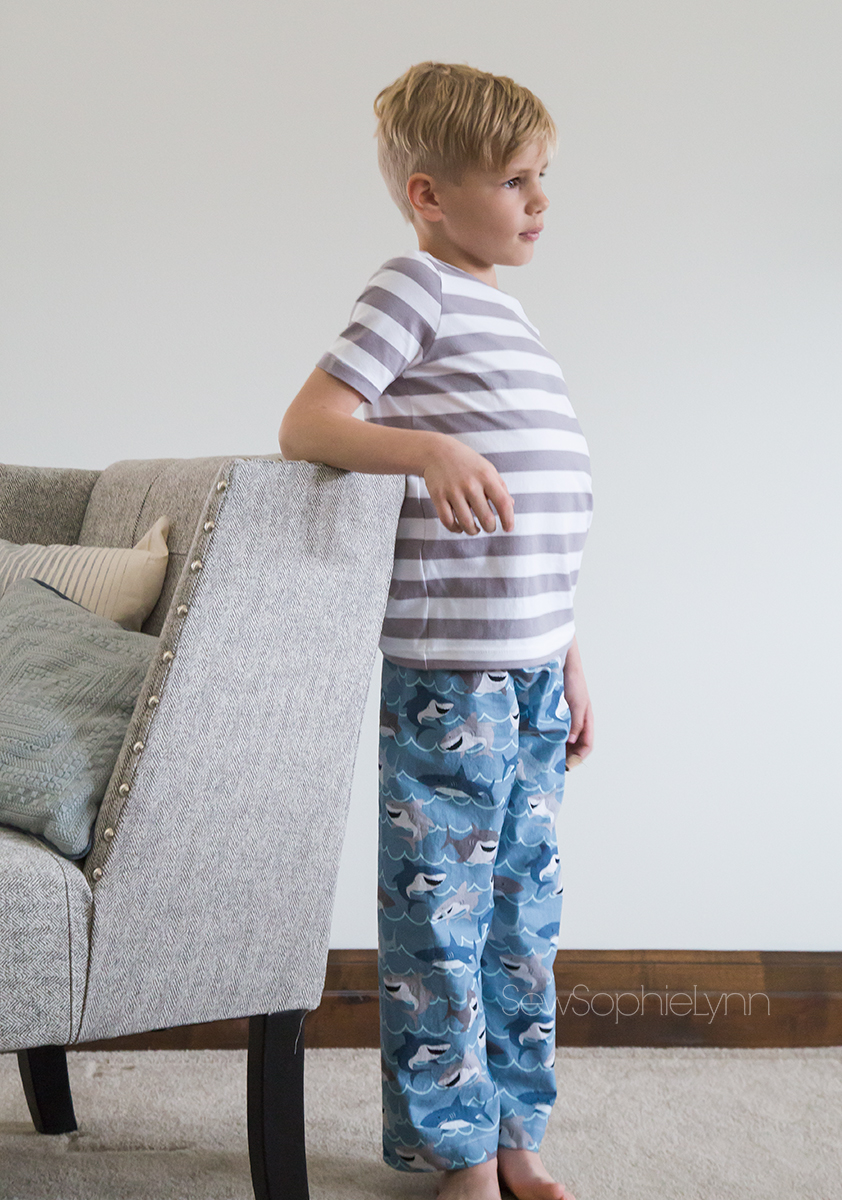
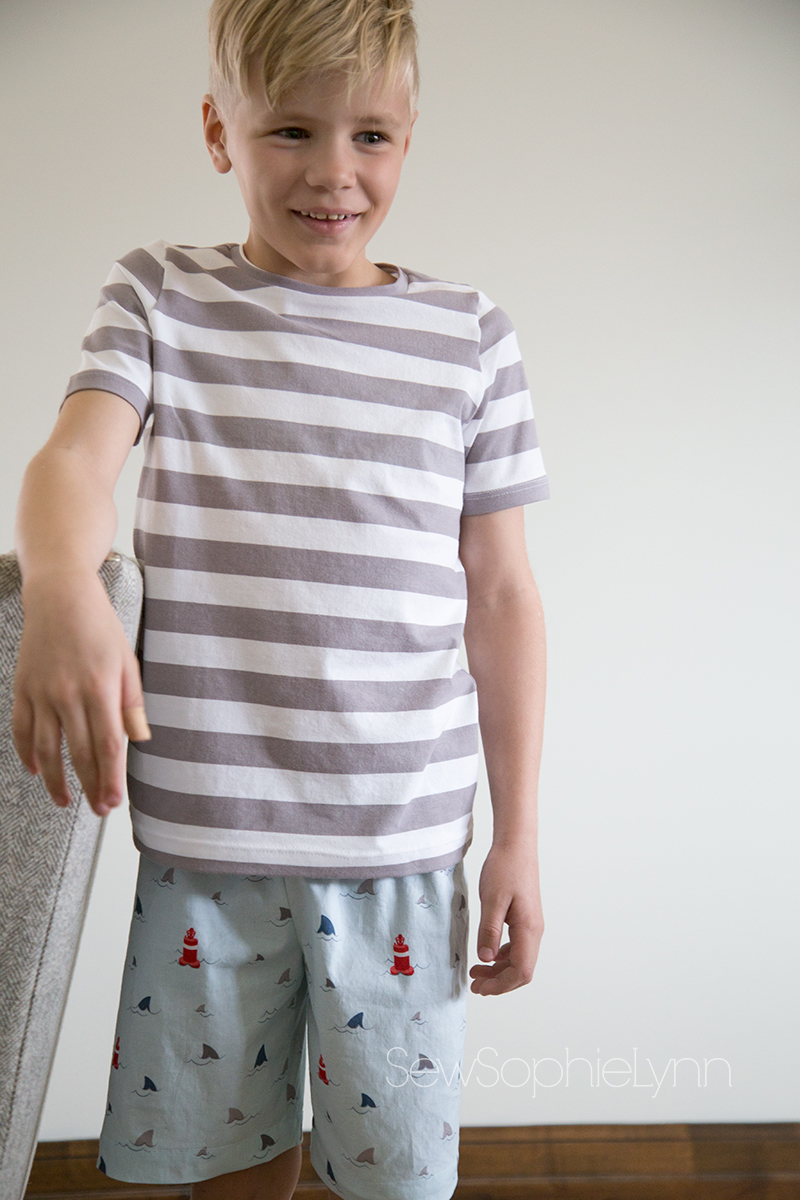
For these pajamas I used Riley Blake’s Sharks Novelty Blue and Fins Novelty Light Blue paired with Grey 1/2″ knit stripes.  I love the stripes with the shark prints for a boy look that’s not too babyish.

light3blue4

For these quick and easy pajamas, I used the FREE Walk the Plank pajama pants from Patterns for Pirates paired with the Oliver + S School Bus T-shirt (sized up one for a looser fit).  I sewed up a size 5 waist with a 7 length for the pants and a straight size 5 for the knee-length shorts.  The pajama pants are available for the whole family and are a great wardrobe staple.  They are loose fitting but not too huge and I always find the fit pretty spot on.  They make a great project for anyone just learning to sew too!

blue3

crazy

Make sure to check out your local quilt and fabric shops for this cute fabric.  If you have a little shark lover you will make their day! No scary sharks here, just one happy little man!

main

Fabric was sponsored by Riley Blake Designs but all opinions and shark facts are my own 😉


Raspberry Creek Fabrics Valentine Line

group

Raspberry Creek Fabrics introduced their Valentine Line last week and I loved sewing some of it up!  We were lucky enough to meet up with Anna and her darling kiddos for a quick photo shoot to really highlight this collection.  I feel so lucky to have such great sewing friends so close and Anna is so incredibly talented!

pair2

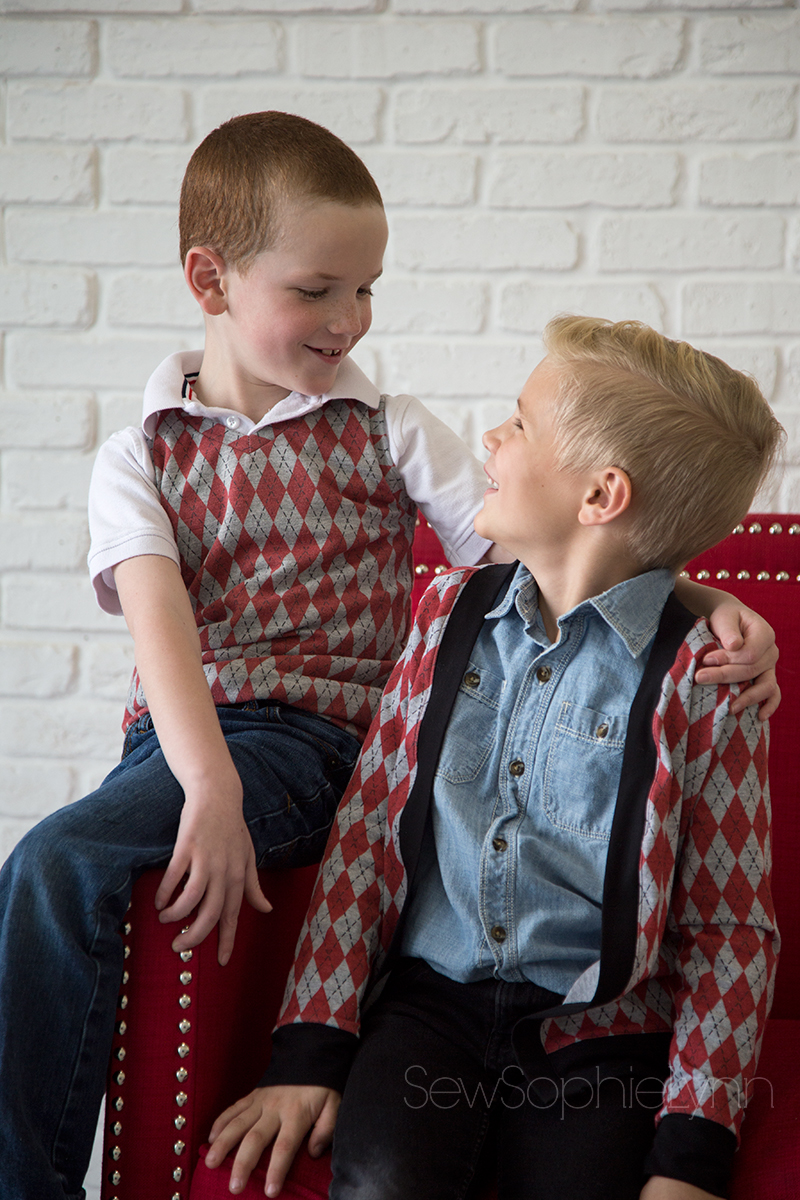
This argyle print is such a classic and was instantly a favorite.  It’s great for the holidays but will also work well year round.  It’s printed on the CLUB grey base which is my absolute fav, especially for boys.

charlie1

I sewed up a Greenpoint Cardigan from Hey June Handmade.  I can’t believe this was my first time using this pattern.  It sewed up quickly and looks so cute on.  I left off the snaps and buttons for now but I’m still debating whether or not to add them.  We’ve struggled with snaps in the past so I’m leaning towards some sleek black buttons…

sophie2

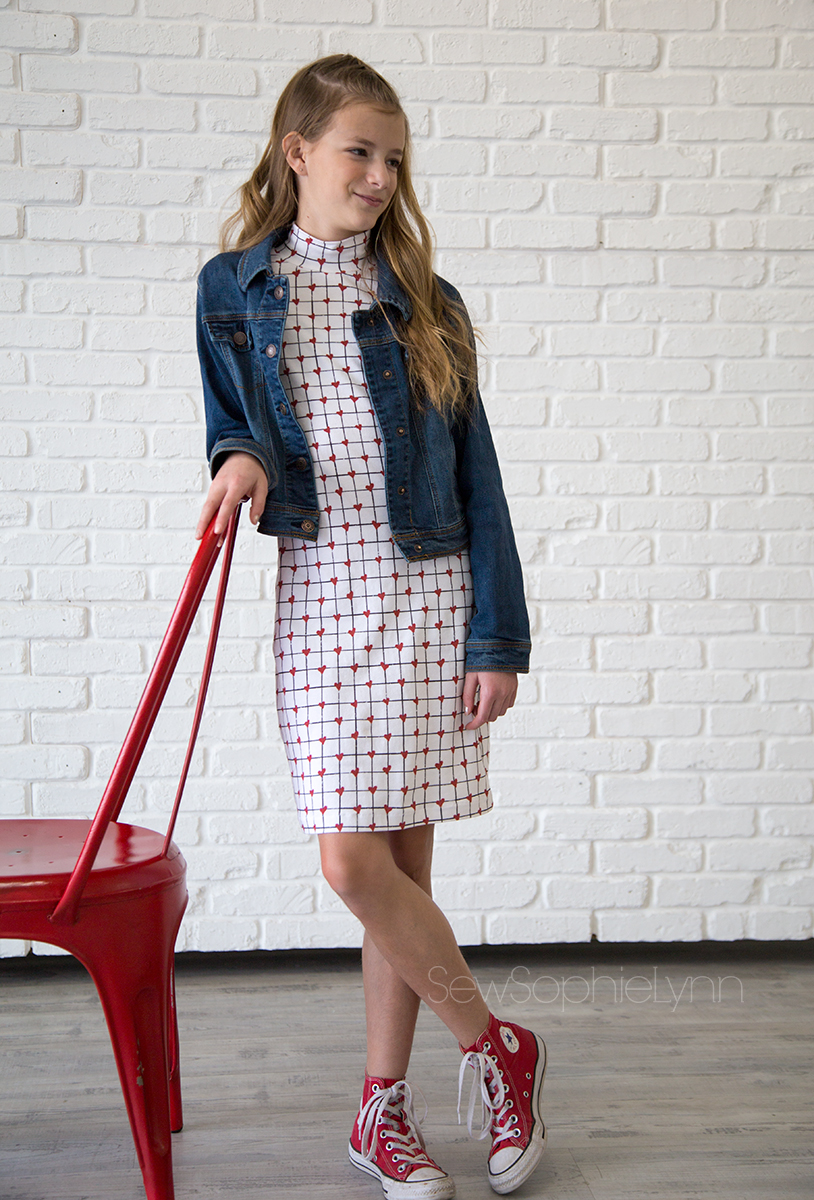
I’ve been dying to sew up the new Modkid Brooklyn.  I love Modkid’s Tween line (Sophie is still just under the size chart chest/hip wise but is a 14 height!).  I think this pattern is similar to the True Bias Niko pattern and since I like to try out new styles on my little mini me first she got to be my guinea pig.  The mock neck, slim fitting silhouette is so cute on her!

sophie1

I thought the modern lines of this print were just too perfect for this look!  Windowpane prints are having such a moment and the addition of hearts just make this fabric so sweet.

payton1

This little girl is all about purple right now.  She loved the pretty watercolor stripe and I knew pairing it with the CLUB lilac dots would be a win.

payton2

I used the Jolly Roger Raglan from Patterns for Pirates with the funnel neck add-on.  I extended the funnel neck height and cropped the bottom hem a couple of inches as well.  It’s a cozy closet staple that will get worn often.

pixie1

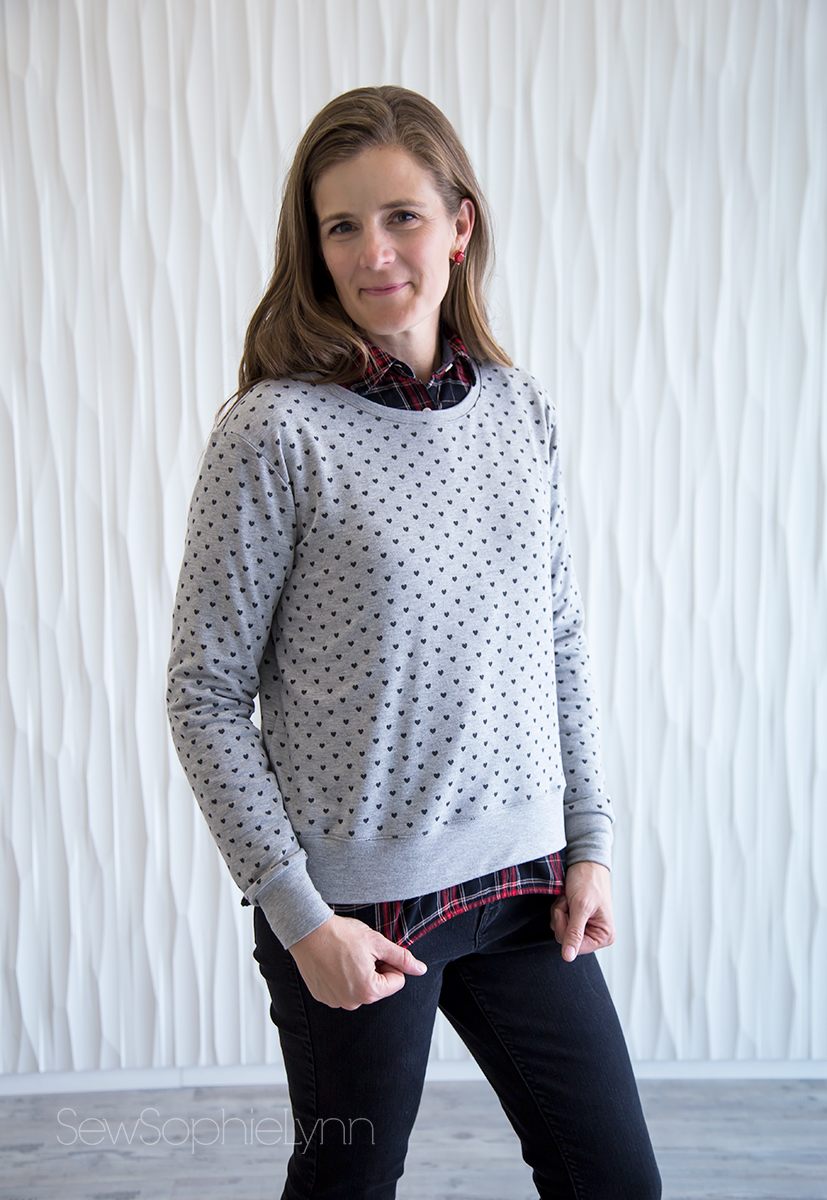
I had to get in on the fun!  I love the simplicity of these tiny hearts on grey.  It’s cute without being too young.  It’s a print I can wear year-round and will pull out this sweatshirt often.  I used my latest go-to pattern, the Pixie Tee from Chalk and Notch.  I cropped the hem about two inches since I plan on wearing this as a layering piece and I love a bit of shirttail sticking out.

manhattan1

I also sewed up a New Horizons Manhattan Dress in the XO double brushed polyester.  I love what a quick sew this pattern is and that boat neck is super cute!  The drape of the double brushed poly is dreamy as a circle skirt and she loves how soft this dress is.

pair1charlie3pair3

manhattan2pixie2charlie2

valentines1valentines2


You can grab these prints on sale through Wednesday, December 19th for $1 off per yard.  They’re available on CLUB cotton jersey and french terry with the bottom two prints on double brushed polyester.  They’ll stay available in the shop through Valentine’s Day.

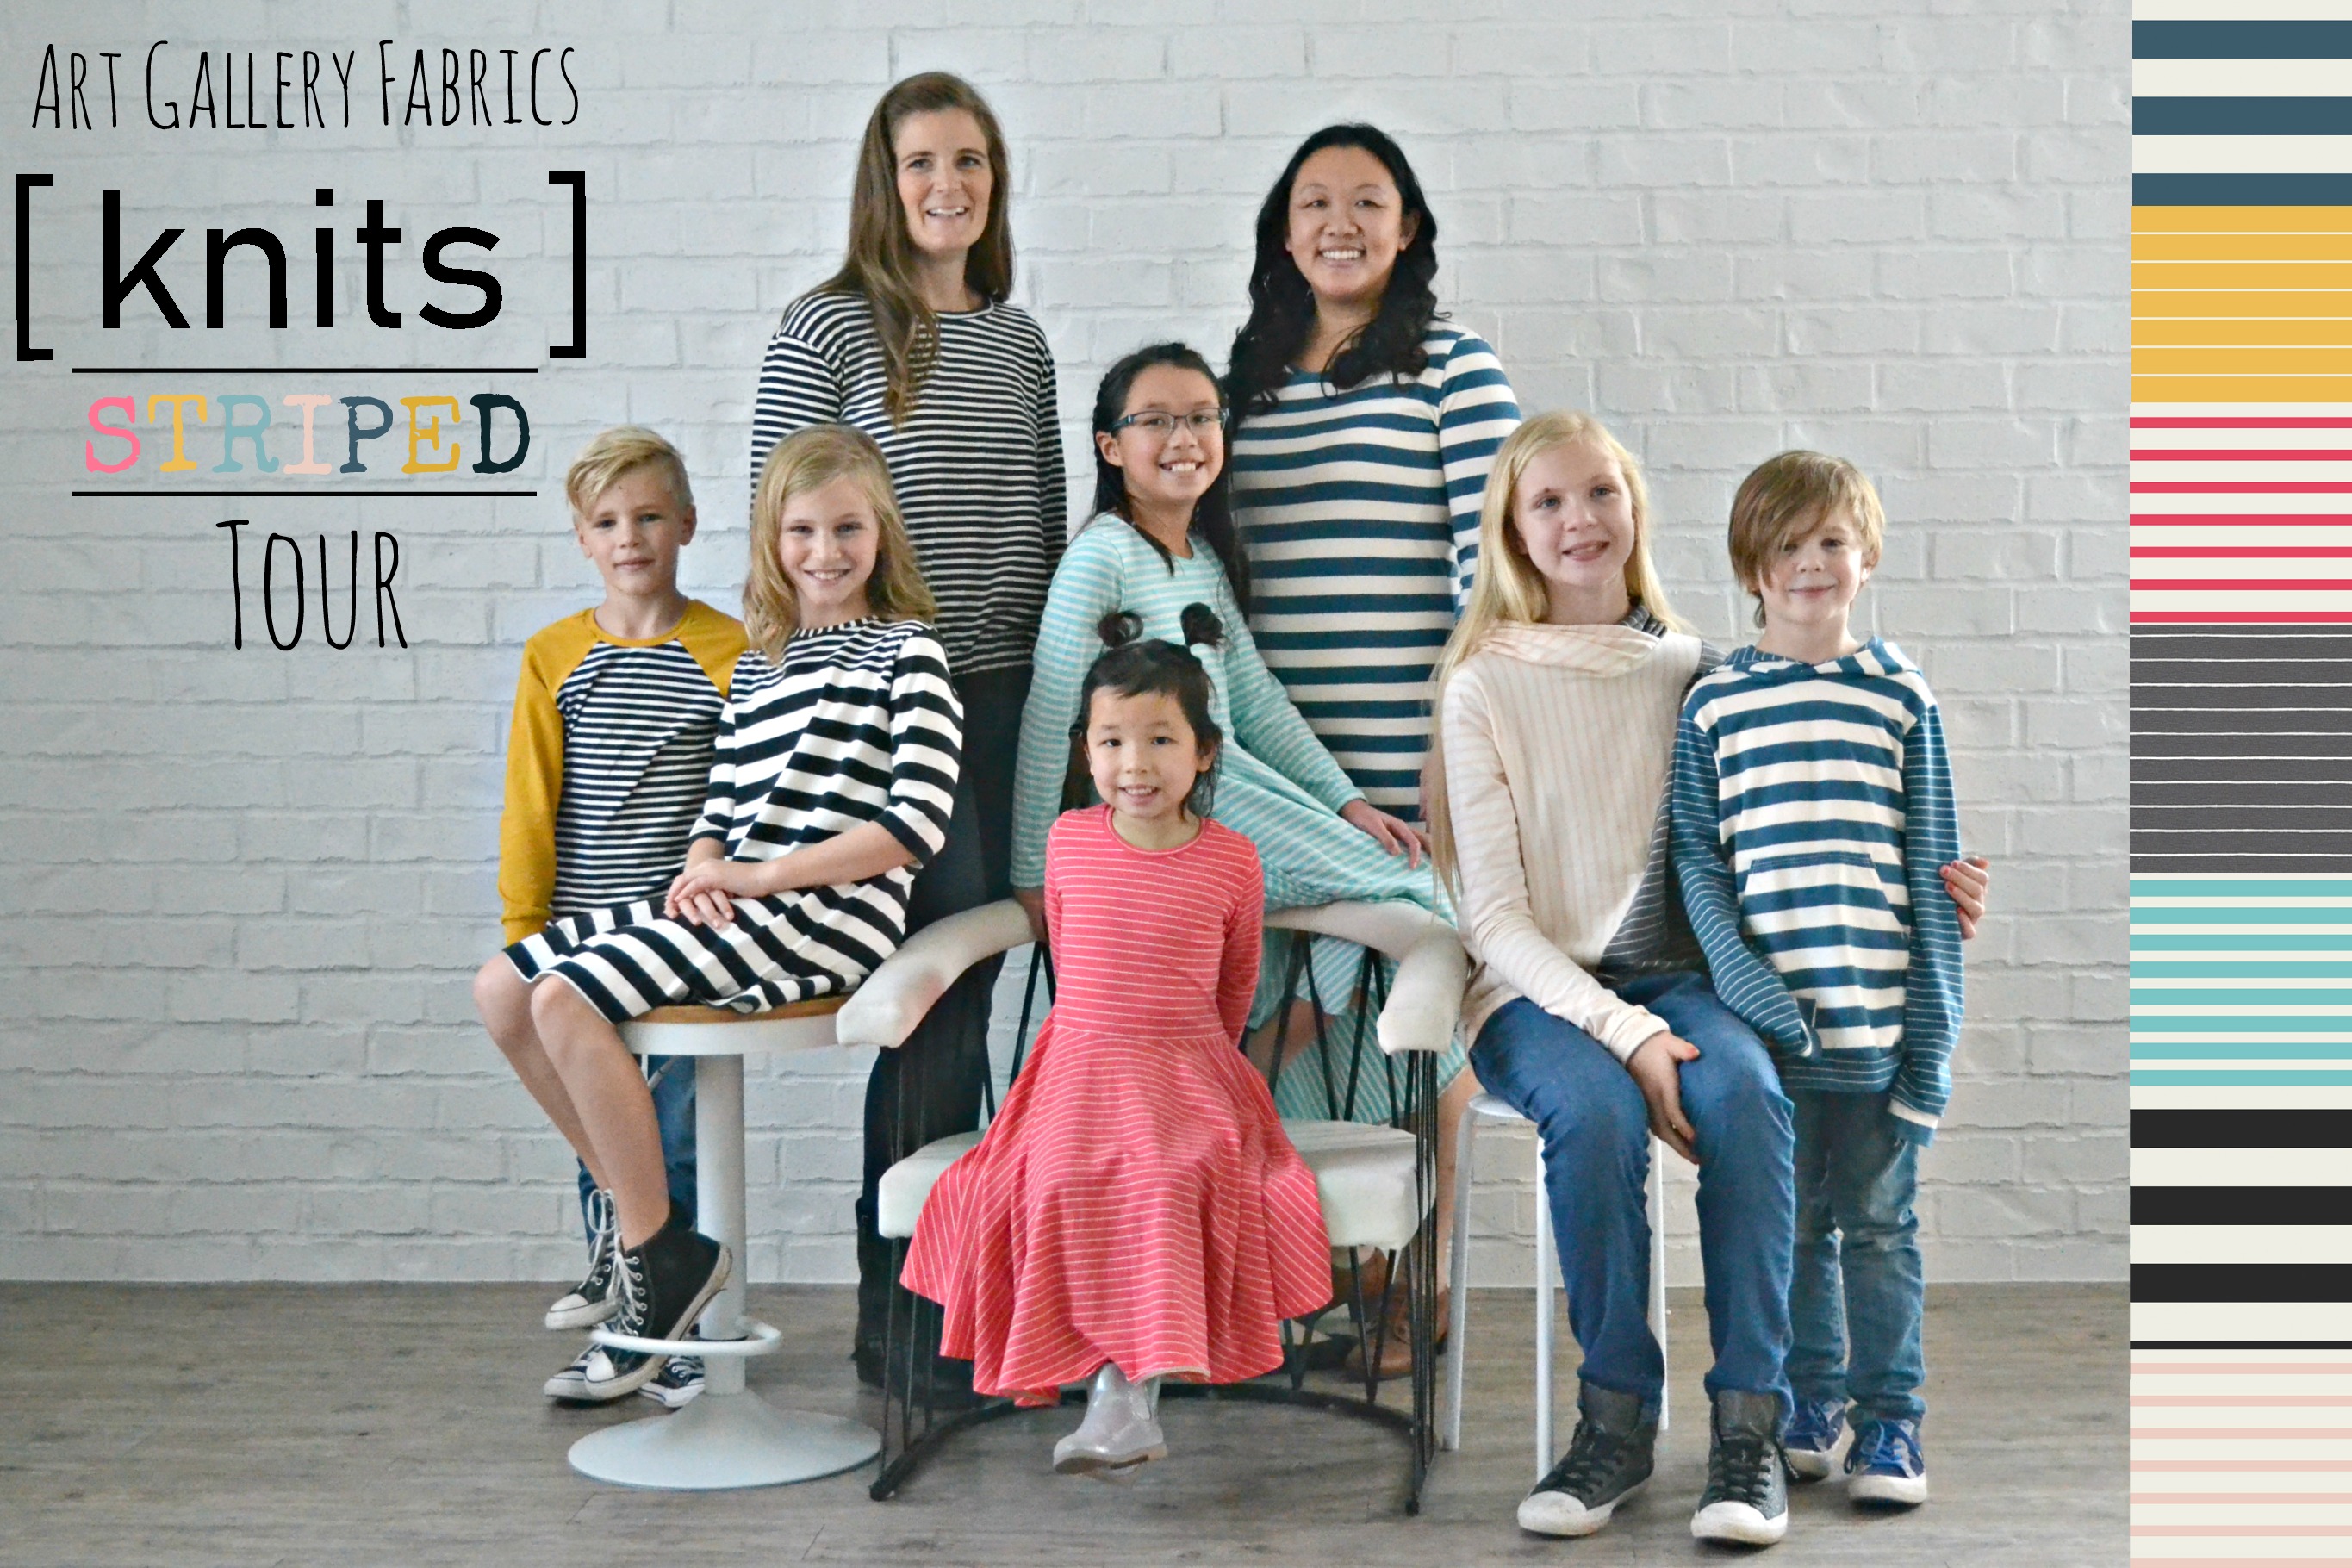
Art Gallery Fabrics Stripe Tour

tourpic

I’m thrilled to be joining Karly from Paisley Roots for the Art Gallery Fabrics Stripe Tour.  Karly and I very first bonded over our shared love of all things striped so this was a definite treat for both of us.  I’m happy to be joining a great group of sewists to share these amazing fabrics with you.  Make sure you check out their posts this week as well!

all2
Stripes are a favorite of mine and these looks were so much fun to create.  I had the hardest time picking which fabrics to use.  Just take a look at all the killer stripes here.  You want them all too, right?!  The colors are just divine and there are so many to choose from.  They are yarn-dyed meaning they’ll stay just as pretty after a million washes as they look today.  Such a dream fabric!
payton4
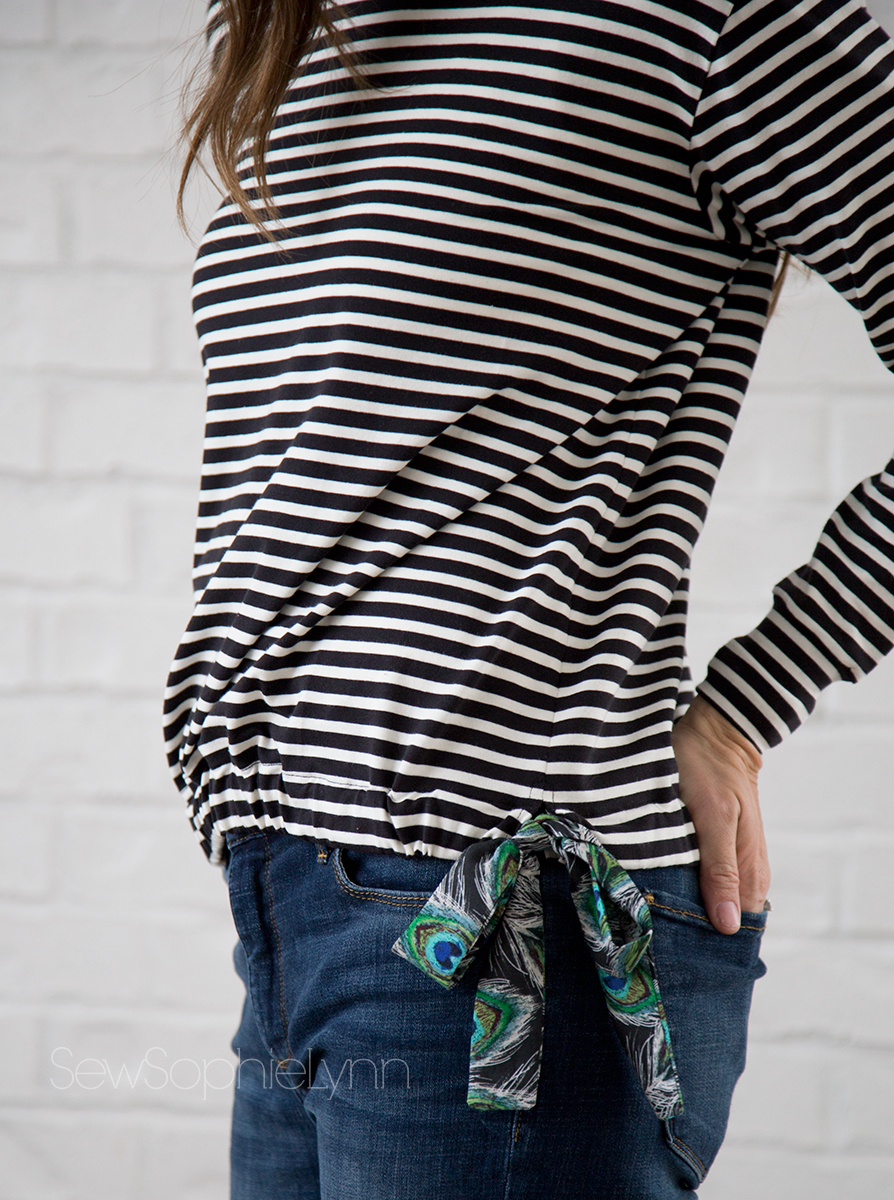
In the end I just couldn’t get this classic black and white combo out of my head.  I used the Striped Bold Caviar and Striped Alike Caviar.  I love the creamy white with the bold black.  I think I already have five black and white stripe tees in my own closet but I’m so drawn to the combo.  There’s no such thing as too many black and white stripes in your wardrobe!
pixie1
For my top I used the Pixie Tee and Dress from Chalk and Notch.  I love the optional side ties and knew it was the perfect place for a fun pop of fabric.  I used scraps from these pretty Art Gallery dresses and I love the combination.
pixie3
A bold peacock print is such a fun touch!
charlie1
I couldn’t bear to waste any of the leftovers so my little guy just had to have a tee too!  I used my go-to Jolly Roger Raglan pattern.  This bold stripe paired with a solid AGF knit in Sahara Sun is just checking all my boxes.  Stripes- check, mustard- check, cute boy- check 😉
payton3
This fun dress is the piece de resistance!  I used the Upton pattern from Blaverry (so sad it is no longer available!).  It’s one of my favorite patterns for combining fabrics and I’m always so happy with the results.
payton5
That back detail just makes me flip!
payton6
Add in that pretty contrast yoke and I’m head over heels!
pair1payton1.2charlie2pixie5all1
We are so in love with our new pieces.  I can’t get over the quality of this fabric.  It was so nice to work with and is so soft and smooth.  I almost felt guilty using this amazing stuff on my kids.  I can tell it will hold up to all that they throw at it though making these a great addition to their closets.  Now to get my hands on all the colors…
pair2charlie3payton2.2pixie2all3main1
Thanks for joining us on our stop!  We hope you treat yourself to some of this amazing fabric soon!


Back to School Tour Capsule Wardrobe

boyfriendoutfit1

I love sewing for fall and the Back to School Blog Tour hosted by Lulu and Celeste and Sprouting Jube Jube was a great excuse to sew for my oldest daughter.  Make sure to head over to Sprouting Jube Jube to see the amazing list of sponsors- so many great pattern and fabric companies!

capsulemain2

When it came time to plan my sweet girl’s back to school wardrobe we first went through her closet to see any gaps that needed to be filled.  It’s no secret that this girly has quite the closet full of clothes.  In an attempt to keep it from overflowing we decided a capsule wardrobe for fall would work best.  We pulled old items from her closet, added a few new handmades, and then hit a couple stores for a few more pieces.  I think this collection of handmade and store-bought clothes sums up her wardrobe in general.  I love to sew her easy, quick pieces and fill it in with ready-to-wear items that don’t make sense for me to sew-  items that are inexpensive or too time consuming for me to fabricate.  Sometimes it’s even easier for me to purchase things and then alter them to fit her skinny body- a quick taking in of the waist and hips has saved many ready-to-wear pants!  Now on to the fashion show…

bomberoutfit1bomberoutfit2bomberoutfit3bomberoutfit4

This blush pink bomber jacket, purchased at TJ Maxx, was the starting point for this capsule.  I love it so much and have a serious case of jacket envy!  It’s the perfect weight for fall and has been in heavy rotation here.

Jeans are one thing I’ve yet to attempt so I will gladly keep purchasing them!  It’s hard to find pants that fit this girl and when we do I feel like cheering!  H&M offers a wider range of sizes and their pants run on the skinny side so they are usually our first stop.  Both of the jeans featured are from there.  We also order online for her quite a bit since more stores carry slim sizing only in their online shops (Old Navy, Target, and Crazy 8 are some favorites).

hoodieoutfit1hoodieoutfit2

This girl loves to browse online and fell in love with a few pieces from Children’s Place, including this hoodie and the button-up shirt (no longer available but here’s a similar version).  For under ten dollars each, these pieces were no brainers for me to purchase.  Button plackets, collars, button-holes- eek!  She loves her button-ups and for that price I will gladly save myself the time, stress, and expense of making them.  These hi-top white sneakers are also from Children’s Place.

boyfriendoutfit2butterflyoutfit4

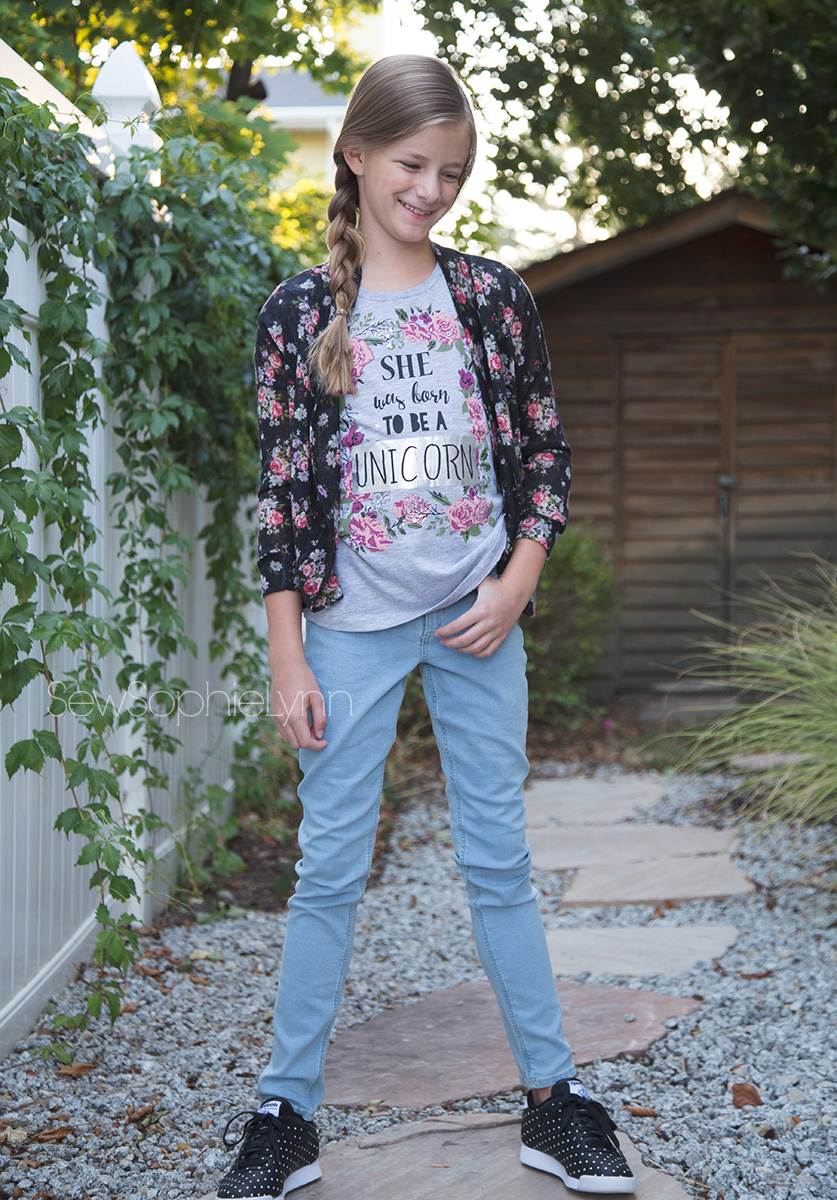
The leggings and this tee were found at Ross and were both under $6- easy things to make, yes, but for that price point we were both happy to add them to our cart!  For all you vinyl-lovers like myself, Thread and Grain has a super cute vinyl file with the same saying!  The black and white polka dot Reebox were also a Ross score.

boyfriendoutfit3boyfriendoutfit4

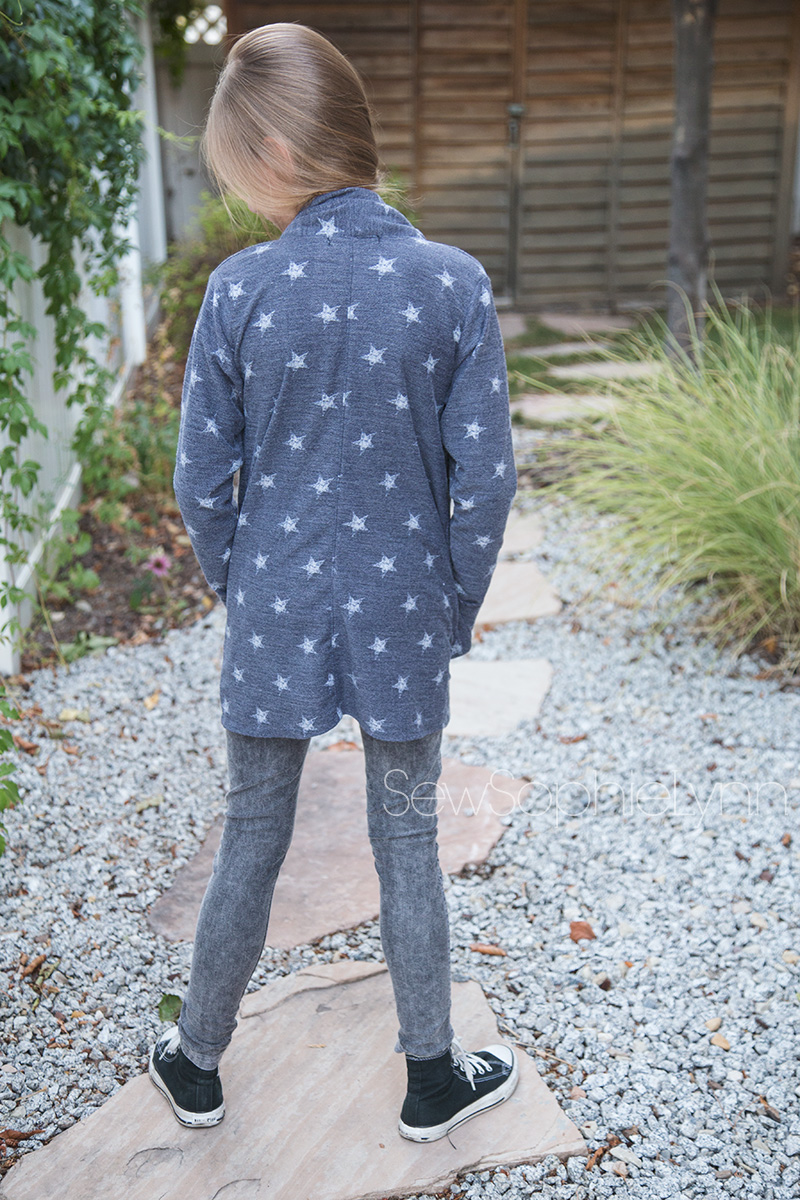
Onto the handmades!! I’m a huge fan of the Love Notions Boyfriend Cardigan (affl. link) and knew she’d love her own french terry version.  I picked up this french terry from Raspberry Creek Fabrics and while it’s currently not available there are PLENTY of other french terry options in the shop!  It’s beyond cozy and a good alternative to the classic hoodie.

andromedaoutfit1butterflyoutfit3

These two tops are oldies but goodies and are still going strong.  The floral is the Andromeda Top from Sew Straight and Gather (you can see more pics of it here).  The striped tee is my go-to t-shirt pattern, the City Park Tee from Hey June Handmade (more pics here).  These are both shirts that she continues to gravitate to so they were no brainers to include in this capsule.

butterflybutterflyoutfit2butterflyoutfit1

The Patterns for Pirates Butterfly Cardigan is another tried-and-true pattern for us.  It’s an incredibly quick sew and I love the slouchy-cool look it has.  This thin sweater knit has been in my stash forever and was perfect for this light-weight fall cardigan.

lazydaysjoggers1

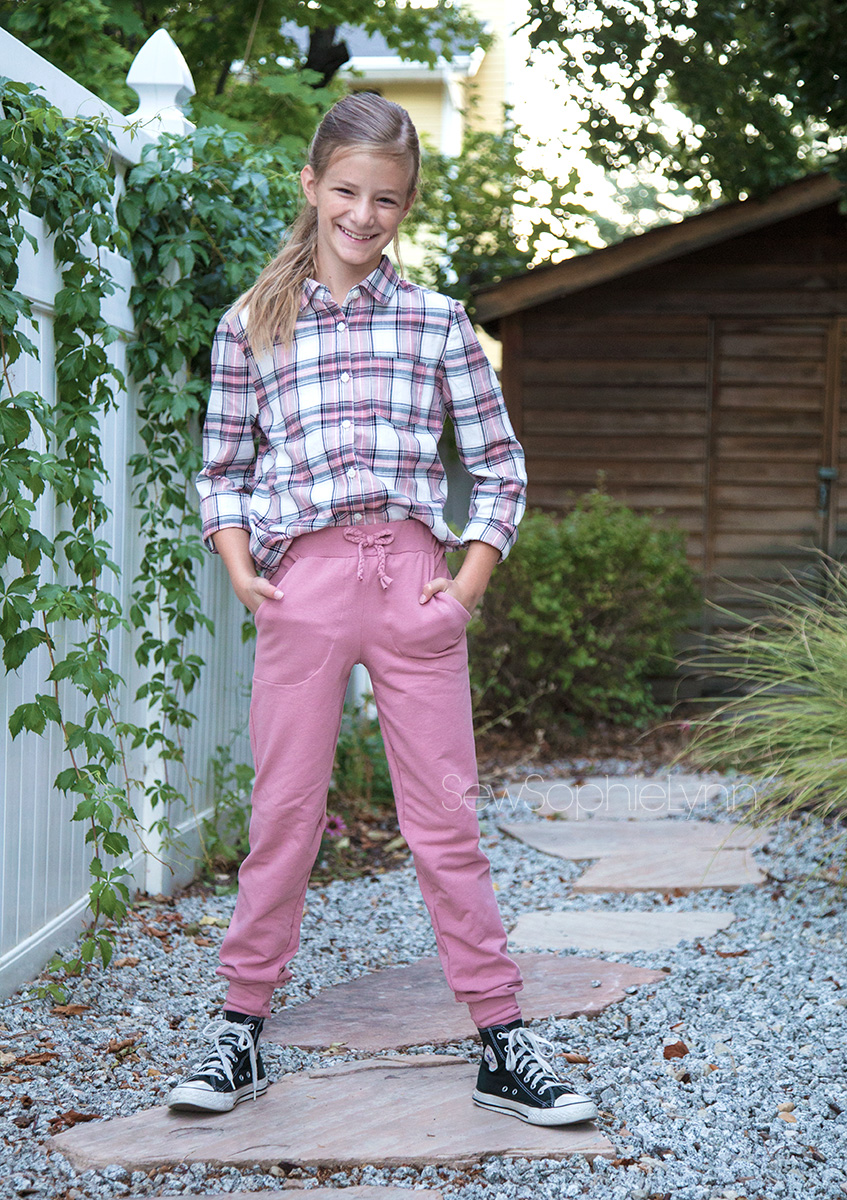
The last piece I made might be my favorite!  The Lazy Day Lounge Pants from Gracious Threads are the perfect comfy pants!  They’re a relaxed fit but not too baggy and sloppy.  In this gorgeous french terry from Raspberry Creek fabrics (currently out-of-stock), I don’t think I could love them more!

Phew!  You made it to the end- you might deserve a medal for sticking through all those details!  So many pieces but they all add up to one super cute, versatile capsule wardrobe!

main

Thanks so much to Deb and Ula for hosting!  Make sure to check out all the amazing inspiration this week.  If you love sewing for kids then this tour is for you!

Monday, September 25, 2017

Host: Sprouting JubeJube

Sewing by Ti * mahlicadesigns * Momma You Can Make It * Kutti Couture * MoonStar – Wondermirakel * Call Ajaire

Tuesday, September 26, 2017

Host: Lulu & Celeste

Sew and Tell Project * From-a-Box * Ronda B. Handmade * MeMade * House of Estrela * My Heart Will Sew On * Tales From A Southern Mom

Wednesday, September 27, 2017

Host: Sprouting JubeJube

mahlicadesigns * Gracious Threads * Adventures With Bubba and Bug * Elli & Nels * Bellevi * Little Heart Threads * Sewing By Ti * Lulu & Celeste

Thursday, September 28, 2017

Host: Lulu & Celeste

Paisley Roots * The Crafting Fiend * Sewstarly * It’s Liesel * Tales of a Tester * Kaleidothought * auschick sews

Friday, September 29, 2017

Host: Sprouting JubeJube

SewSophieLynn * Sew Haute Blog * mahlicadesigns * Sew and Tell Project * RP Custom Fabrics Blog * FABulous Home Sewn * Sewing By Ti * Phat Quarters