Vankyo Projectors for Sewing

*This is a sponsored post.

It’s been a month or so since I’ve joined team Projector. In that time my kiddos have gone back to school and I’ve been able to sew a few things again. Can I get a hallelujah?! I’ve loved getting to play with my projector and to get my sewing setup updated. With my own laptop now, my sewing room is now up to date and I want to spend every spare minute in it!

The generous team at Vankyo sent me another projector to try out and compare. You can read my review of the Leisure 470 here. I got to try out the Leisure 470 Pro (you can check out their other sewing projectors here).

The Leisure 470 Pro is even smaller in size (7.8x5.7x3 inches) than the Leisure 470. The resolution is higher at 1920×1080. It’s brighter and clearer than the 470 and has 2 HDMI ports, a USB port, a memory card slot and AV input. The sound is even better too! They both come with carrying cases, remotes, and HD cables. The Leisure 470 Pro is even easier to transport and it’s so nice to be able to take it anywhere.

So that should make it better for sewing right? More bells and whistles doesn’t necessarily make it ideal for the sewing room though. For projecting patterns you need a few things. A bright light, clear focus, correct and easy calibration, and the right throw height (the distance from the projector to the surface it’s projected to). My sewing space is in our basement with 8 foot ceilings and the short throw height (50″ from ceiling mount to table top) just was not ideal for the 470 Pro. I could get it to work by projecting from the ceiling to the floor (I know many sewists prefer to cut on the floor so this projector could be for you!). It really just needed about 6 more inches to get a crisp clear focus so even a slightly taller ceiling or shorter table would be perfect!

Before I set the new projector up in my sewing space we tried it out for movie night. We set it up outside and it was fantastic. The picture was amazing and the sound was great. There’s just something about cuddling up under the stars with popcorn and a good flick!

Of course I had to sew something up with the new projector! I used the free Tessuti Monroe Turtleneck and the Love Notions Sybil Skirt.

I used a thick rib knit that I picked up from Knitpop last year. It’s a mid weight and will be perfect as the weather cools off. I sewed up a size 2 Monroe Turtleneck with size 3 sleeves. I really wanted an oversized look that was super comfy and I could wear with leggings or jeans too. For the skirt I added a few inches to the midi length and left one side open at the knee. I also added a 3″ elastic waistband.

The Monroe Turtleneck did not have a projector file but it did have a copyshop version that worked just as well. Love Notions patterns come with so many options and the projector file is so easy to use.

If you’re looking to join the projector sewing party, check out the options from Vankyo.

Jumping into Projector Sewing

This is a sponsored post. Products have been given to me in exchange for a review.

If you’ve been around the sewing world for very long you know that projector sewing is here to stay. I’m always on the cautious side of ‘trends’ and usually wait way too long before I pick up anything new technology-wise. I’m a creature of habit and comfort and it’s got to be GOOD for me to change my ways. It seems to take me far too long to pick up on things and man, do I need things dumbed WAY down for me to understand them. So of course I’ve been dragging my feet forever when it comes to switching to using a projector for sewing pdf patterns. When Vankyo reached out to me to see if I would be interested in trying one of their projectors in exchange for a post about my experience, well, let’s just say it was the push this stubborn lady needed!

Vankyo has multiple projectors they promote for sewing (you can see them here) and I got the Leisure 470. It checks all of the necessary boxes for ideal use with patterns- 720p, remote, screen mirroring, WiFi connection. They sent along a ceiling mount as well so I was set to get started.

My ceiling had a spot where a chandelier used to be that was just waiting for a projector to be mounted there. It also means that I will be able to easily wire my projector to the ceiling and ditch the power cord soon! We had this up and mounted in no time.

My sewing space is in our basement right at the bottom of our stairs. It’s not big and glamorous but it works really well for me (and now my girls too!). I was a little concerned that my throw height would be too short since it’s a lower basement ceiling but with 5 feet from the projector to the tabletop, it works great! I loved that this projector was sooooo user friendly- like plug it in and follow a couple of easy steps and my pattern was screen mirrored in seconds! Now actually getting to where I felt good about cutting a pattern took me a bit. There are so many helpful resources out there that really walk you through every aspect of setting up your projector, from calibrating to pattern adjustments. I’ve been in the Projectors for Sewing Facebook group for ages and it was the first place I turned when researching. I highly suggest starting with the files in this group to get you started. Many pattern designers have blogs that offer useful information, especially if you are using one of their projector files. I turned to Love Notions since I was sewing up the Allegro pattern and Katie Kimmell has an excellent post that takes you through the basics of using a projector file.

While the projector itself was a breeze to setup, I thought I’d share a couple of my stumbling blocks as I started this new way of life (there’s no turning back now right?!). With my sewing space in the basement, I typically use my phone for reading pattern instructions so I was hopeful I could use my phone to project from as well. It opened up and mirrored easily but I couldn’t get my pattern zoomed large enough to be calibrated correctly but small enough to fit a pattern piece on my tiny phone screen (that then projects onto your surface). It was also suggested to use Adobe Acrobat to project files (it’s what you typically use to print files as well). One snag is that the mobile app doesn’t support the layers function making it difficult to calibrate a file if you can’t turn on the grid and also difficult to cut the correct size if you can’t turn off the size layers. Now, these are all newbie issues and I’m sure there’s a work around that I’ll need to look more into.

Once I snagged my husband’s laptop we were in business! I was able to easily project my first pattern, the Ellie and Mac Oversized Tee. I went with a loose, knit pattern to keep it simple but I didn’t need to worry. It was super easy to check the 1″ square on the pattern page to ensure my pattern was the correct size. One reason many people are hesitant with projectors is that it makes pattern adjustments a little more difficult. For me, my most common adjustment is adding length and it was so easy! No extra paper to tape on, just my trusty quilting ruler.

Since I sew for my kids so much a projector just makes so much sense! This is my pile of printed patterns from the last year or so that I hadn’t filed away. Going through them about 75% were for my kids which means you guessed it, they had already outgrown them! I can’t wait to not have to print and cut out multiple sizes as my kids grow and grow or when I’m sewing up the same pattern for multiple kids. I’ve cut way down on pattern testing but in future tests a projector file would save a ton of time and paper. Paper- that’s a whole other issue. For patterns that I use again and again, I never felt bad about printing a pattern. But for those patterns that you might only use once or twice the waste is a little disheartening. Not anymore!

This is my first official ‘projector’ outfit: an Ellie and Mac Oversized Tee paired with a Love Notions Allegro skirt. I used a super soft jersey knit I got in LA for a comfy on the go summer look. I’m really wishing I’d sewn this earlier in the summer because it’s so breezy and cute!

It might not have been the simplest choice to use stripes for my first project but it wasn’t too bad. I was easily able to make the adjustments I wanted to these patterns. For the top, I added an inch to the sleeve length and two inches to the hemmed crop top length. For the skirt, I did a yoga waistband to keep it extra comfortable.

I kind of feel like the last person to jump on the projector band wagon but let me tell you, I am so excited! Vankyo has such affordable options and amazing reviews. If you’re anything like me you like to scout out as many reviews as you can and guess what? They all said the same thing- great, easy to use projectors at incredible prices! Thank you Vankyo for bringing this sewing chic into 2022!

Retro Tees with the Cricut Easy Press 2

retrogroup

This post is sponsored by Cricut.  I received the Cricut Easy Press 2 in exchange for promotion.  All thoughts in this post are my own.

It’s no secret that we’re huge Cricut fans in our house.  We’ve all gotten spoiled and love to create looks that we dream up ourselves.  As a seamstress, I love to create clothes and pick out pattern and fabric combos that suit both me and my children.  The Cricut Maker, Easy Press 2, and sewing products help us take our handmade wardrobe to the next level.

legendary2

I’ve been absolutely loving all the rainbow and vintage vibe tees and sweatshirts that are everywhere these days.  It was so much fun to come up with our own sayings and designs and use our handy Cricut tools to create looks that fit their personalities.

main

The Cricut EasyPress 2 makes ironing on your vinyl designs such a breeze.  I’m loving the new vibrant color and three different sizes that will suit all your needs.  The small 6″x7″ size works great for baby clothes and little projects.  The medium 9″x9″ size is super versatile and a great all-purpose machine.  The large 12″x10” has been fantastic for our family.  It’s great for youth and adult clothing and has been getting a work out at our house.

The EasyPress 2 is easy to use and is so quick and handy.  It heats up so fast and the ceramic coated plate produces smooth, even heating (something my iron sure lacked!).  I use mine on my kitchen table and I know that it’s protected from the heat by the insulated safety base and the EasyPress Mat.  It gets up to 400 degrees and irons on your designs in no time.  The easy to read digital display makes it easy to set the temperature and timer to suit your iron-on material and fabric.  And I love that it’s easy to store on my shelf and is light and portable.  Phew!  So many great qualities!  I honestly don’t know how I lived without mine.

ezpress

When creating these looks I turned to Cricut Design Space and the loads of fonts at my finger tips!  You can create this look for yourself here.  I used the Playroom Sampler pack, with Kelly, Orange, and Sky but I think it’d look amazing in an array of Glitter Iron-On as well.

I’m a Cricut Iron-On convert.  After using different brands I’ve been thrilled with how well our Cricut brand makes have held up.  Cricut has introduced the StrongBond guarantee that will give you the confidence and peace of mind that your iron-on projects will last and last.  The StrongBond guarantee means that if your Cricut iron-on products are used as directed and you’re not completely satisfied, Cricut will replace it for free.  Cricut Iron-on products are made to last 50+ wash and dry cycles and I’m here to testify that ours have taken a beating and still look amazing.  That’s a big deal with kids- their favorites can stick around until they’re outgrown!

dreamer2

I used the Samson Sweater from Love Notions sized up one and with an extra wide bottom band to give it that oversized look.  This french terry from Raspberry Creek is one of my favorite fabrics for fall.  (I love it so much I used it for my little guys joggers too!)  It’s nice and thick and worked wonderfully with the iron-on.

legendary1

This Legendary tee was another fun design.  This kiddo has certainly reached ‘legend’ status at our house so this tee was just too perfect for him.  I used the Boho Sampler pack of Everyday Iron-On for this look.  I used the #121 Ringer Raglan pattern from Thread Faction- I can’t get enough of that slim fit!

legendary3

I used the Lexi and Lou Loungers from Made for Mermaids for his pants.  I added a long vinyl stripe down the side and in the pocket for a touch of color.  The large EasyPress made ironing on the stripe simple and easy!  One bonus of making a garment is that you can iron things on flat, before they get completely sewn together.  I sewed up the pockets and side seam, EasyPressed the stripes on, then continued with the construction.

good-times2

This design is a trial and error look.  I’m always trying to come up with new ways to use my Iron-On materials and this one was a fun one.  I took strips of each color and taped them together using transfer tape on the plastic backing.  I cut the design out in white iron-on and applied it to the sweatshirt.  I then cut the design out of my rainbow piece and applied it directly on top of the white lettering.  It’s far from perfect but that just means I get to keep trying it until I get it just right!  I love the look and used the same technique here too.  You can get this design in Design Space here.

Her top was made using the Striped Swallow Designs Apres Ski.  Those big full sleeves take this sweatshirt from boring to brilliant.

main1

I’m thrilled with this whole Retro Rainbow collection and love how quick and easy it was to make with our Cricut products.

This is a sponsored conversation written by me on behalf of Cricut. The opinions and text are all mine.

This is a sponsored conversation written by me on behalf of Cricut. The opinions and text are all mine.

https://influencers.tapinfluence.com/assets/cogs/core-v4.js var ts=document.getElementById(‘ti-pixel-tracker’); var axel = Math.random() + “”; var num = axel * 1000000000000000000; var ti=document.createElement(“img”); ti.style.display=”none”; ti.src=”https://tracking.tapinfluence.com/trk/IfFFz/qCBqj/p.png?p=zRsnp” + String.fromCharCode(38) + “i=9W3yX” + String.fromCharCode(38) + “ord=”+ num + String.fromCharCode(38) + “s=” + encodeURIComponent(document.referrer); ts.parentNode.replaceChild(ti,ts); JSON.stringify({“program_id”:”5d3784ea-9018-11e8-83a8-0632d5c66a00″,”post_id”:”548e2120-d193-11e8-ad38-06344b32889a”});

Personalizing our wardrobes with Cricut

This post is sponsored by Cricut.  I received all Cricut products in exchange for promotion.  All thoughts and projects in this post are my own.  I’m thrilled to introduce you to some fantastic new Cricut products!

summerteescollection3

I’ve got an addiction folks.  I can’t stop vinyling ALL. THE. THINGS!  I’m excited to be sharing a couple of our recent designs that are now available on Cricut Design Space!  You can also check them out over on the Cricut blog.

vacationmode3

I designed these files using Design Space and Cricut Access.  There were so many fun graphics to choose from and the hardest part was narrowing it down to these three.  This Vacation Mode design is a nod to my favorite vacation destination- a sunny beach with palm trees, sand, and a beautiful ocean view.

paradise3

This Paradise Tee was made for my flamingo loving daughter.  Flamingos just symbolize the chill, relaxed life.  They’ve got it made hanging out in the water and just soaking it all in.

summertimevibes3

The Summertime Vibes tee was the first design I did as we ushered in summer and said goodbye to the cool spring days.  Summertime means lazy days, family time, and lots of sunshine.

charlie1

For this design I was anxious to try out the new Cricut SportFlex Iron-On.  I made this rash guard for my kiddo and used my Cricut EasyPress to adhere this to the front.  To get the right settings for SportFlex and swim fabric I turned to my Cricut expert and pal Paisley Roots.

This is what she found and it’s worked perfectly:

EASYPRESS: Heat up your Easy Press to 305 Degrees and make sure to warm your garment for 10-15 seconds before laying the vinyl on top. Using medium pressure, press on top of the vinyl for 30 seconds, then turn the garment over and press the back for 15 seconds.
It’s also recommended to warm peel.
REGULAR IRON: it’s recommended to put it on Wool setting. Warm up your garment for 10-15 seconds before laying your vinyl then press the front of the garment for 50 seconds and the back for 15 seconds. Cold Peel.
He’s worn this rash guard constantly and it’s been in chlorine, splash pads, and sun.  It’s held up so well and still looks brand new!  Hooray for SportFlex!
main
I’m so excited to introduce to you all my favorite Cricut products EVER!  The original EasyPress changed my crafting life and the new EasyPress 2 machines are even better!
They now come in three different sizes- 6″x7″, 9″x9″, and 12″x10″ for all your iron-on needs.  The EasyPress is simple to use, heats up in just 60 seconds, and is a great alternative to a standard heat press.
mini2
I love how convenient it is.  I never considered a conventional heat press for safety and storage reasons and my regular household iron was not consistent.  My EasyPress addressed all those issues.  It’s easy to store and the insulated resting base protects surfaces.  I often let my kids use the EasyPress (with my supervision of course!) because it’s so easy to use and the hot surface stays away from your body.  Use the EasyPress Mat or a thick, folded towel under you project to protect your surface and to absorb the heat.  You can find all the recommended settings here.  It couldn’t be easier!
mini1
I’m loving the cute mini version.  This one is going to live in my sewing space because it is absolutely perfect for little projects like adding iron-on size tags to all my handmade garments (you can see a whole post about how I make them here).  I was blown away by how quickly this little guy heated up!  It was ready in no time at all.
large
The new 12″x10″ EasyPress is such a great addition to the line up too!  It was so nice to be able to iron-on a wide design in one pass.  Since I make a ton of personalized tees and sweatshirts for my family, this one will be heaven-sent.

I couldn’t wait to try out the new machines and whipped up some back to school tees in no time.

pair2

summerteescollection2

Whether you’re still in summer mode or planning for fall, Cricut has you covered!

This is a sponsored conversation written by me on behalf of Cricut. The opinions and text are all mine.

http://influencers.tapinfluence.com/assets/cogs/core-v4.js var ts=document.getElementById(‘ti-pixel-tracker’); var axel = Math.random() + “”; var num = axel * 1000000000000000000; var ti=document.createElement(“img”); ti.style.display=”none”; ti.src=”http://tracking.tapinfluence.com/trk/NjWWl/0ZnqQ/p.png?p=Dmruk” + String.fromCharCode(38) + “i=9W3yX” + String.fromCharCode(38) + “ord=”+ num + String.fromCharCode(38) + “s=” + encodeURIComponent(document.referrer); ts.parentNode.replaceChild(ti,ts); JSON.stringify({“program_id”:”5d3784ea-9018-11e8-83a8-0632d5c66a00″,”post_id”:”b0cd2366-9f1e-11e8-be46-0a11af595dac”});

The New Cricut Maker

maker1

If you’ve been a follower for very long you know I love my Cricut.  I recently upgraded from the Explore Air 2 to a Cricut Maker and I’m here to answer any questions you might have about the two.

This post is sponsored by Cricut.  I received the Cricut Maker, Easy Press, and Bright Pad in exchange for promotion.  While I received these products for free all thoughts and reviews on these products are my own.  I’ll do my best to highlight the pros and cons of all these products.


First, let me say that I’m a sucker for heat transfer vinyl or as Cricut calls it Iron On.  I’d say that’s what I use my machine for 90% of the time.  As a sewist, I’m all about personalizing our wardrobe.  That’s part of why I sew, to create unique, one of a kind clothing for me and my children.  The skies the limit with what we can design and iron on and the fact that it takes just minutes makes it so fun and easy.

If you’re like me and use your cutting machine primarily for vinyl then honestly the Maker just isn’t necessary.   It has lots of bells and whistles that I’ll address further down this post and the potential it has is huge.  I’m excited by what I can create knowing all the possibilities this machine has but if I was sticking with vinyl my Explore Air 2 was amazing too.

The biggest game changer for me was getting an Easy Press.

easypress1

I have a normal inexpensive iron that I was using to iron on my projects.  While it worked fine I would notice peeling after a couple of washes every now and then.  It was frustrating and always made me nervous to gift personalized tees because I was worried about the quality.  I never considered a heat press- too big and bulky, expensive, and unsafe.  My craft space is small and open so my kids are always in and out of it, just not ideal for a heat press.

The Easy Press has seriously been such a huge upgrade.  It’s so portable and easy to use.  The surface heats quickly and evenly and the temperature control and timer take all the guess-work out of it.  It comes with a handy Quick Reference Chart that I keep with it that details the exact temperature and time for your vinyl/fabric combination.


The weekend I got my Easy Press we set to work making some quick, cute Christmas presents for my daughter’s and their bff’s.  They helped me design their projects in Design Space then I had them do the rest.  They quickly weeded their sheets using the Bright Pad and I supervised as they pressed the designs to the tees.

easypress2

The Easy Press is easy to handle and the flat design makes it easy to slide from the cradle to the project.   We picked up a few tips along the way (most of these are mentioned in the user manual but I think they’re essential to getting a good result).  First, use a towel between your project and the hard surface beneath it.  The towel will absorb any moisture and protects your surface.  Second, preheat your area where you’ll be placing your vinyl with a quick press.  This will get rid of any lingering moisture and help the vinyl adhere best.  And lastly, make sure to flip your project inside out and iron from the backside as well.  This just makes it adhere even better!  Even following all these steps, you’ll have a great finished product in minutes!  I can’t say enough good things about the Easy Press and the great results you get when using it.

maker2

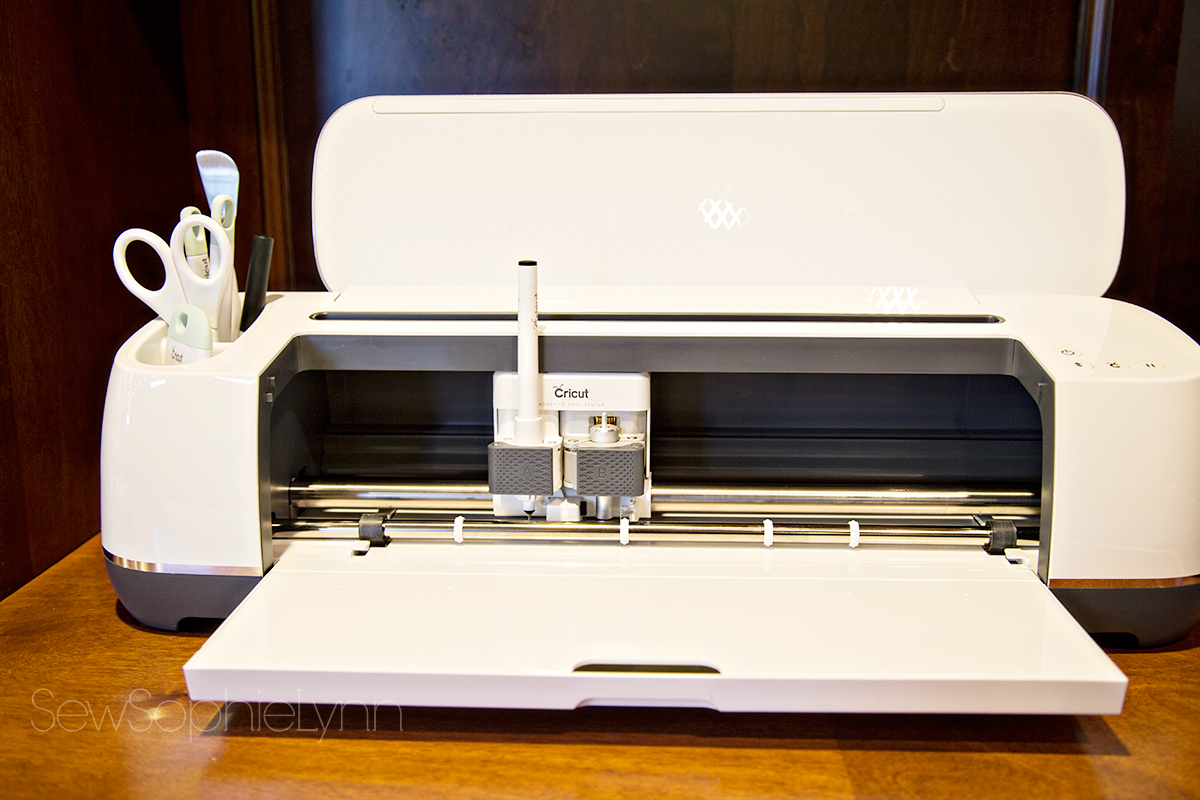
Let’s talk about the Maker.  It gets ALOT of use in our house.  We use our cutting machine a few times a week.  We have a big built-in desk in our main living space that the Maker sits on next to our computer making it convenient to use.  We use it for school projects, bulletin boards, Valentine’s boxes, decorations, and more, using it to cut all kinds of paper and fabric.


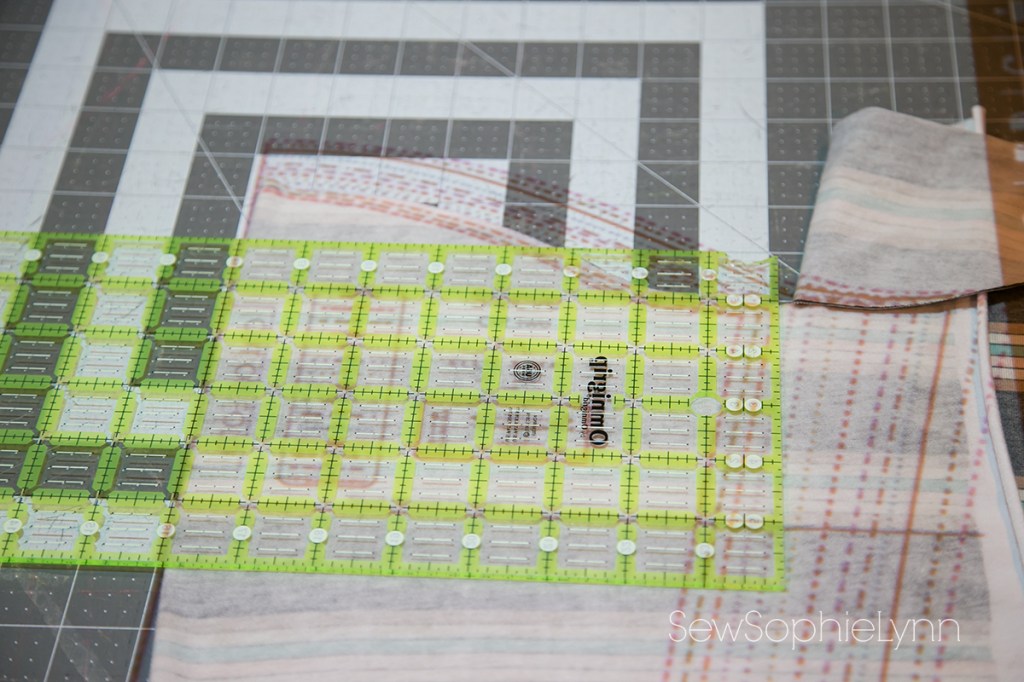
The Maker has so many unique features.  It is heavy-duty, with up to 10x more cutting power than other machines.  It has an Adaptive Tool System that allows you to switch between blades easily and has the potential for more tools to be added.  The Rotary Blade is what sets this machine apart from others on the market.  The Rotary Blade acts just like a rotary cutter, gliding over the surface and pivoting to make even the most intricate cuts.  It can cut anything from thin, delicate tissue paper to thick denim.  It’s amazing to watch and I was in awe as it easily cut through thick glittered felt.  My son is so excited for the knife blade to hit the market.  He had the idea to make a chipboard puzzle as a gift this Christmas and I had to tell him that the Maker would soon be able to make it happen for him.  The possibilities of this machine are what sold me.  I hate getting a product only to feel like it’s ‘old technology’ within months (hello- how many gaming consoles have we gone through?!).  The fact that this machine can grow and expand is a huge selling point.

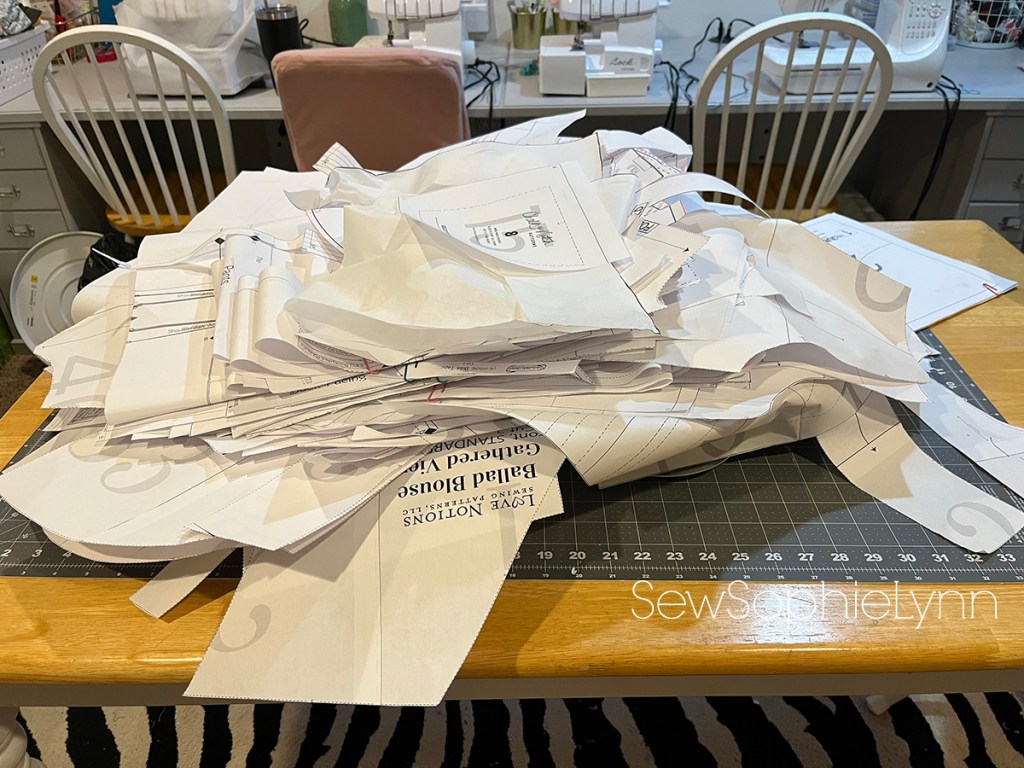
As an apparel sewist, I have yet to really use my Maker for garment sewing.  The small cutting space (you can use a 12×24 mat) just doesn’t make it practical.  BUT I can think of a ton of small projects that will be great for it.  My daughters have been sewing and enjoy quick little makes.  Design Space is full of projects that will be perfect for them.  I know when spring break and summer vacation roll around our Maker will be busy.  They love doll clothes, small bags, hair bows, accessories, and decorations.  Design Space continues to add more of these type of projects and I’m excited to get my craft on with them!

Our Cricut products are well-loved and have become a natural part of our lives.  We love to create and are grateful to have our Maker, Easy Press, and Bright Pad to help our dreams come to live.

This is a sponsored conversation written by me on behalf of Cricut. The opinions and text are all mine.

http://influencers.tapinfluence.com/assets/cogs/core-v4.js var ts=document.getElementById(‘ti-pixel-tracker’); var axel = Math.random() + “”; var num = axel * 1000000000000000000; var ti=document.createElement(“img”); ti.style.display=”none”; ti.src=”http://tracking.tapinfluence.com/trk/5ckXD/DATzX/p.png?p=b5EIz” + String.fromCharCode(38) + “i=9W3yX” + String.fromCharCode(38) + “ord=”+ num + String.fromCharCode(38) + “s=” + encodeURIComponent(document.referrer); ts.parentNode.replaceChild(ti,ts); JSON.stringify({“program_id”:”8b1a7330-fcc6-11e7-b475-22000af436a0″,”post_id”:”7cf18a68-0708-11e8-9267-22000af436a0″});

Elofex Thread Blog Tour

main

If you’re anything like me you’re always on the hunt for products that make will make your sewing experience better.  When Coats approached me about trying out their newest product, Eloflex Thread, I was totally intrigued.  I jumped at the opportunity and I can’t wait to share this revolutionary thread with you guys!  Read to the end for two chances to win your own stash of this amazing product.

Eloflex Thread is designed to be used when sewing stretch fabrics.  It has just the right amount of stretch making it super easy to sew those pesky knits and stretch wovens with ease.  I honestly struggled a bit with how I would actually use this thread.  I am constantly sewing knits for my kids and myself but do 90% of it on my serger.  This new thread is meant to be used in your regular sewing machine which is a huge plus for those that don’t have a serger/overlock machine.  Now, for those of us that are attached at the hip with our sergers how does this new thread help?

Well, I’ve had my thread for almost a month now and I’m constantly reaching for it!  I’m so glad I had the time to really work it into my sewing routine so I can give you an honest, real life review.  I’ve used it on dozens of garments and had the chance to see how it wears and stretches in many different applications.  As I sewed my kids back to school requests it came in handy for topstitching knit pockets onto tees and finishing knit neckbands.  The fact that it stretches means you can use your standard lengthened straight stitch for beautiful topstitching that retains the garments stretch!  Game changer right there!  I’ve almost always skipped the topstitching around necklines because I wasn’t a huge fan of the zig-zag finish my regular machine does.  With this thread in both the bobbin and top, my stitch length lengthened just a touch, my neckbands have never looked better.  This cute pair of undies was done by serging the elastic on then topstitching it down with Eloflex and a zig-zag stitch.  So easy and I know it’ll last wash after wash.

eloflex8

I don’t have a Coverstitch machine and this thread is making it less and less a priority for me.  I played around with my double needle and this thread and think I have the perfect combination to keep me happy for a long time.  I have a Brother sewing machine and I use Eloflex in my bobbin with a stretch double needle and regular thread up top.  I did try using all Eloflex and with my machine it was actually too much stretch, resulting in a bit more tunneling than normal.  Even on this drapey poly rayon, my hems look great!

eloflex4

When thinking about what project I wanted to make to really highlight this thread I knew this gorgeous quilted knit would be perfect.  Because of the quilting I wanted to use single stitch topstitching throughout the garment and this thread was just what I needed.  With this thread in the top and bobbin I was able to use my regular straight stitch to hem the sleeves and bottom, sew the pleats, and topstitch the pockets and neckband for such a nice finish.

eloflex2

eloflex1

It has honestly changed my sewing habits.  I will continue to use this thread for all my finishing needs on my stretch garments.  I’m so wishing I had had this for all the swimsuits I sewed this summer and can’t wait to use it for next years.  I know I will keep coming up with different uses for it too- workout gear, undergarments, socks/tights, Halloween costumes… I think the list will grow and grow!

giveaway

Have I converted you yet?  Are you ready to win your own pack to get you started?  Just follow me on Instagram and leave a comment for me here once you have to be entered to win this fun rainbow pack of 10 colors that will get you hooked just like me.  I’ll close comments and draw a winner next Thursday, September 7th. *Giveaway is now closed and winner has been notified.  If you weren’t the lucky one head on over to your local Joann’s or Hobby Lobby to try it for yourself!!


logo

Head to the Coats blog and enter here to win the grand prize too- it’s easy, I promise!

This thread was provided to me by Coats & Clark.  The opinions stated here are my own.

quiltedknit1

Fabric in this post from Raspberry Creek Fabric  (except yellow plaid that was gifted to me by my cute sister 😉

Patterns used:  Men’s Metro Tee from Liesl and Co., Mama Ava Tee from Made for Mermaids, Unders (free pattern) from Winter Wear Designs, and Joy Dress from Made for Mermaids