Personalizing our wardrobes with Cricut

This post is sponsored by Cricut.  I received all Cricut products in exchange for promotion.  All thoughts and projects in this post are my own.  I’m thrilled to introduce you to some fantastic new Cricut products!

summerteescollection3

I’ve got an addiction folks.  I can’t stop vinyling ALL. THE. THINGS!  I’m excited to be sharing a couple of our recent designs that are now available on Cricut Design Space!  You can also check them out over on the Cricut blog.

vacationmode3

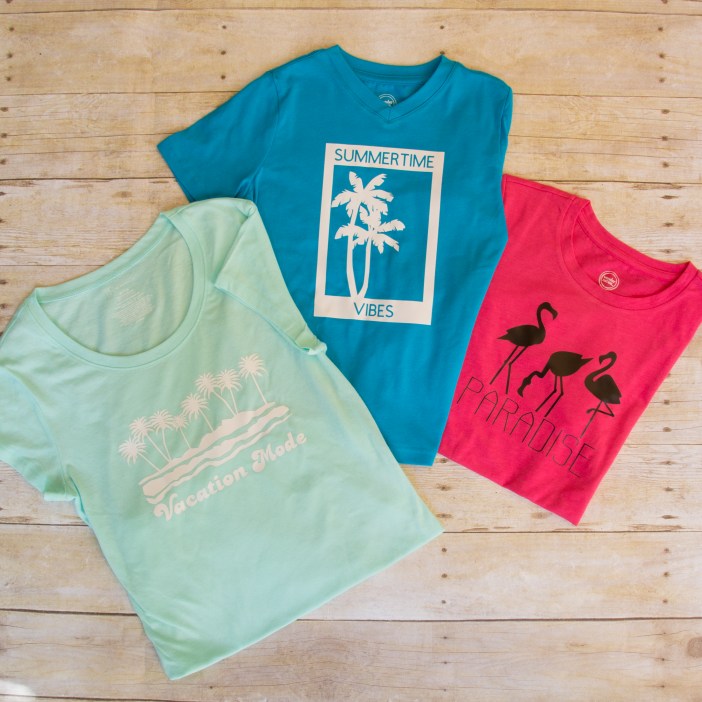
I designed these files using Design Space and Cricut Access.  There were so many fun graphics to choose from and the hardest part was narrowing it down to these three.  This Vacation Mode design is a nod to my favorite vacation destination- a sunny beach with palm trees, sand, and a beautiful ocean view.

paradise3

This Paradise Tee was made for my flamingo loving daughter.  Flamingos just symbolize the chill, relaxed life.  They’ve got it made hanging out in the water and just soaking it all in.

summertimevibes3

The Summertime Vibes tee was the first design I did as we ushered in summer and said goodbye to the cool spring days.  Summertime means lazy days, family time, and lots of sunshine.

charlie1

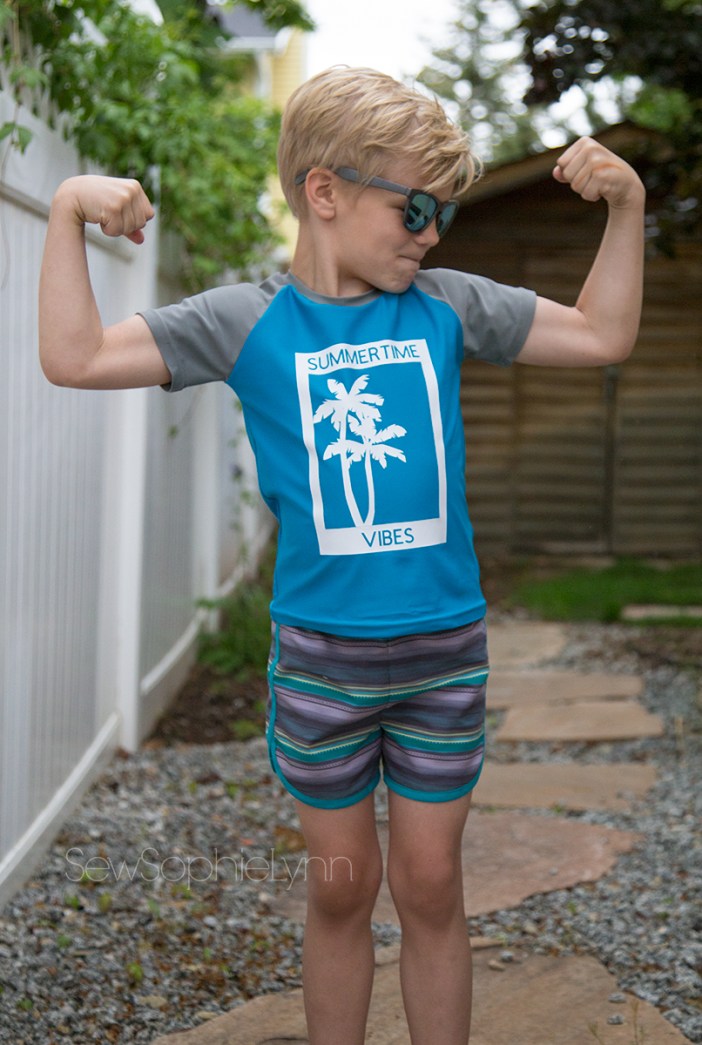
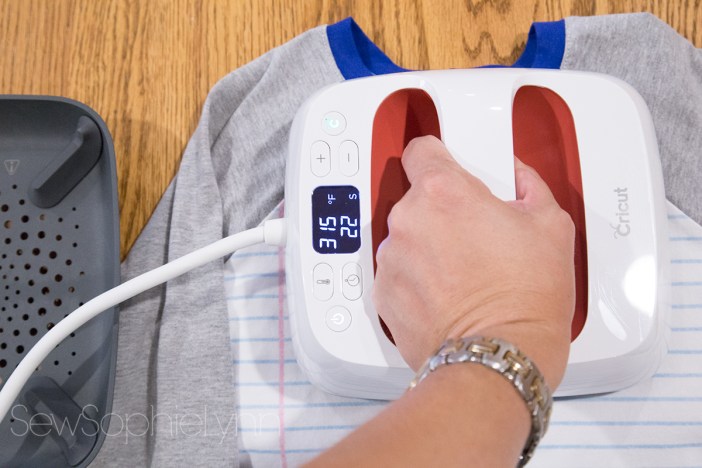
For this design I was anxious to try out the new Cricut SportFlex Iron-On.  I made this rash guard for my kiddo and used my Cricut EasyPress to adhere this to the front.  To get the right settings for SportFlex and swim fabric I turned to my Cricut expert and pal Paisley Roots.

This is what she found and it’s worked perfectly:

EASYPRESS: Heat up your Easy Press to 305 Degrees and make sure to warm your garment for 10-15 seconds before laying the vinyl on top. Using medium pressure, press on top of the vinyl for 30 seconds, then turn the garment over and press the back for 15 seconds.
It’s also recommended to warm peel.
REGULAR IRON: it’s recommended to put it on Wool setting. Warm up your garment for 10-15 seconds before laying your vinyl then press the front of the garment for 50 seconds and the back for 15 seconds. Cold Peel.
He’s worn this rash guard constantly and it’s been in chlorine, splash pads, and sun.  It’s held up so well and still looks brand new!  Hooray for SportFlex!
main
I’m so excited to introduce to you all my favorite Cricut products EVER!  The original EasyPress changed my crafting life and the new EasyPress 2 machines are even better!
They now come in three different sizes- 6″x7″, 9″x9″, and 12″x10″ for all your iron-on needs.  The EasyPress is simple to use, heats up in just 60 seconds, and is a great alternative to a standard heat press.
mini2
I love how convenient it is.  I never considered a conventional heat press for safety and storage reasons and my regular household iron was not consistent.  My EasyPress addressed all those issues.  It’s easy to store and the insulated resting base protects surfaces.  I often let my kids use the EasyPress (with my supervision of course!) because it’s so easy to use and the hot surface stays away from your body.  Use the EasyPress Mat or a thick, folded towel under you project to protect your surface and to absorb the heat.  You can find all the recommended settings here.  It couldn’t be easier!
mini1
I’m loving the cute mini version.  This one is going to live in my sewing space because it is absolutely perfect for little projects like adding iron-on size tags to all my handmade garments (you can see a whole post about how I make them here).  I was blown away by how quickly this little guy heated up!  It was ready in no time at all.
large
The new 12″x10″ EasyPress is such a great addition to the line up too!  It was so nice to be able to iron-on a wide design in one pass.  Since I make a ton of personalized tees and sweatshirts for my family, this one will be heaven-sent.

I couldn’t wait to try out the new machines and whipped up some back to school tees in no time.

pair2

summerteescollection2

Whether you’re still in summer mode or planning for fall, Cricut has you covered!

This is a sponsored conversation written by me on behalf of Cricut. The opinions and text are all mine.

http://influencers.tapinfluence.com/assets/cogs/core-v4.js var ts=document.getElementById(‘ti-pixel-tracker’); var axel = Math.random() + “”; var num = axel * 1000000000000000000; var ti=document.createElement(“img”); ti.style.display=”none”; ti.src=”http://tracking.tapinfluence.com/trk/NjWWl/0ZnqQ/p.png?p=Dmruk” + String.fromCharCode(38) + “i=9W3yX” + String.fromCharCode(38) + “ord=”+ num + String.fromCharCode(38) + “s=” + encodeURIComponent(document.referrer); ts.parentNode.replaceChild(ti,ts); JSON.stringify({“program_id”:”5d3784ea-9018-11e8-83a8-0632d5c66a00″,”post_id”:”b0cd2366-9f1e-11e8-be46-0a11af595dac”});

One thought on “Personalizing our wardrobes with Cricut

Leave a Reply

Fill in your details below or click an icon to log in:

WordPress.com Logo

You are commenting using your WordPress.com account. Log Out /  Change )

Facebook photo

You are commenting using your Facebook account. Log Out /  Change )

Connecting to %s

This site uses Akismet to reduce spam. Learn how your comment data is processed.