Suit Up for Summer 2021 Blog Tour Day Two- Adding Graphics to Your Swimwear

It’s day two of the Suit Up tour and I hope you’ve already been thoroughly inspired. Today I’m sharing my tips for adding graphics to your swimwear and a happy little discovery!

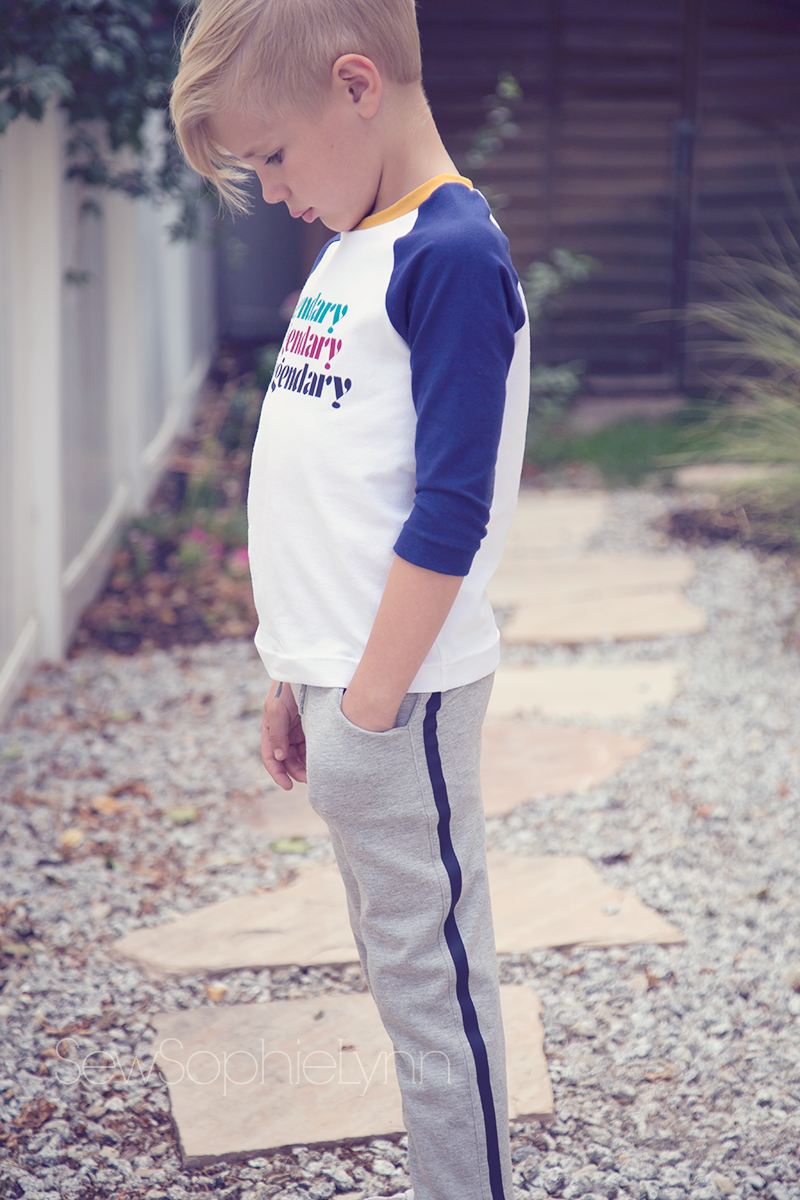
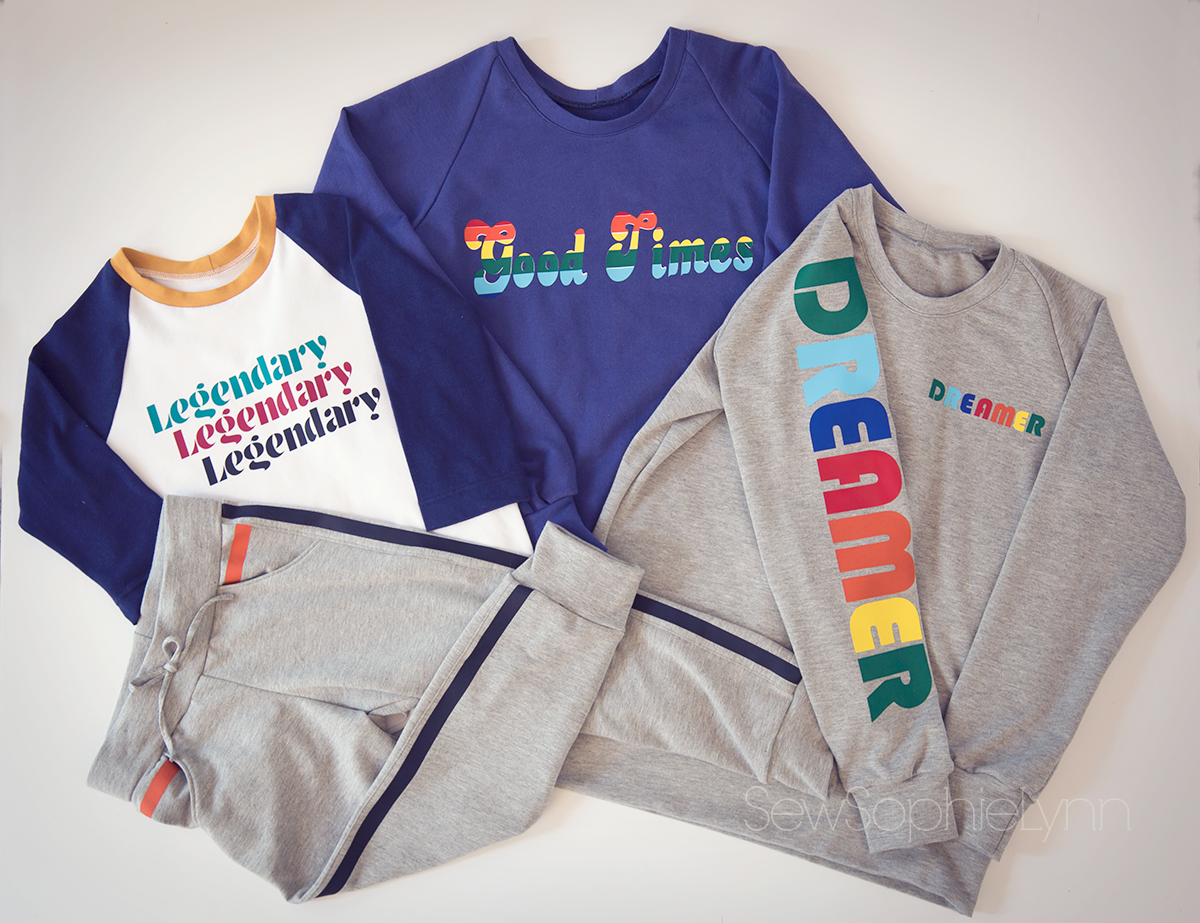
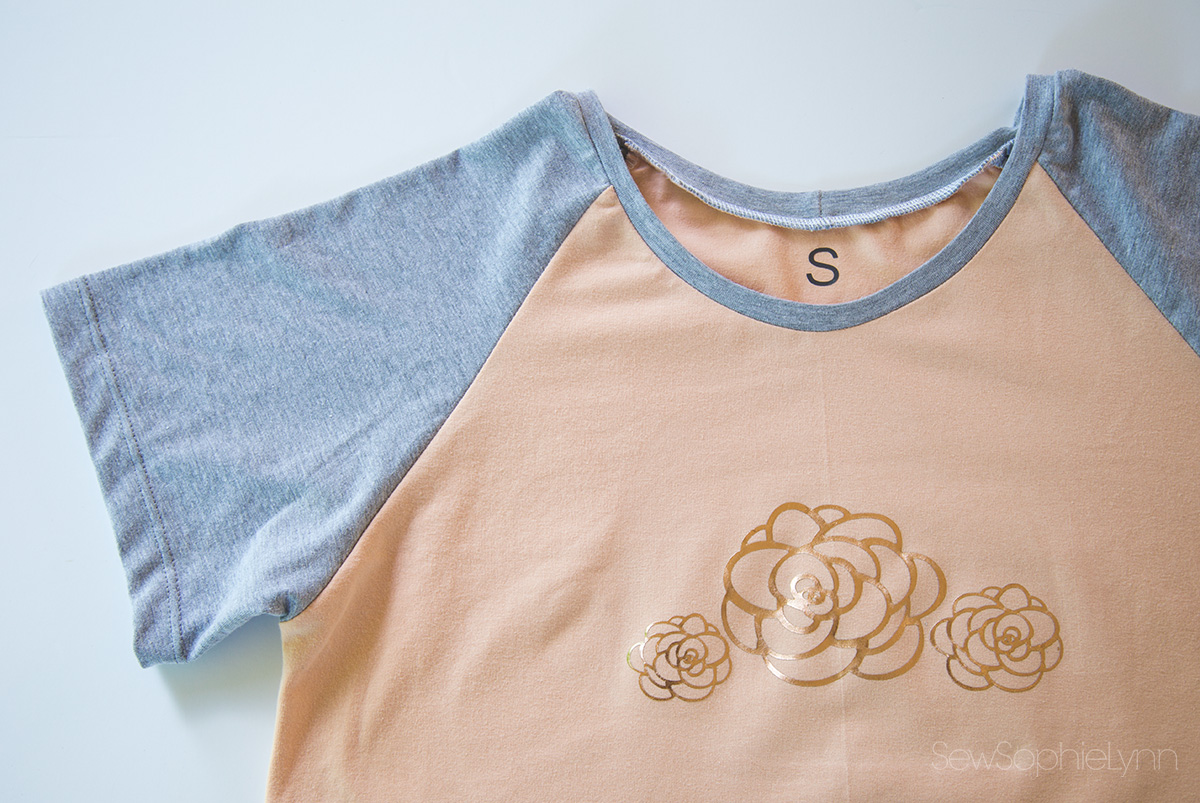
The techniques I share work great for embellishing rash guards but they’ll also work well for the front of a swimsuit or wherever you’d love a little something extra. For my kids tops, I turned to two of our go-to patterns: the Hey June Camden Raglan and the Titchy Threads Rowan Tee. I use these patterns often in their everyday wardrobe and they work great for swim tops too. Both of these patterns are slimmer fitting making them perfect for the pool.

I sew up my boys rashguards exactly like I would a tee shirt but for my girls I make a couple of simple alterations. I like to line the front of theirs with an extra layer of swim fabric for a little more coverage. When cutting this lining piece, cut it slightly shorter than your outer piece so you aren’t folding it up in the hem. I also cropped this top 2 inches to better suit wearing it with all of their high waisted swim bottoms. If you’d like even more chest coverage you can follow Nicole’s easy tutorial to add a shelf bra or head to my post from last year to add swim cups as well.

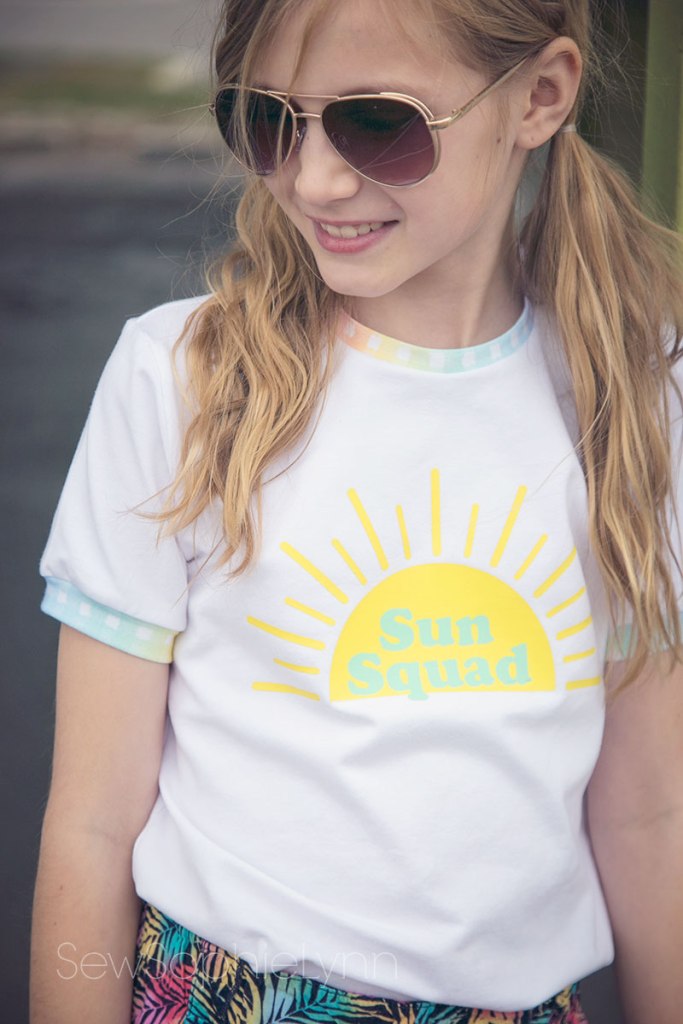
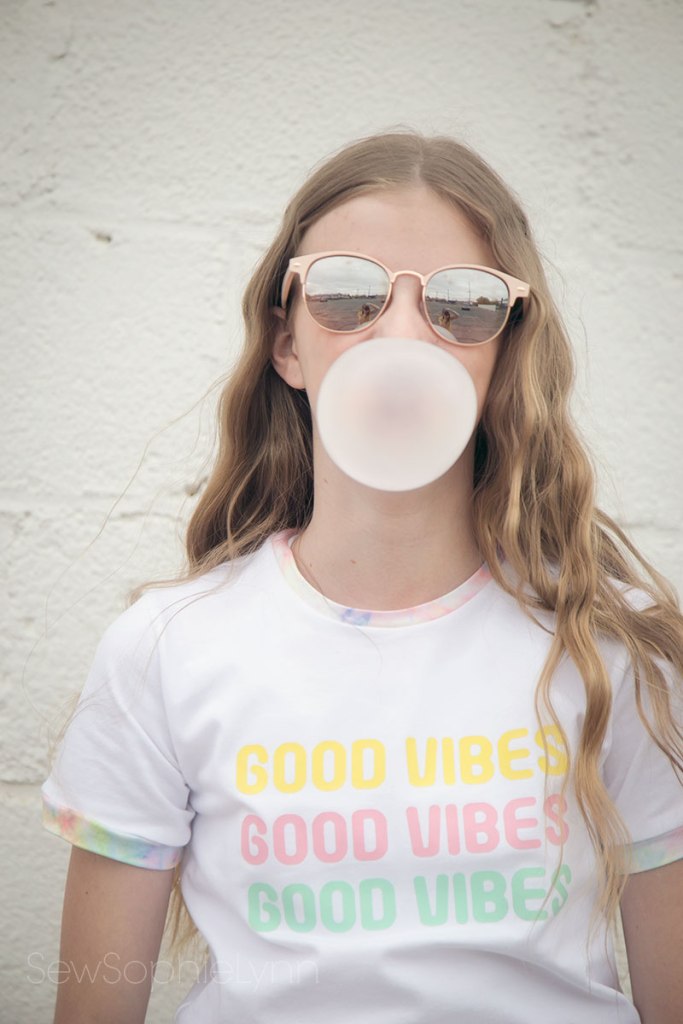
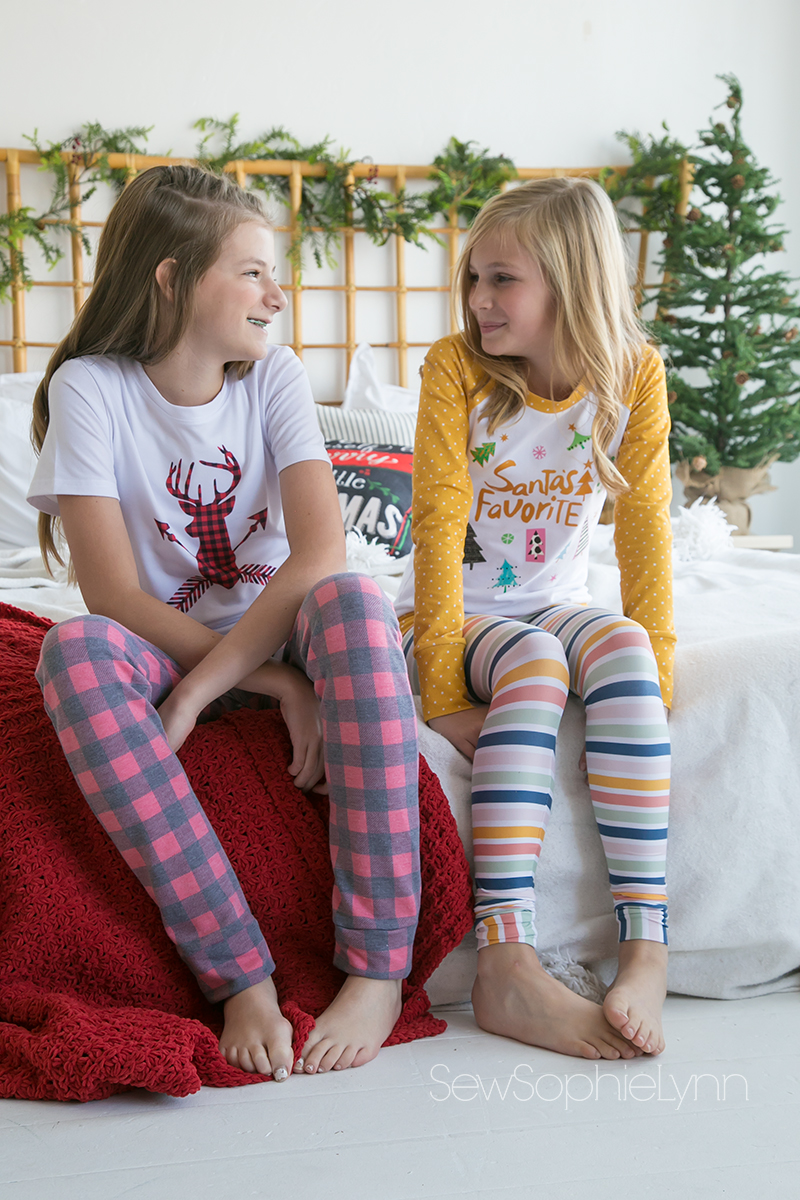
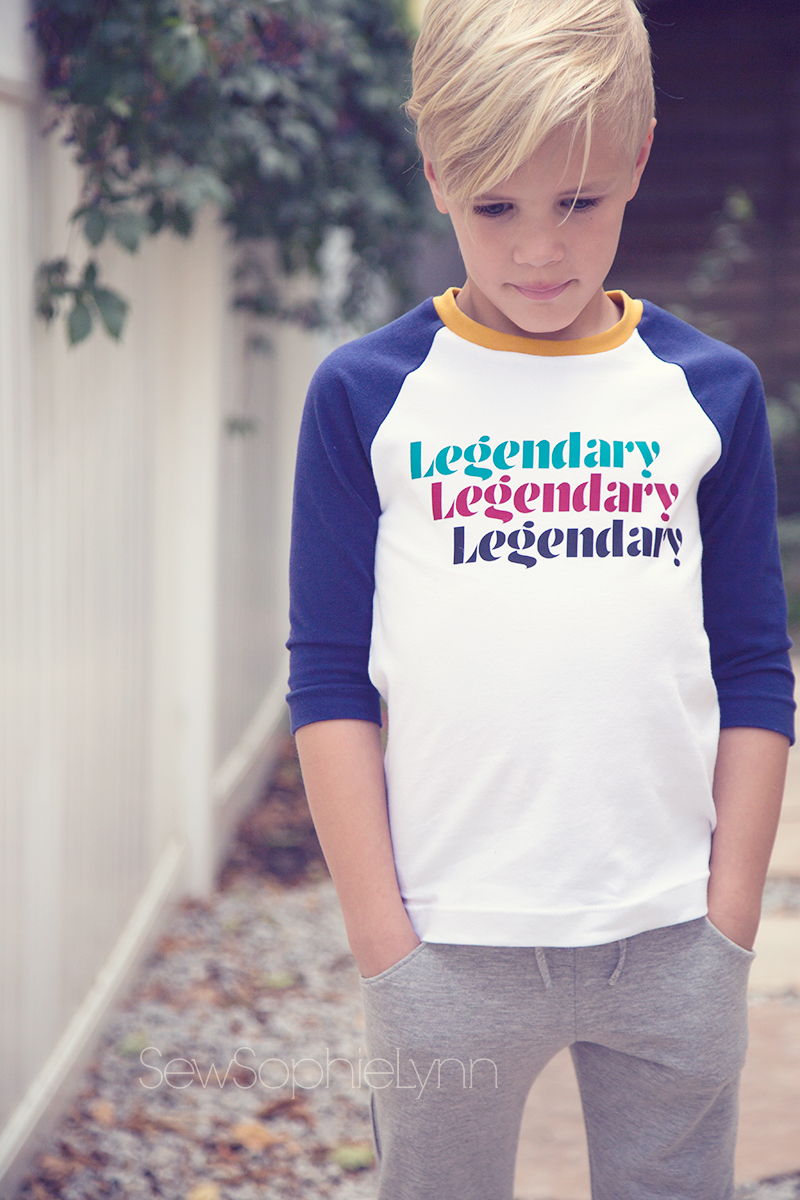
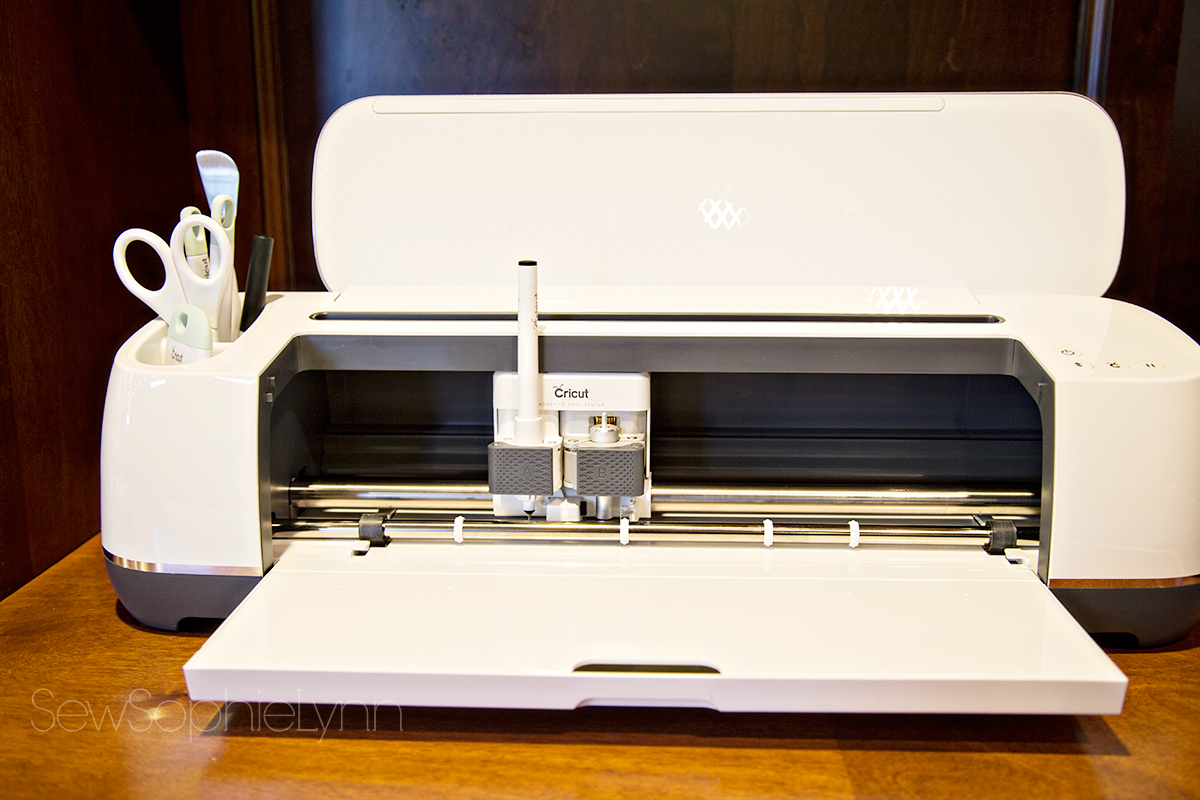
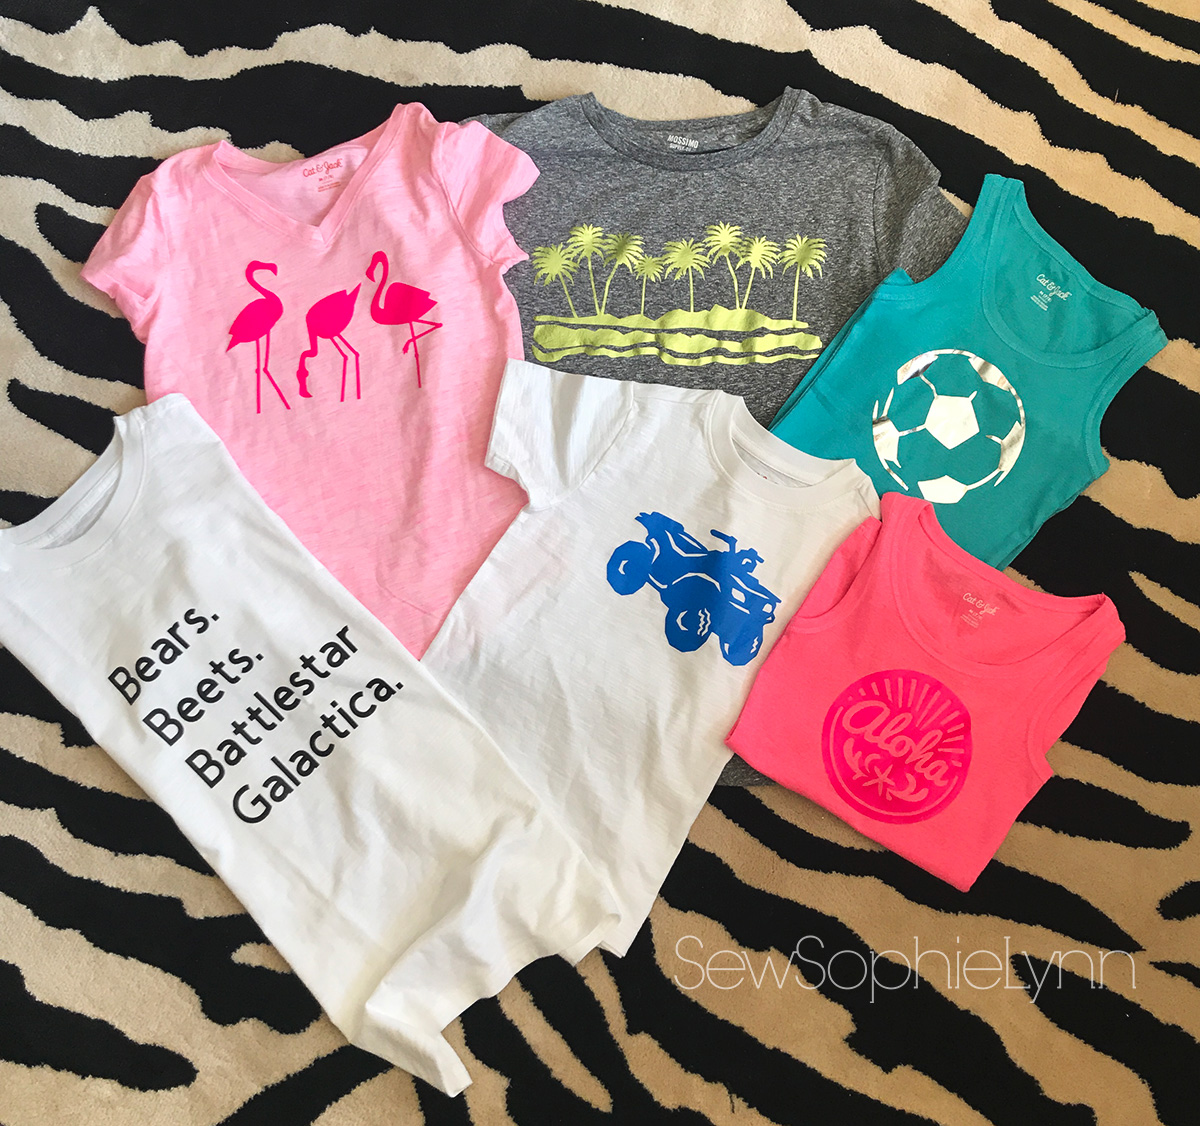
I love any chance I get to pull out my Cricut and adding a little personality and pizzazz to their pieces. For these tops I used stretch vinyl and Cricut Infusible Ink. In the past I’ve used Cricut SportFlex HTV and I’ve been thrilled with the results. I use my Cricut EasyPress and their swim tops have held up year after year (until they’ve outgrown them but they still look brand new when we pass them on!). I swear by Teflon sheets when using iron-on vinyl. They add a layer of protection to your garment and also seem to help the vinyl melt into the fabric better. When pressing SportFlex on to swim fabric I set my EasyPress to 305 degrees and do 30 seconds on the right side then flip it and do 15 seconds on the back.

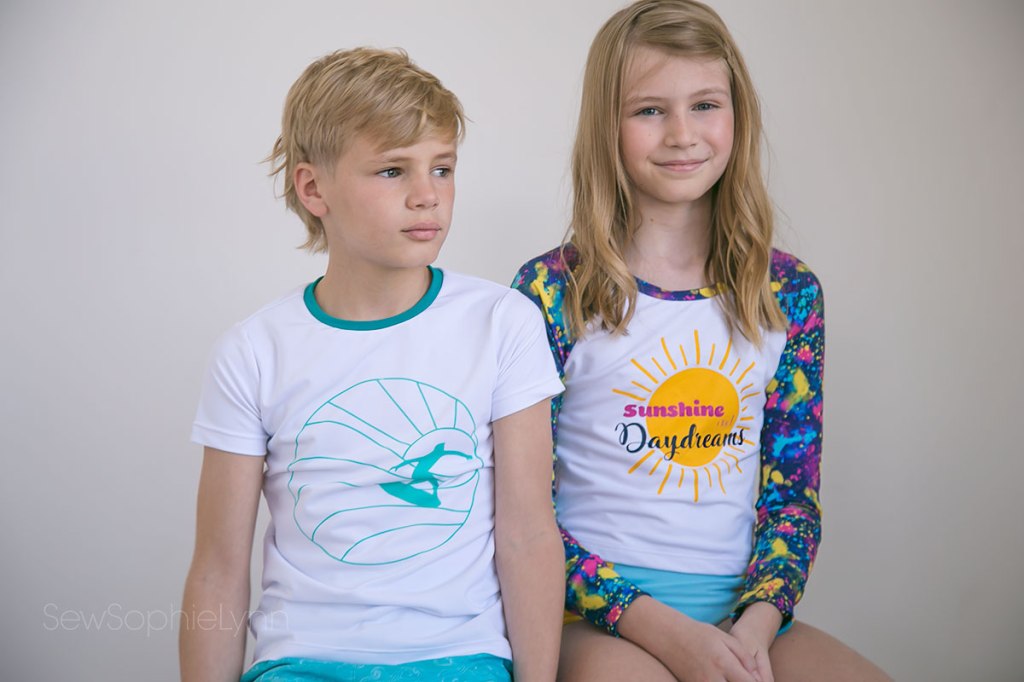
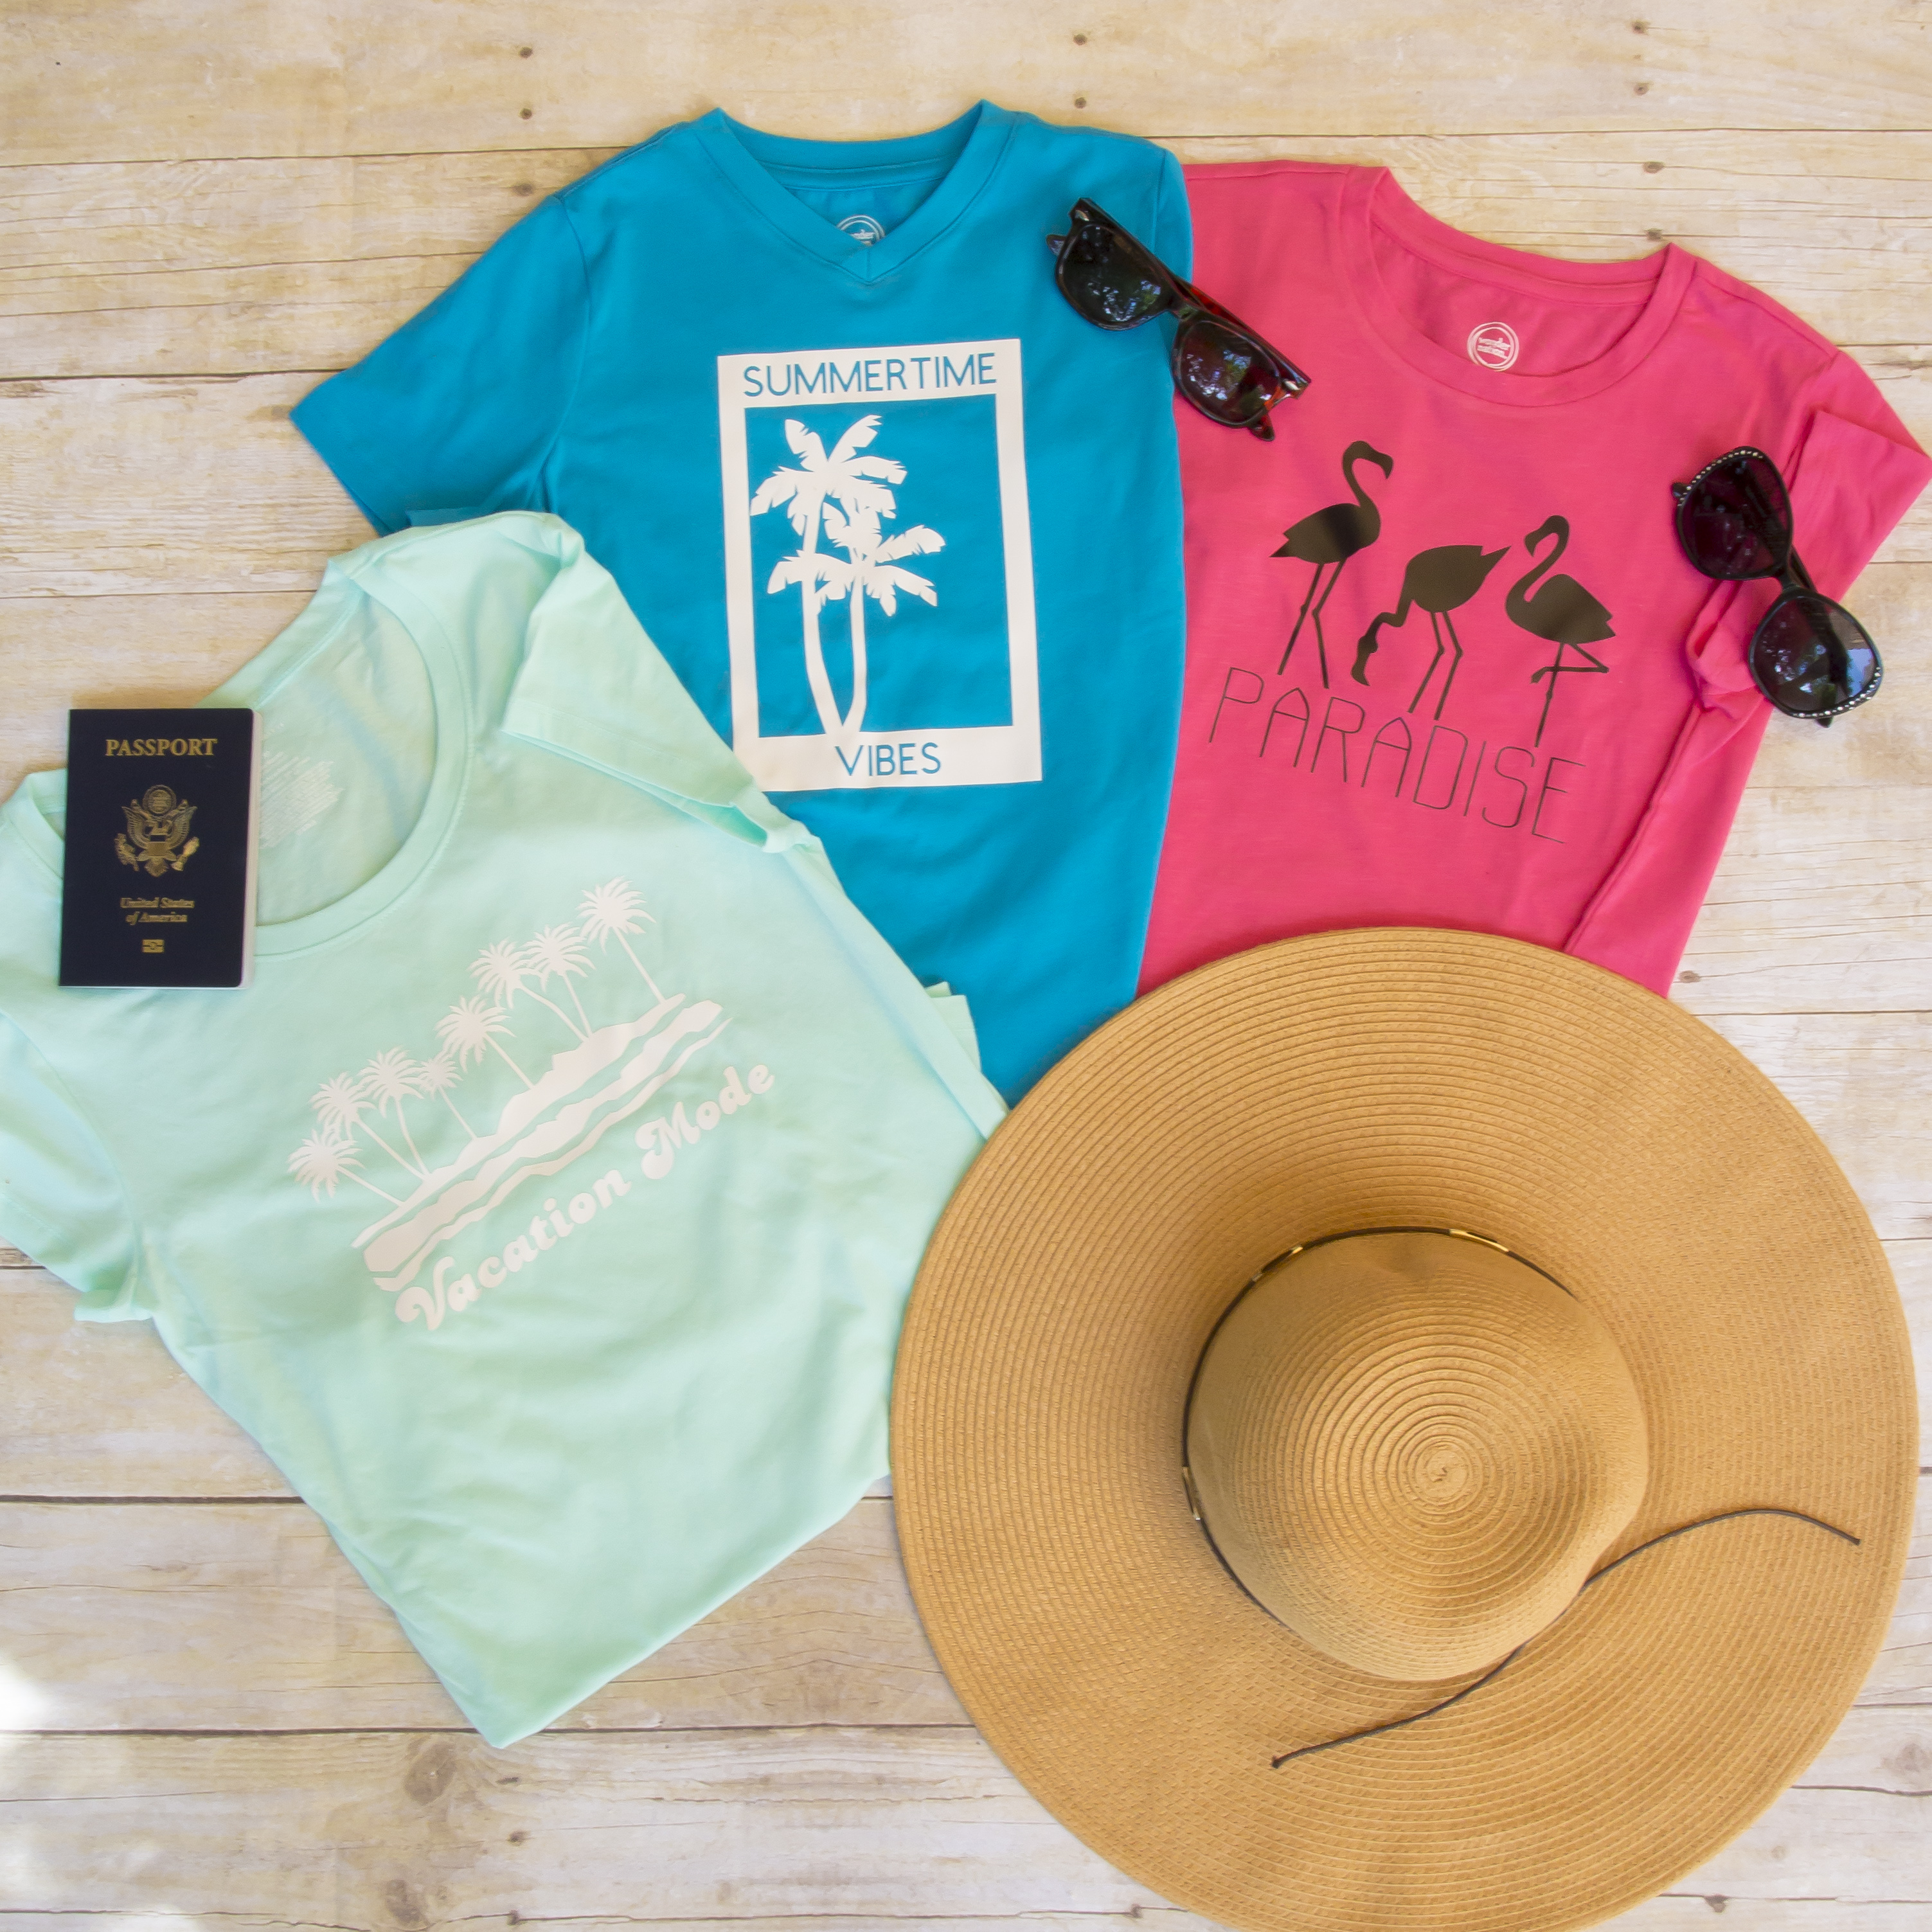
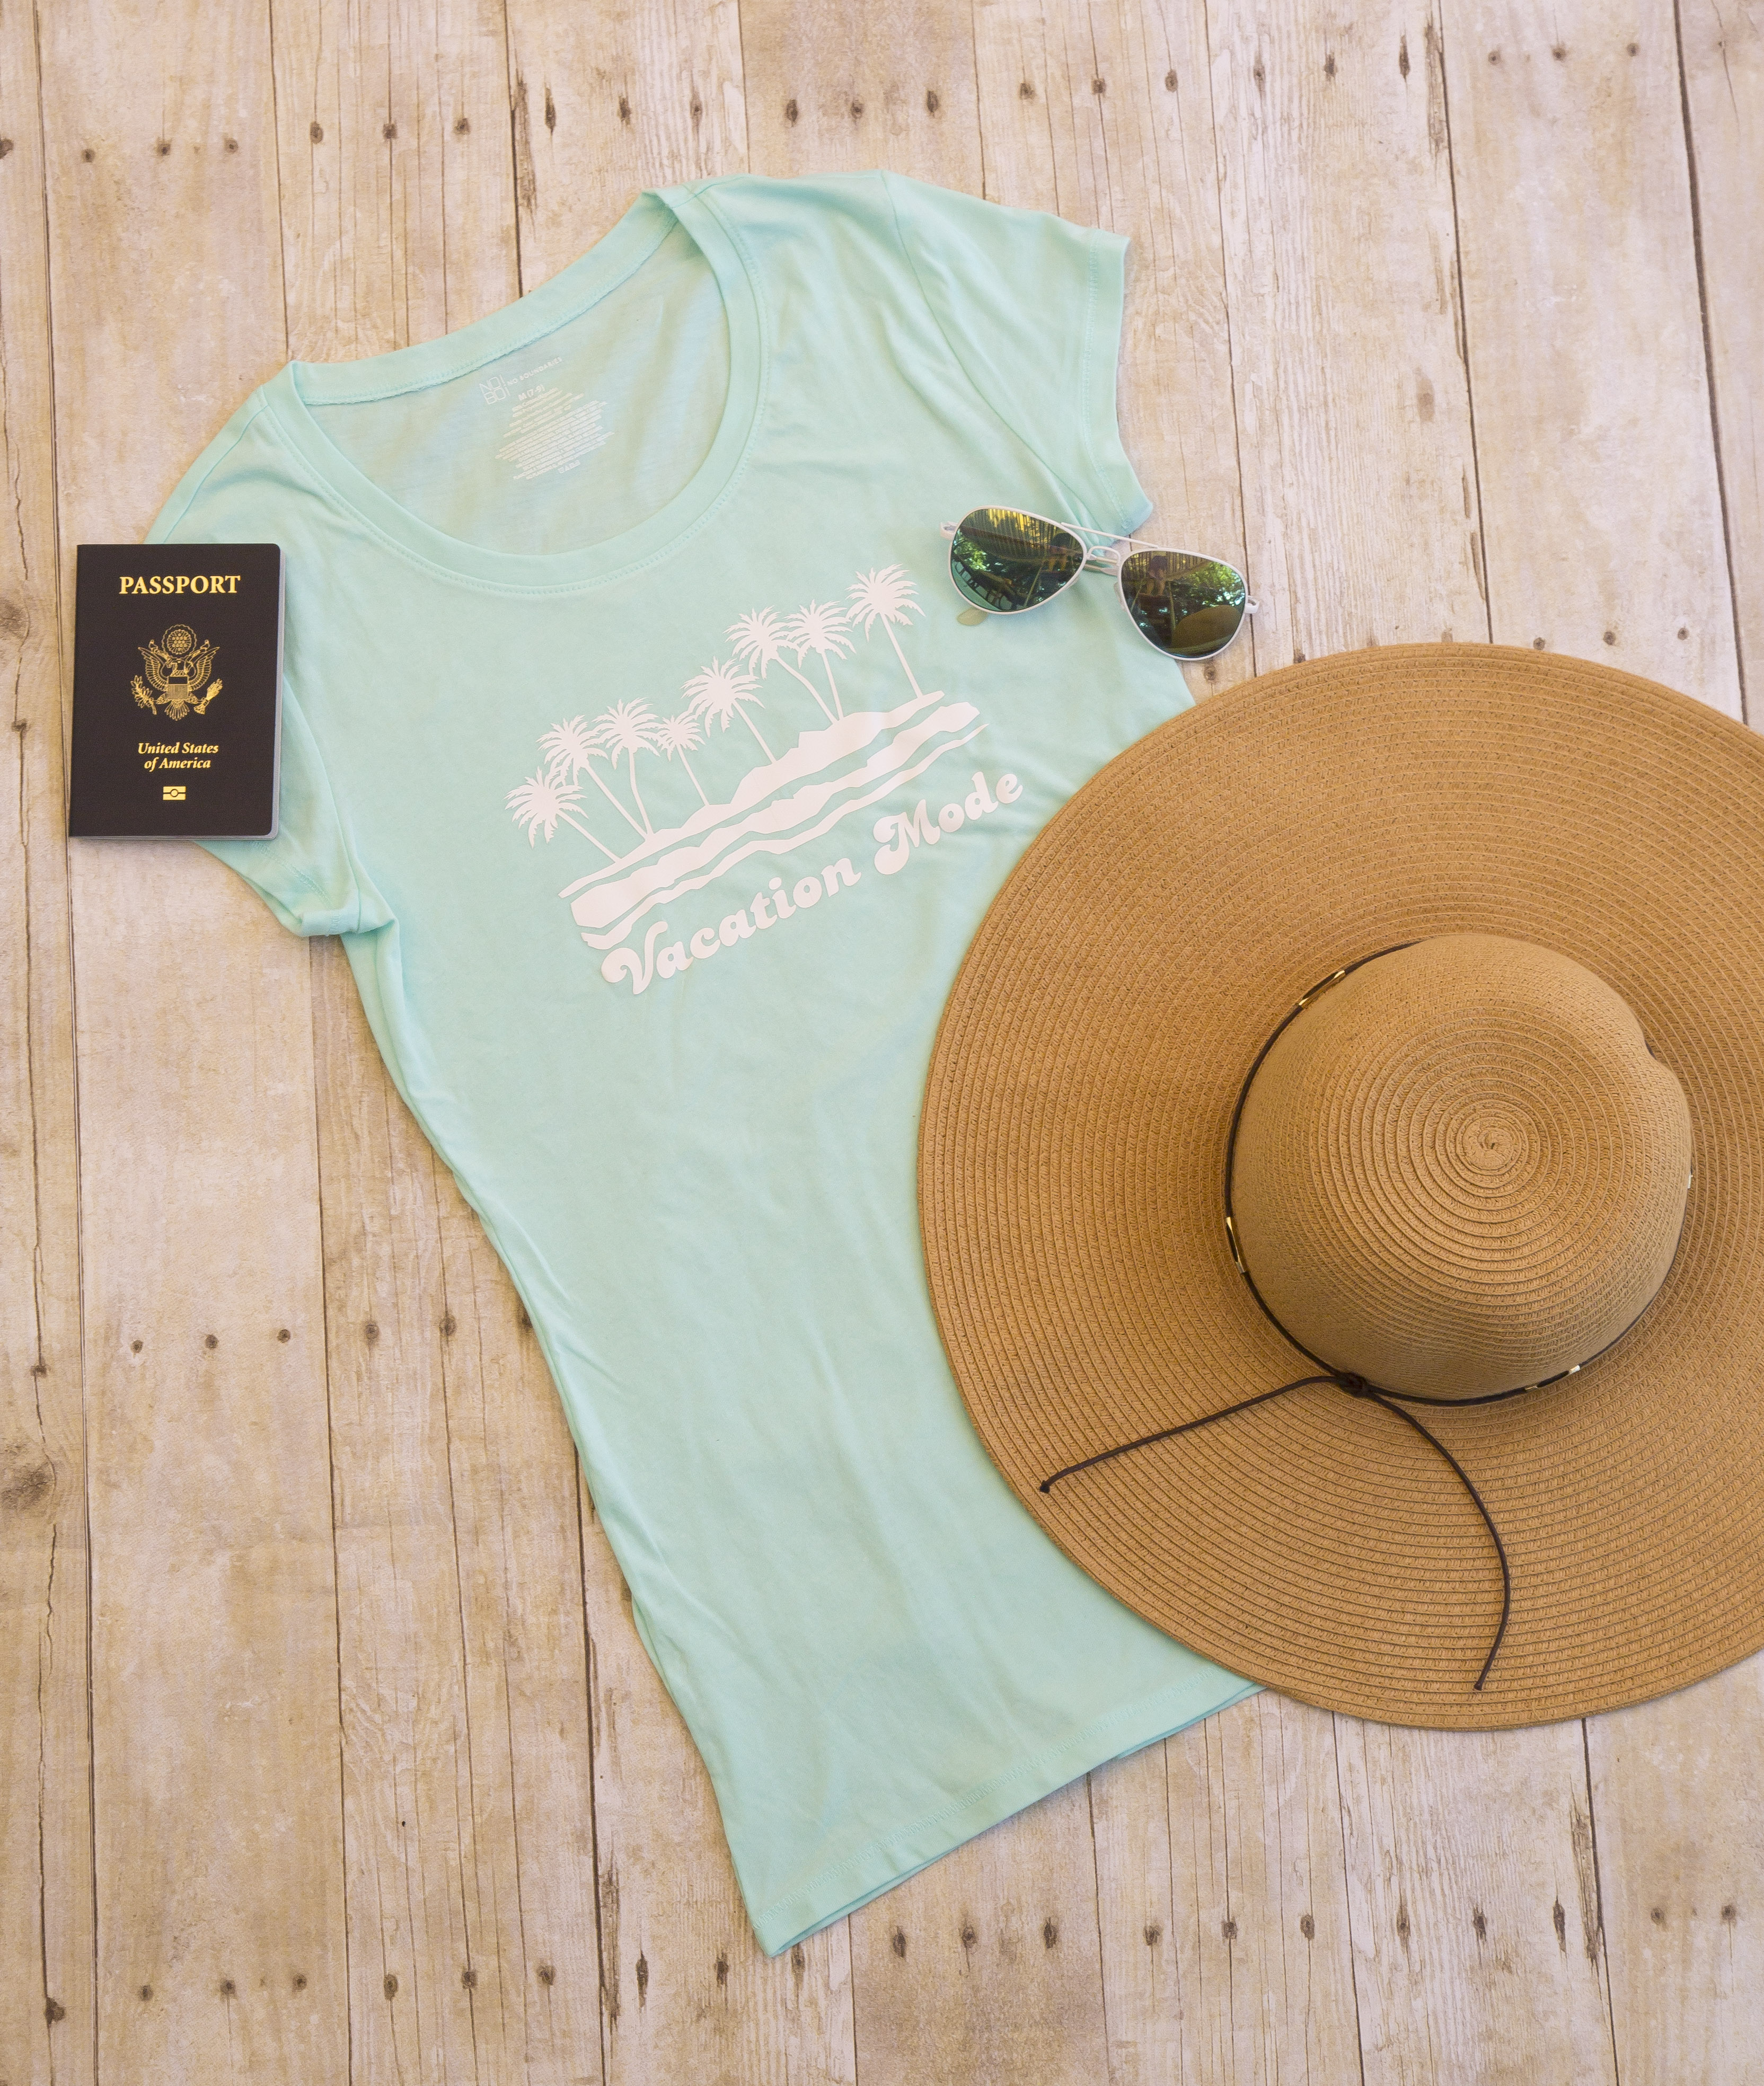
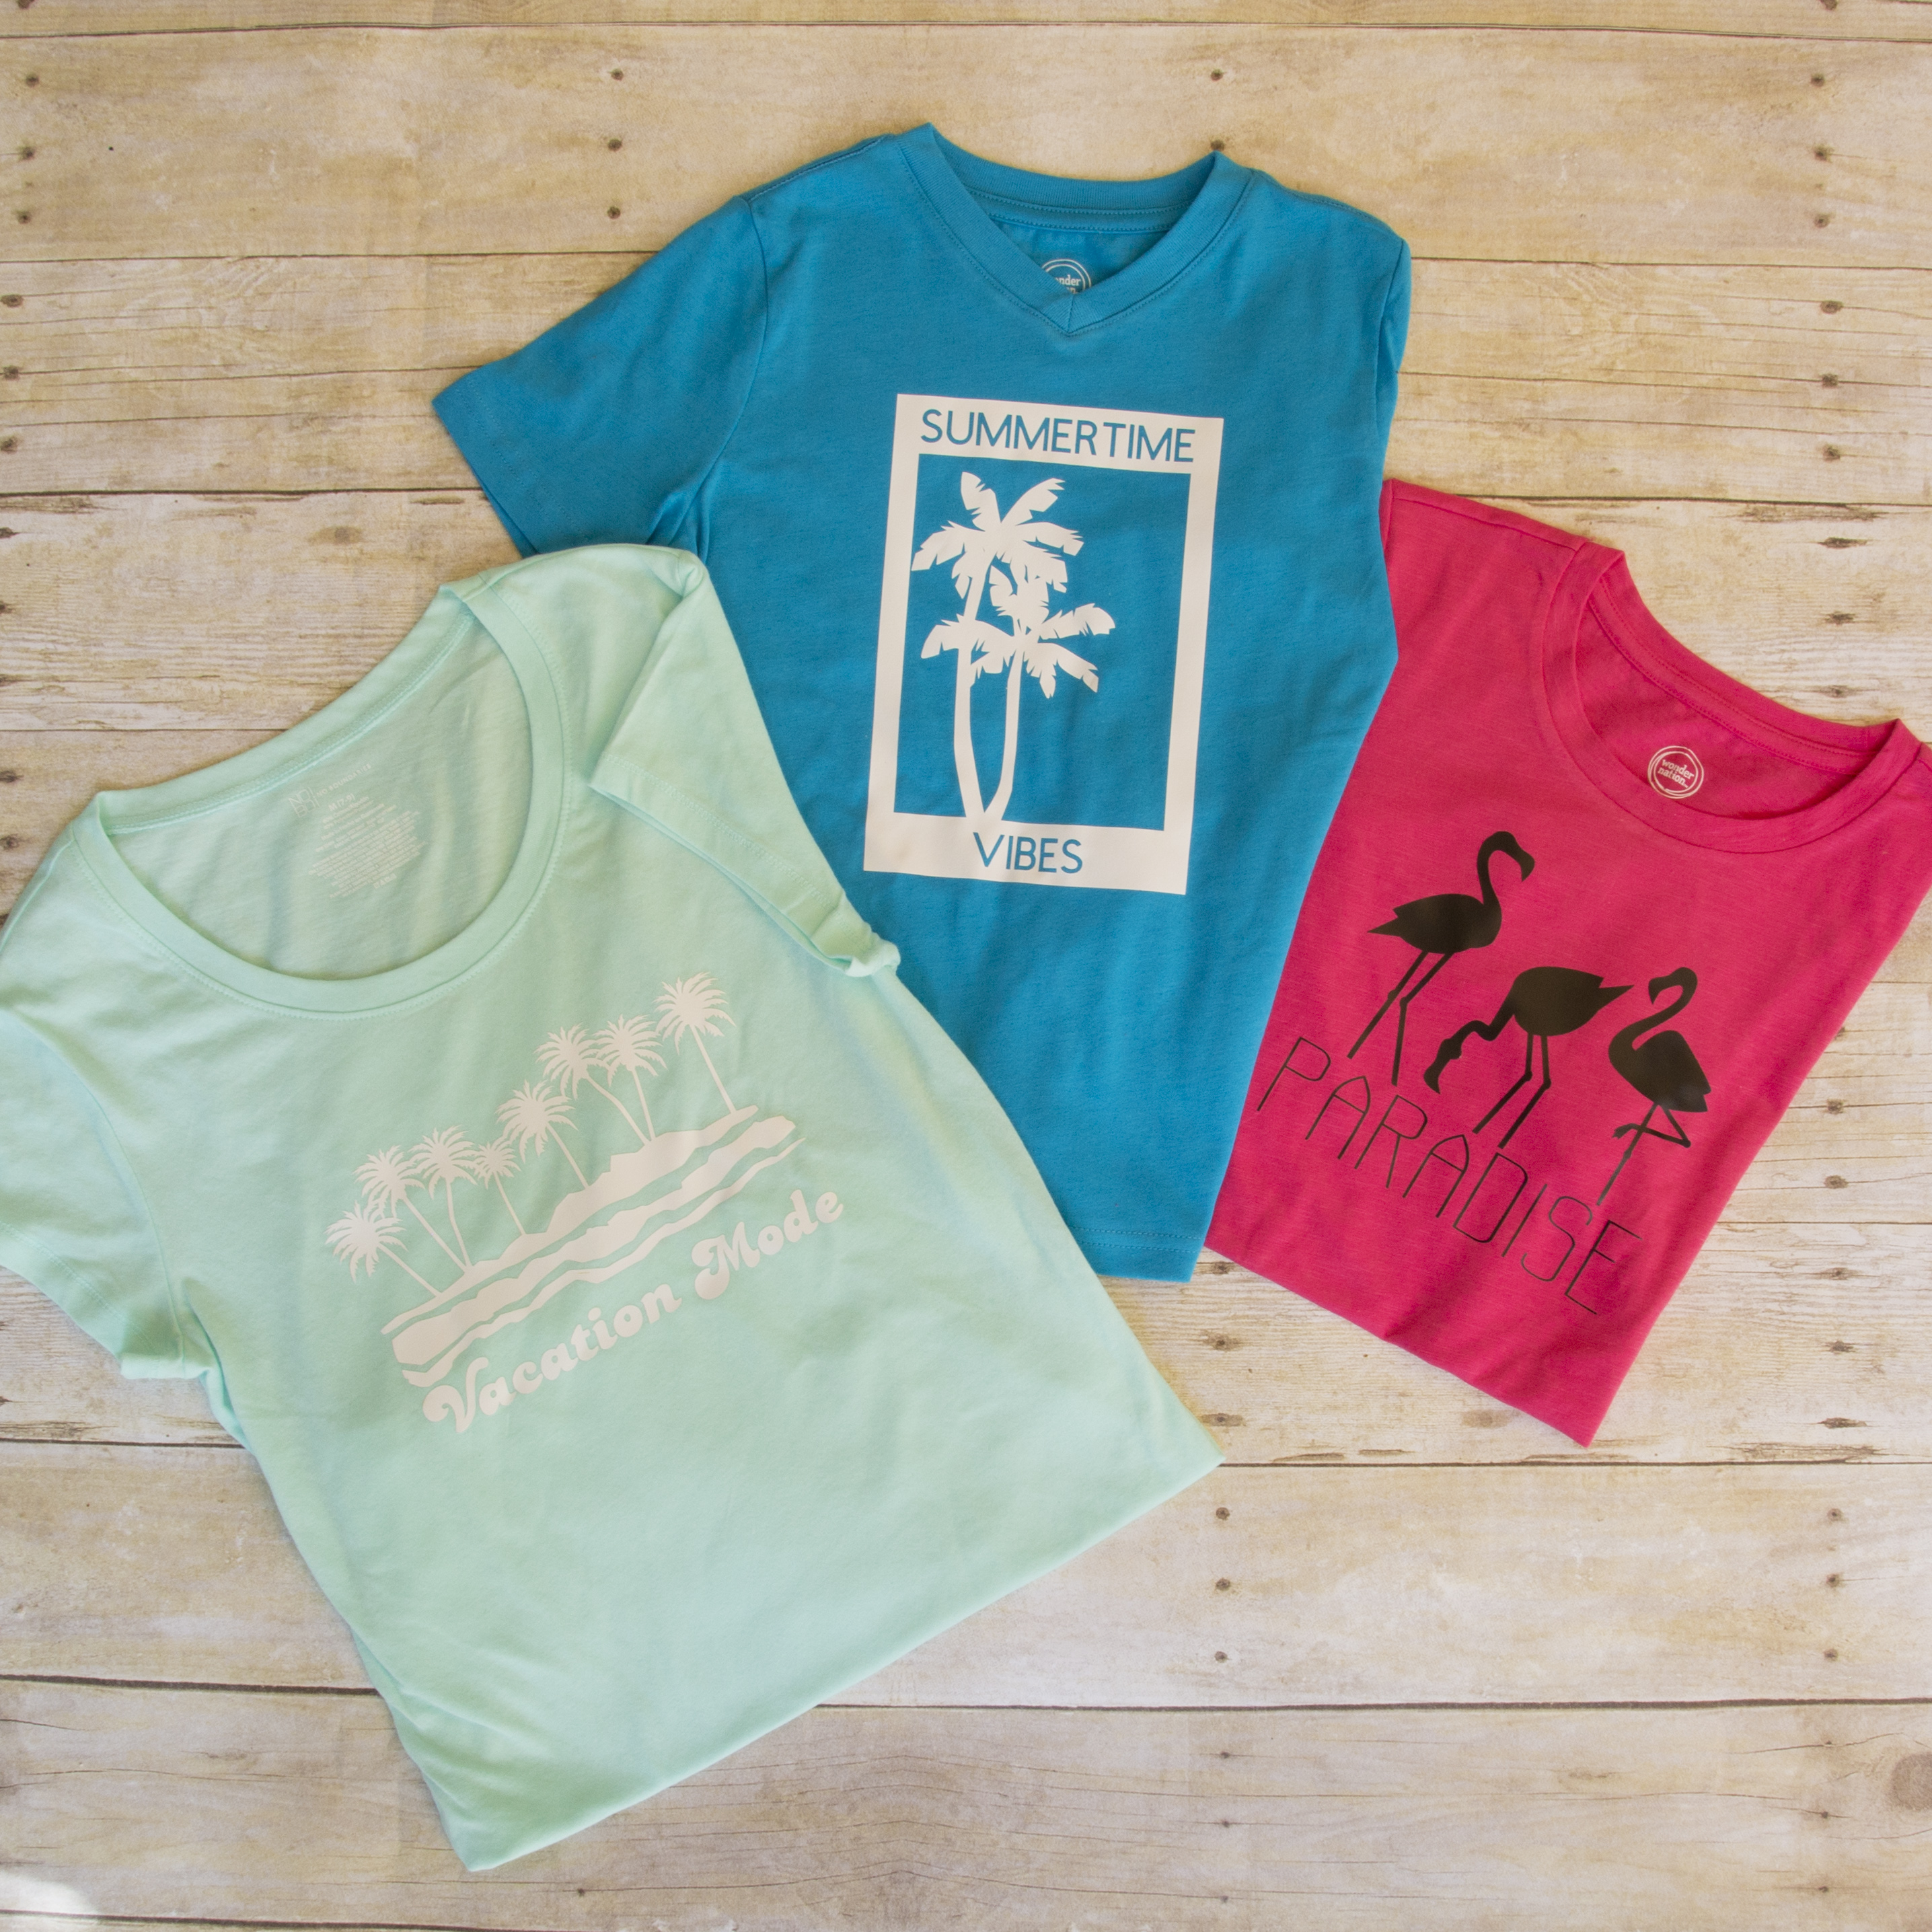
This year I headed to my local vinyl shop, Vinyl Outlet, and picked up these three stretch vinyl sheets. You want to look for stretch vinyl since knits, especially swim, will be stretched when worn. I’ve heard great things about this stretch vinyl so I’m hopeful it will hold up as well as the SportFlex. There were so many colors to choose from that I’d love to be able to match all of the RCF swim fabrics! I designed this digital design and it’s available in the Project Run and Play shop.

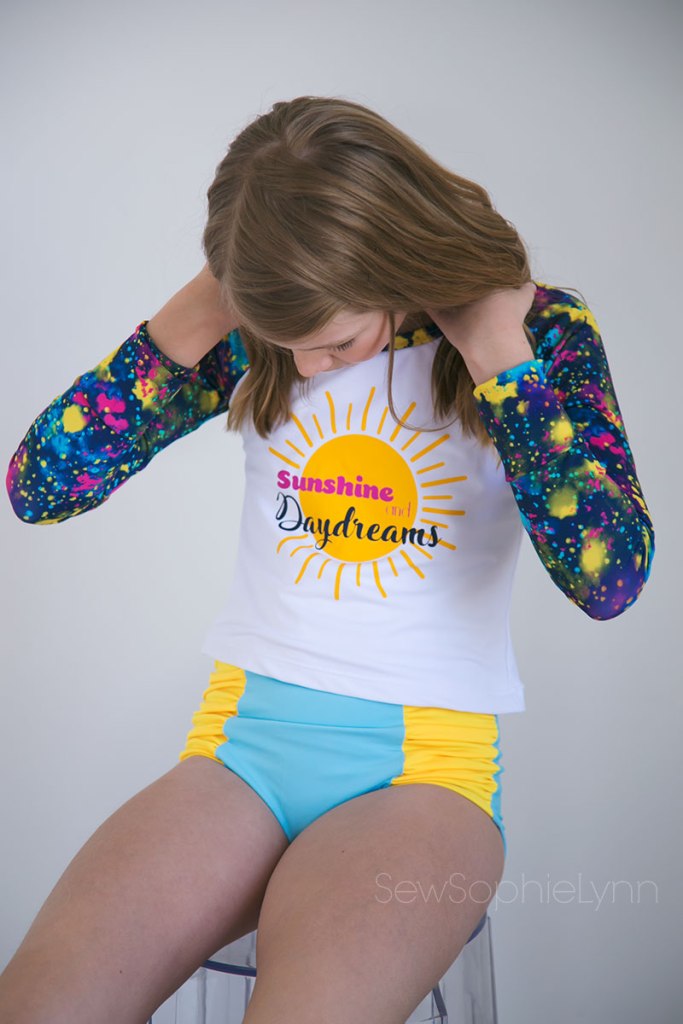
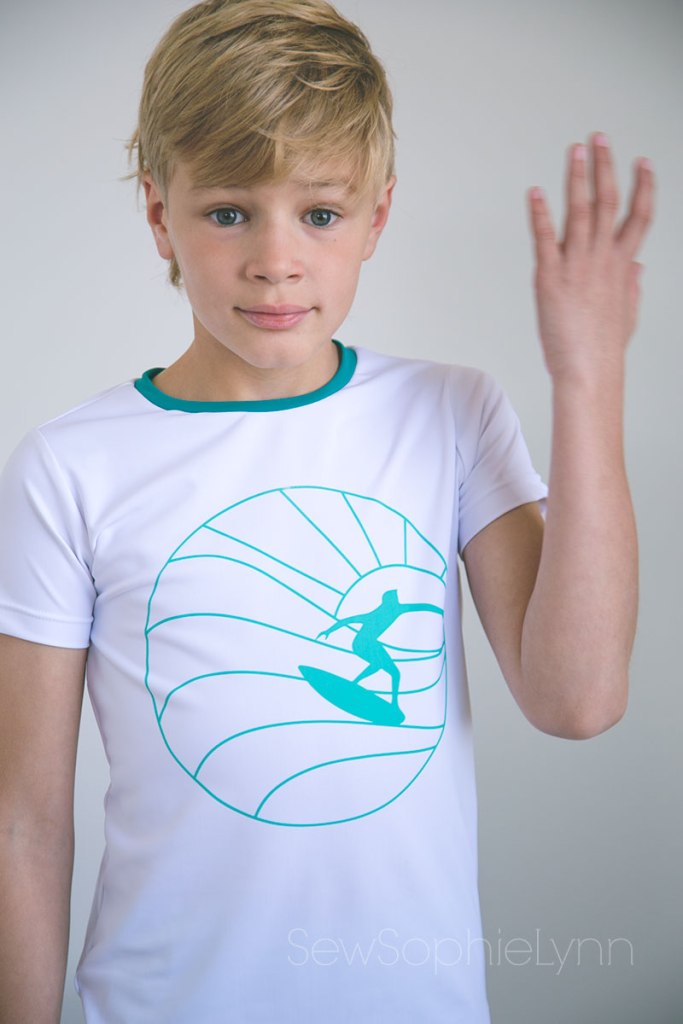
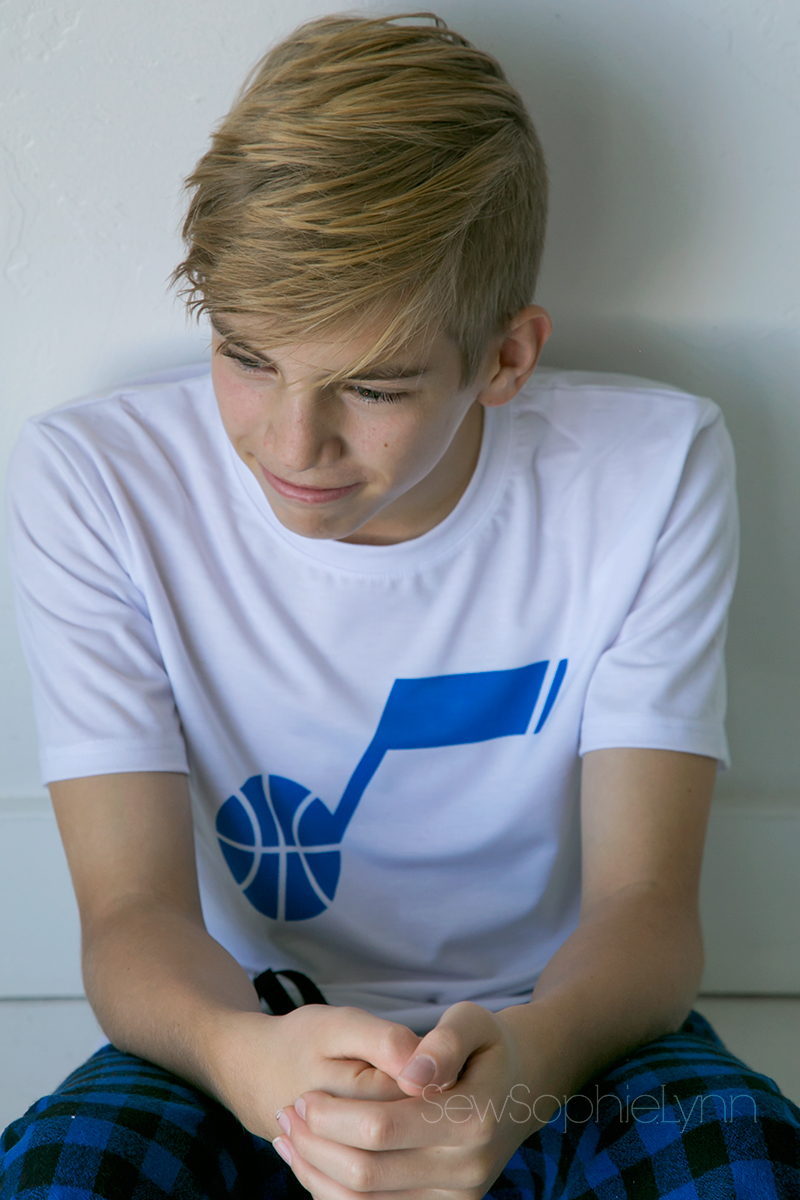
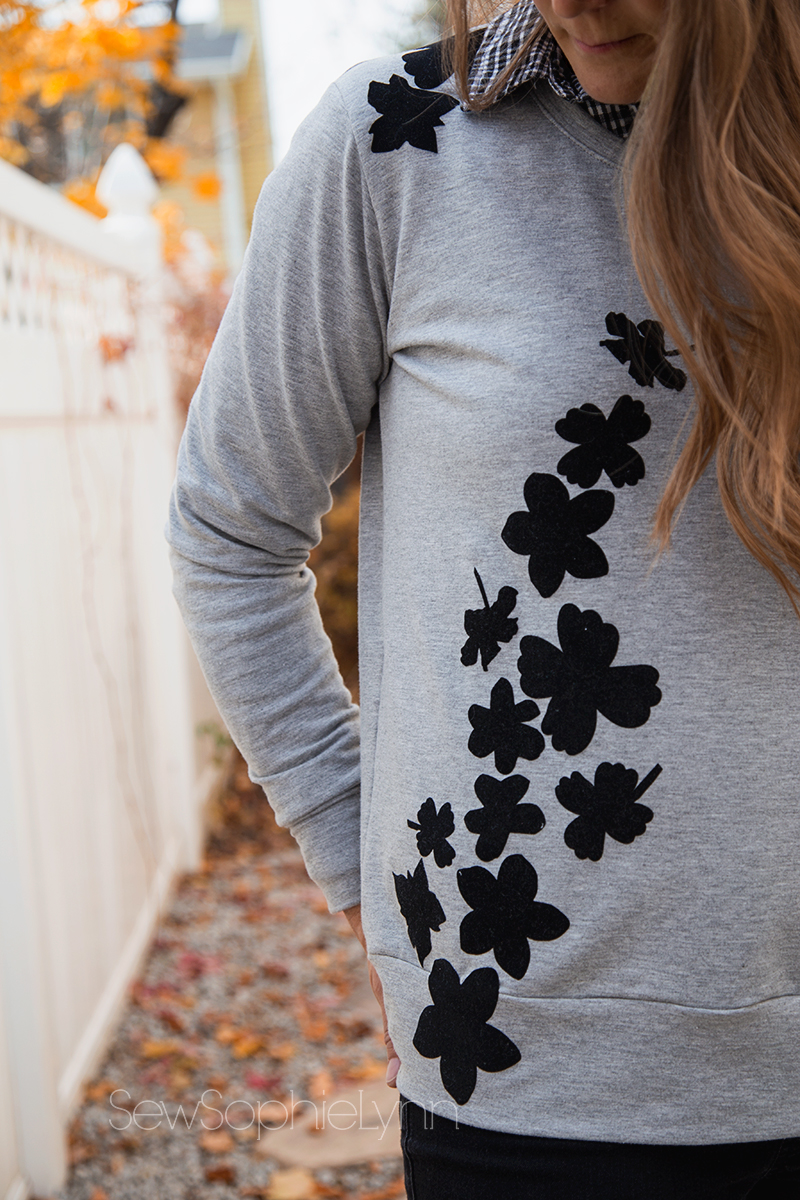
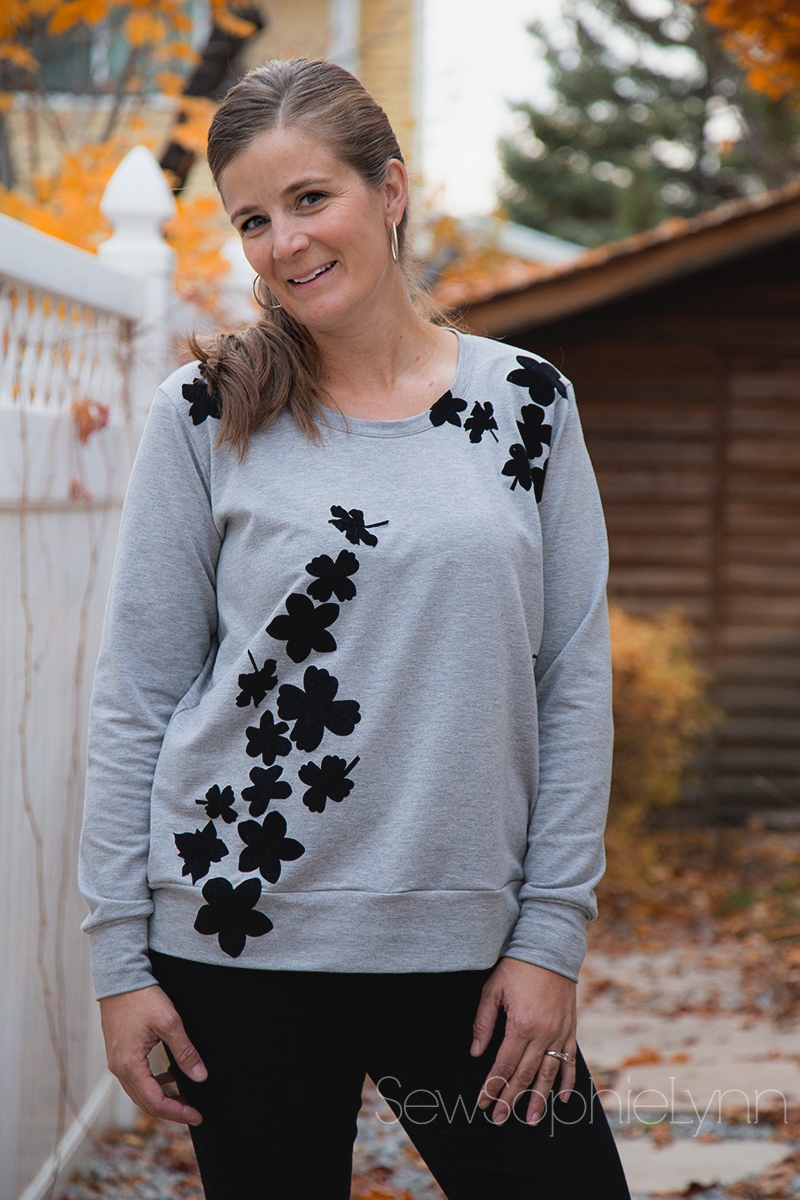
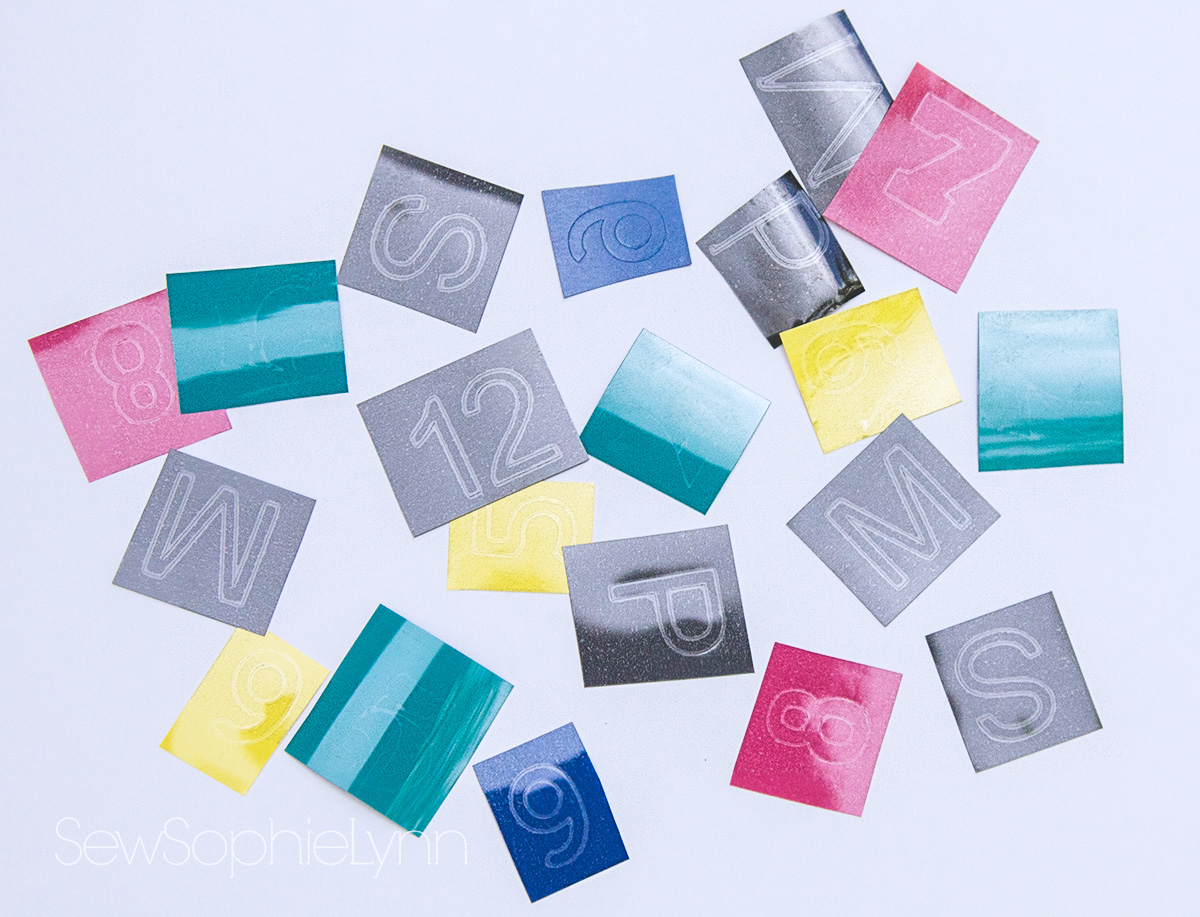
For this one, I was dying to try Cricut Infusible Ink. Cricut recommends only using their blanks but that is so limiting. With a little research I found that many had had great results using synthetic fabrics, perfect for this poly spandex swim knit! I did a couple of test swatches and then went for it. I recommend doing all of your embellishing PRIOR to sewing up your pieces. 1- it’s easier to lay our your fabric and 2- it’s not quite as heartbreaking if you mess up!

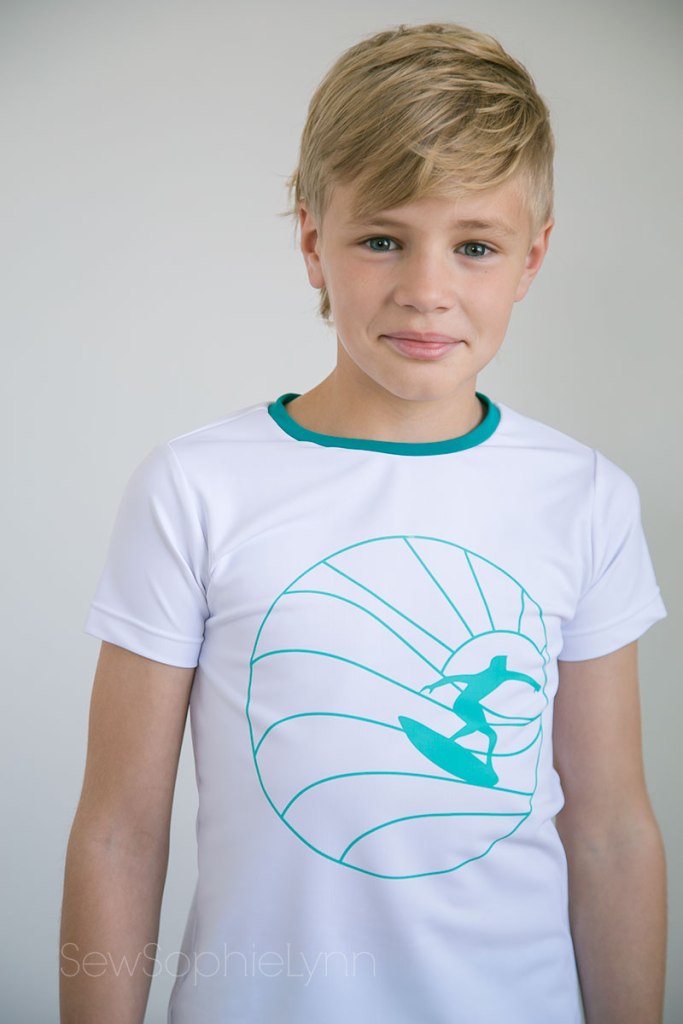
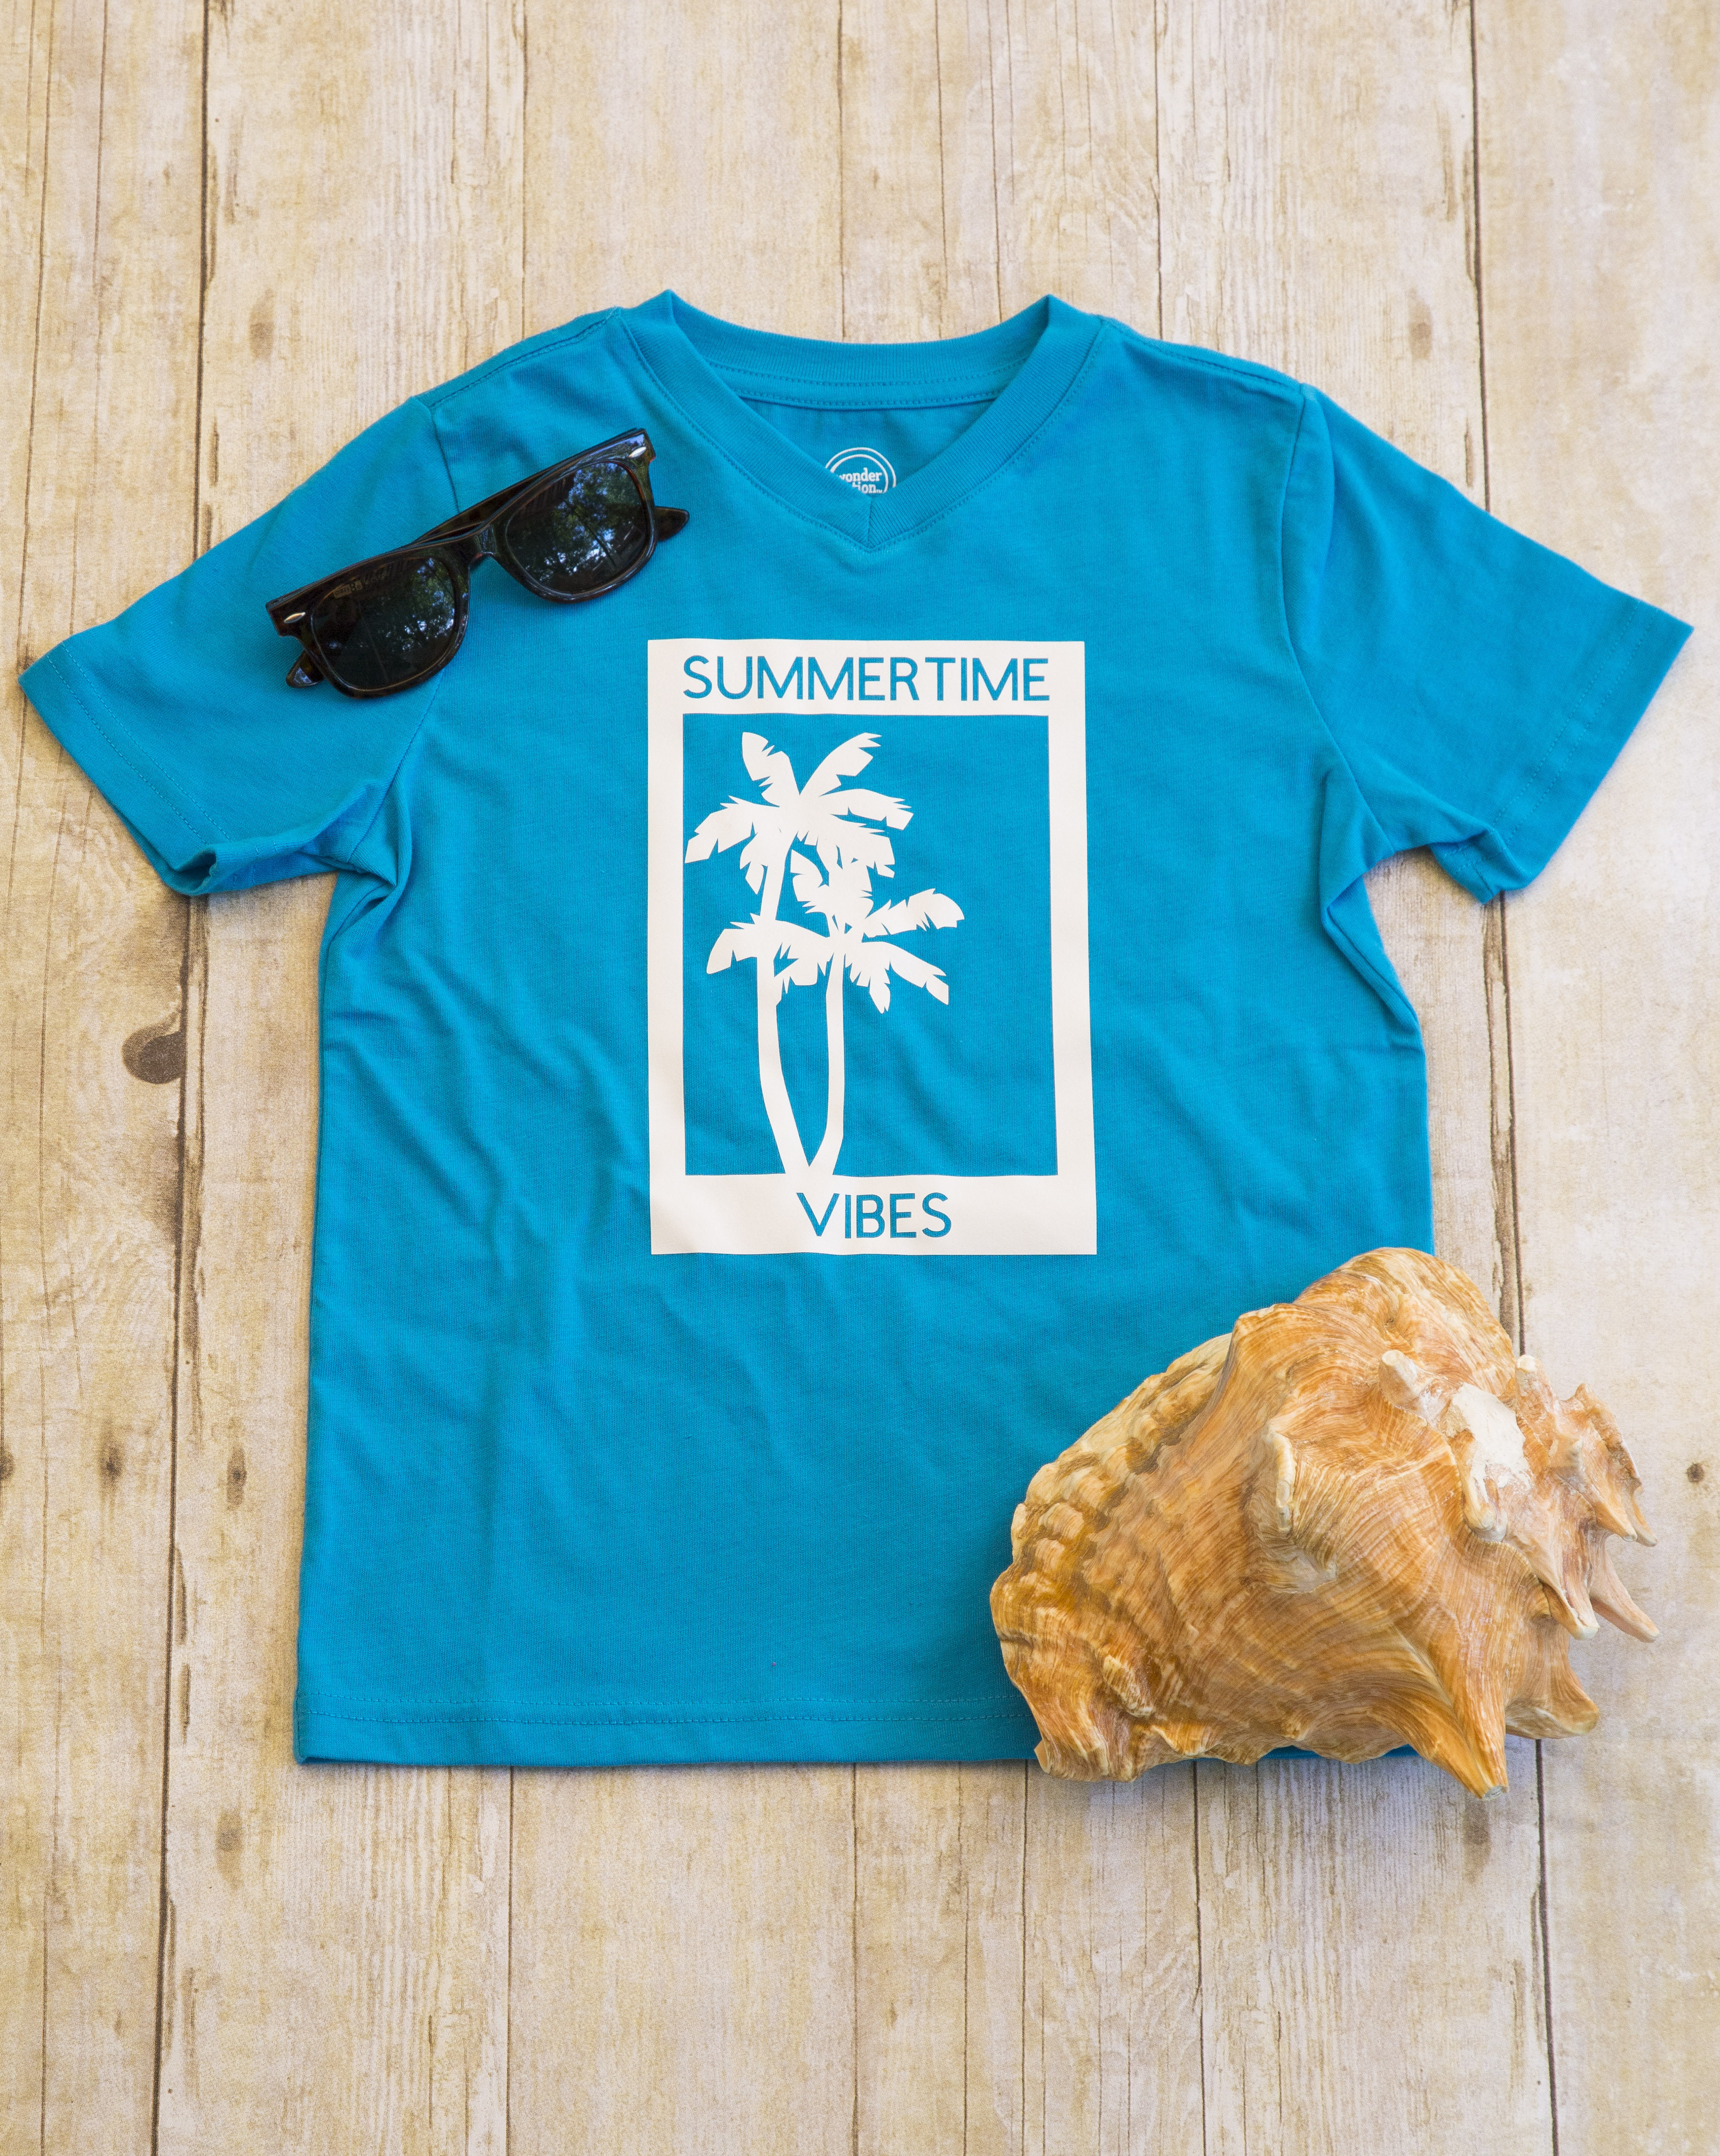
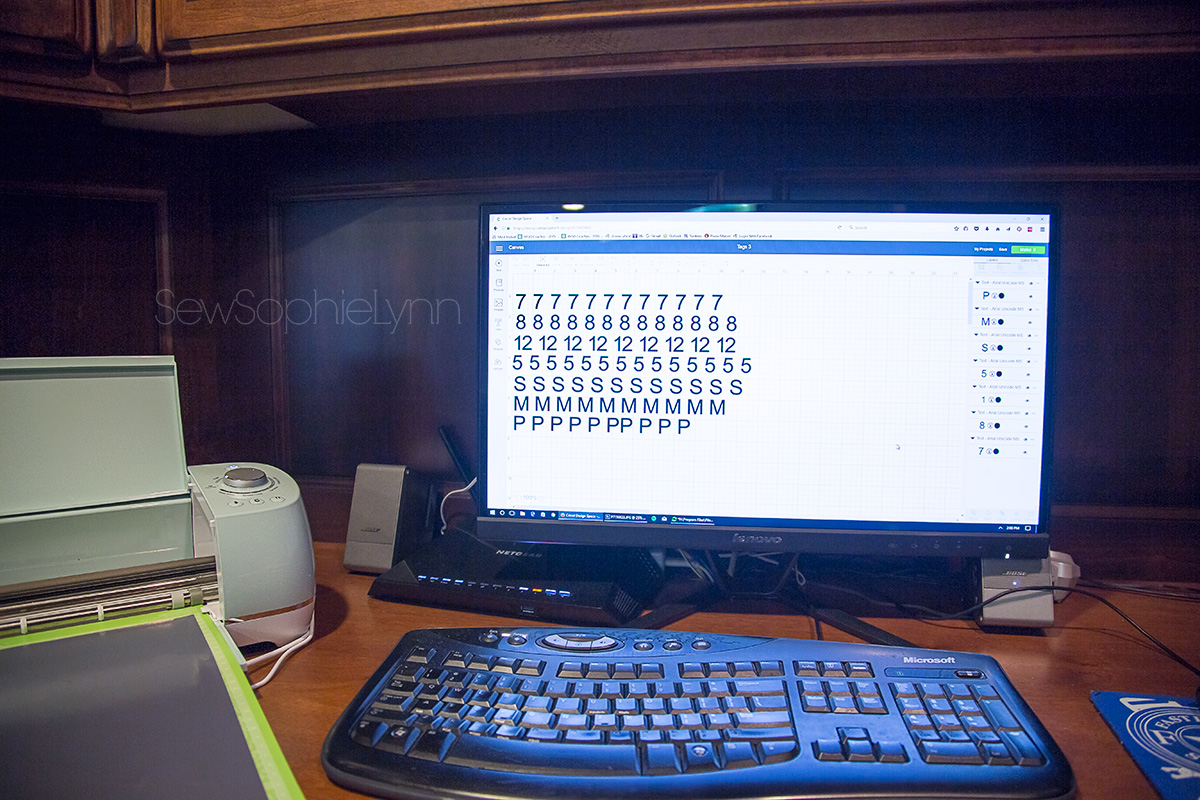
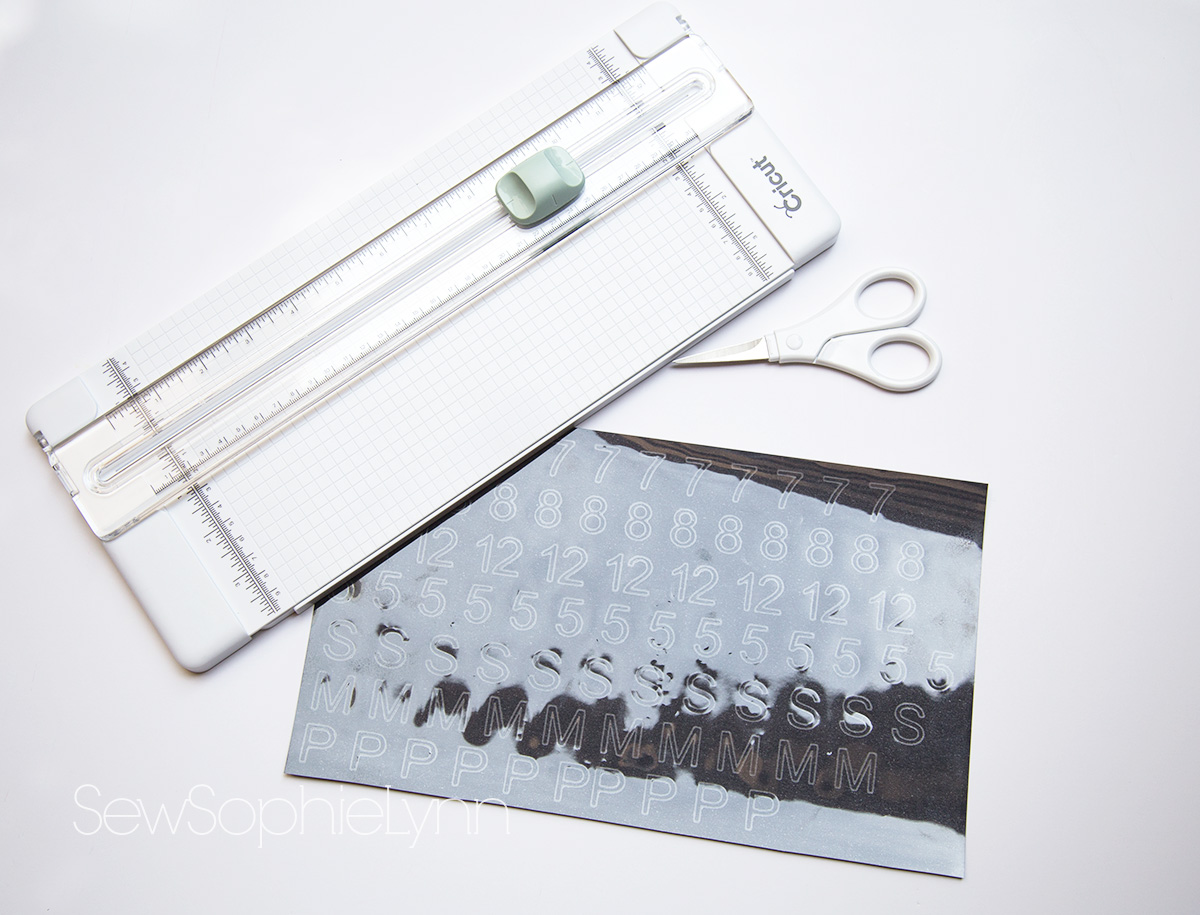
For this design, I used a graphic available in Design Space and Bright Teal Infusible Ink. I followed the instructions for cutting and fusing the ink (using the Heat Guide here) and it worked beautifully! I love seeing that ink just melt right into the fabrics. I talked to Diana of Raspberry Creek Fabrics and she said the infusible ink process and setting temperature is similar to what they use in their shop when printing swim fabrics so the result should be easy and long lasting.

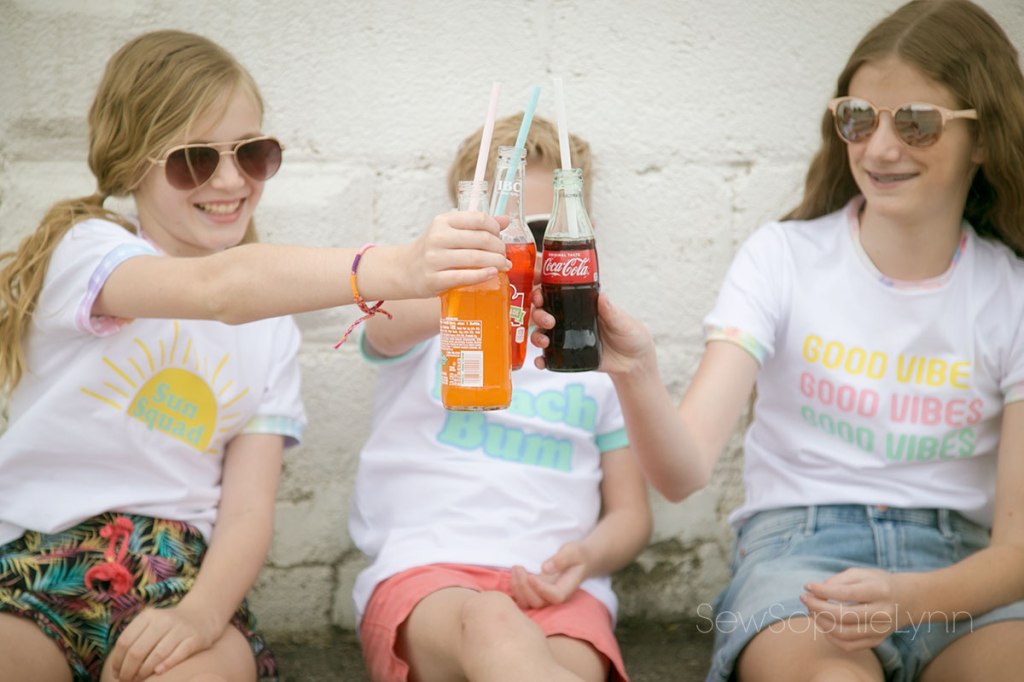
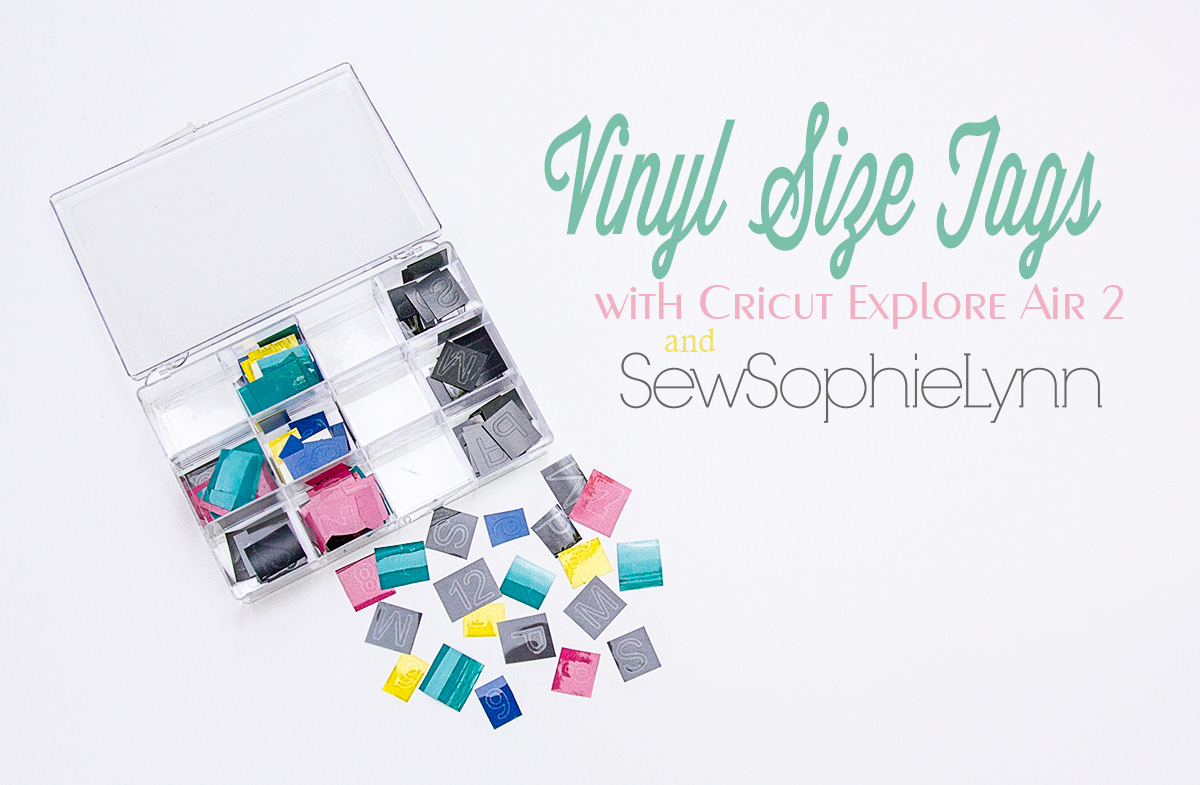
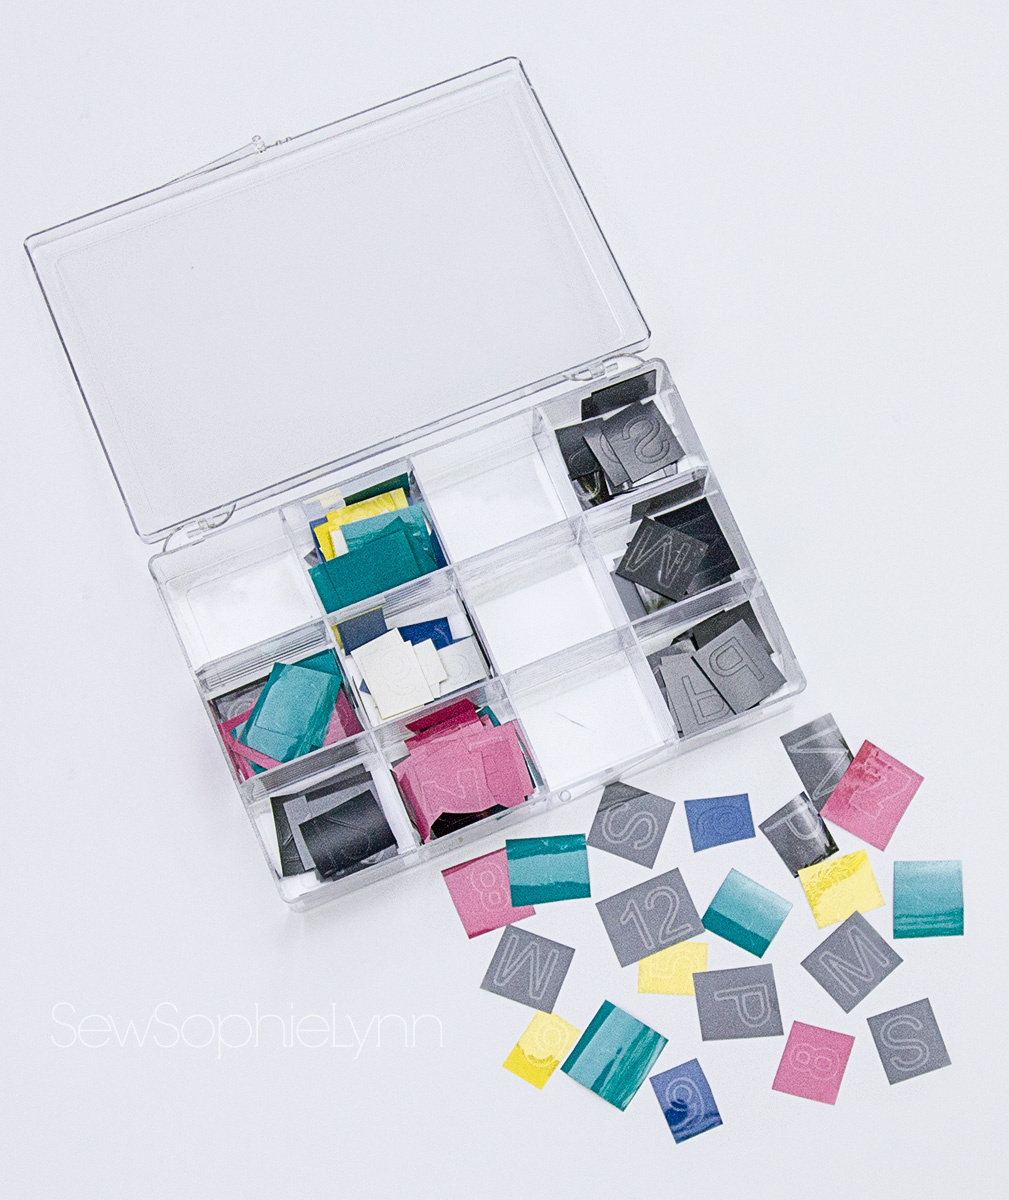
These both have their pros and cons. The infusible ink will only work on white, possibly light colors, while the vinyl will work on any solid or print. The infusible ink melts into the fabric making it a great choice if you want to add sizing labels to garments without the itchy tag or vinyl. Vinyl is fun to layer and you can create more complicated designs with it. I’m just excited to have options when it comes to creating unique looks for my family!

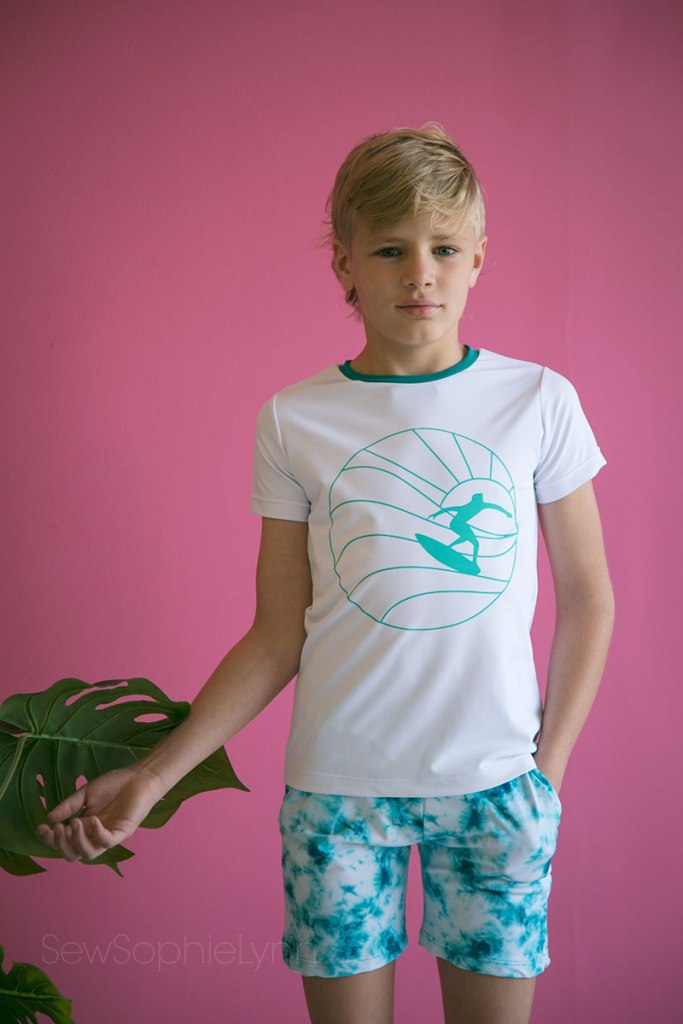
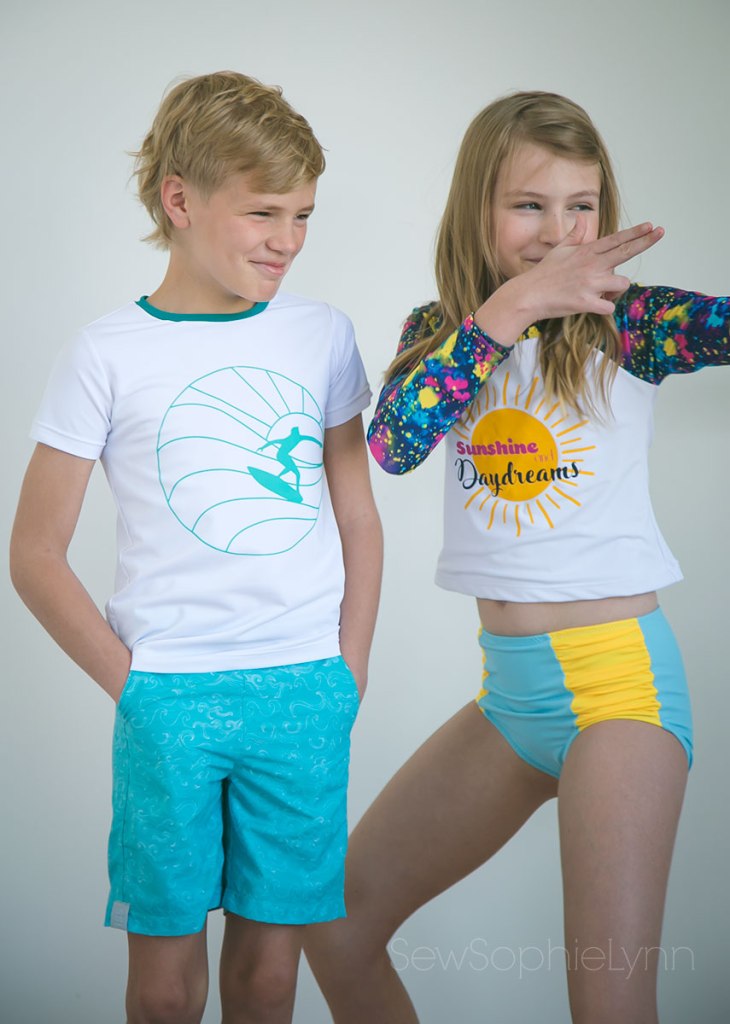
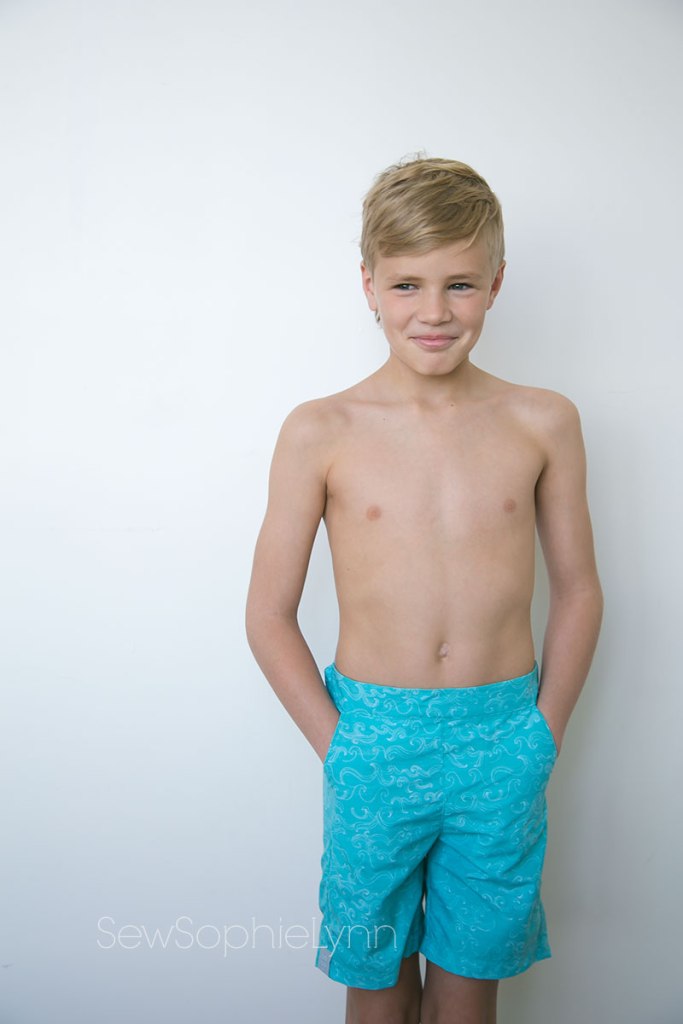
My little guy got two new suits this year. And I promise he wasn’t as miserable during this shoot as his pictures look! This studio looks out over a busy street and this boy is so car obsessed he hated missing watching them, even for the few minutes it took to take these photos.

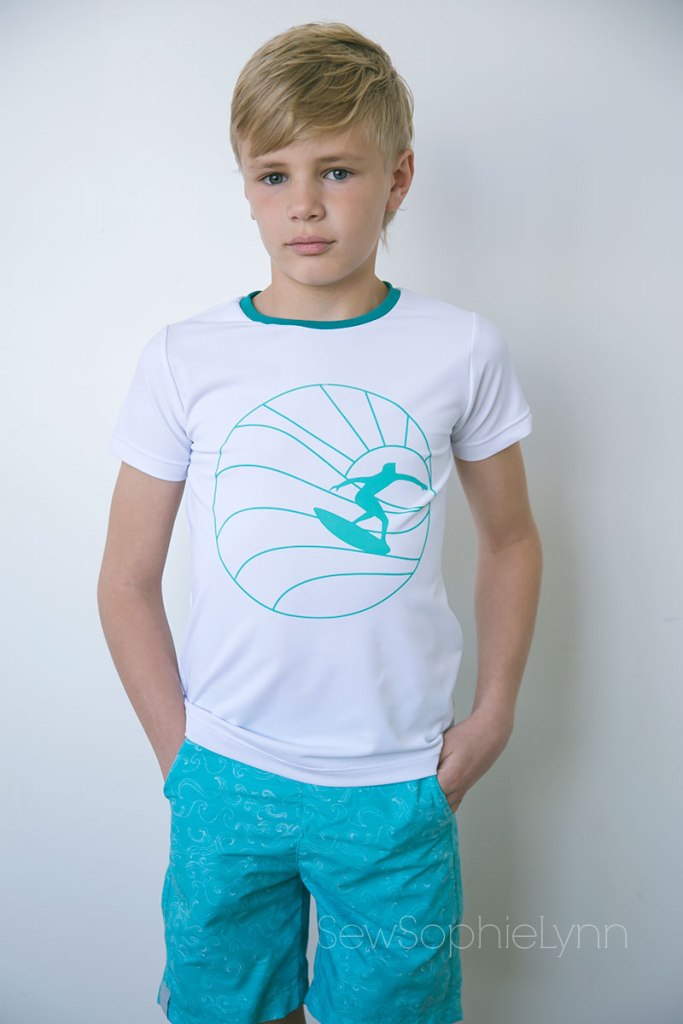
His first suit is a Lowland Kids Swim Brief. This pattern is unique because it uses swim knit making is especially soft and great for kids with sensory issues (there’s instructions to fully enclose seams too!). I used this teal tie dye print that I think is perfect for the whole family.

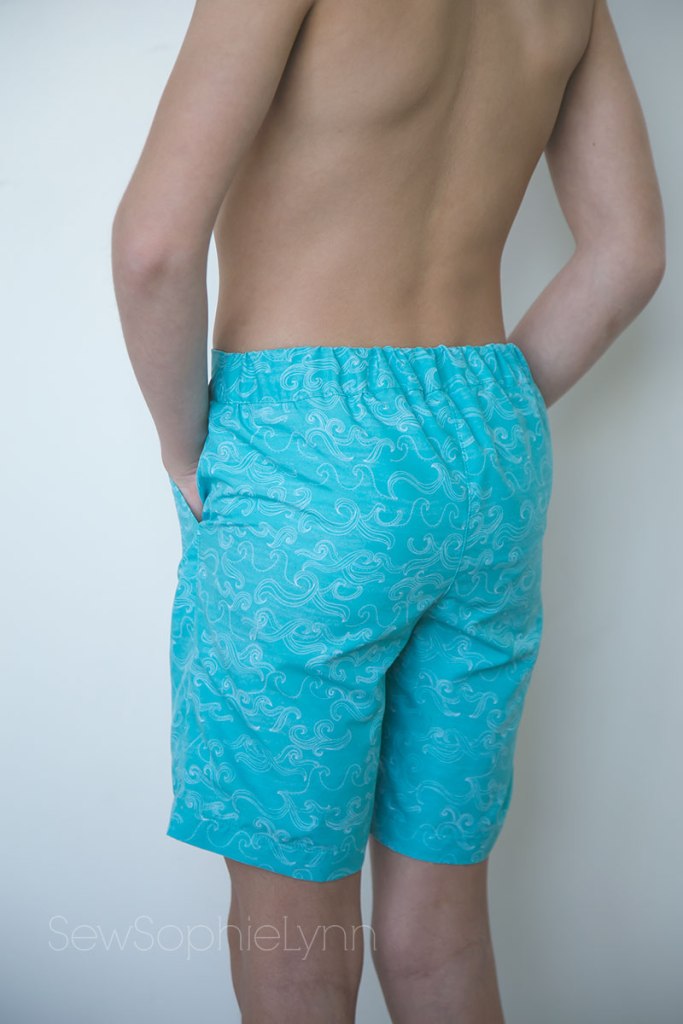
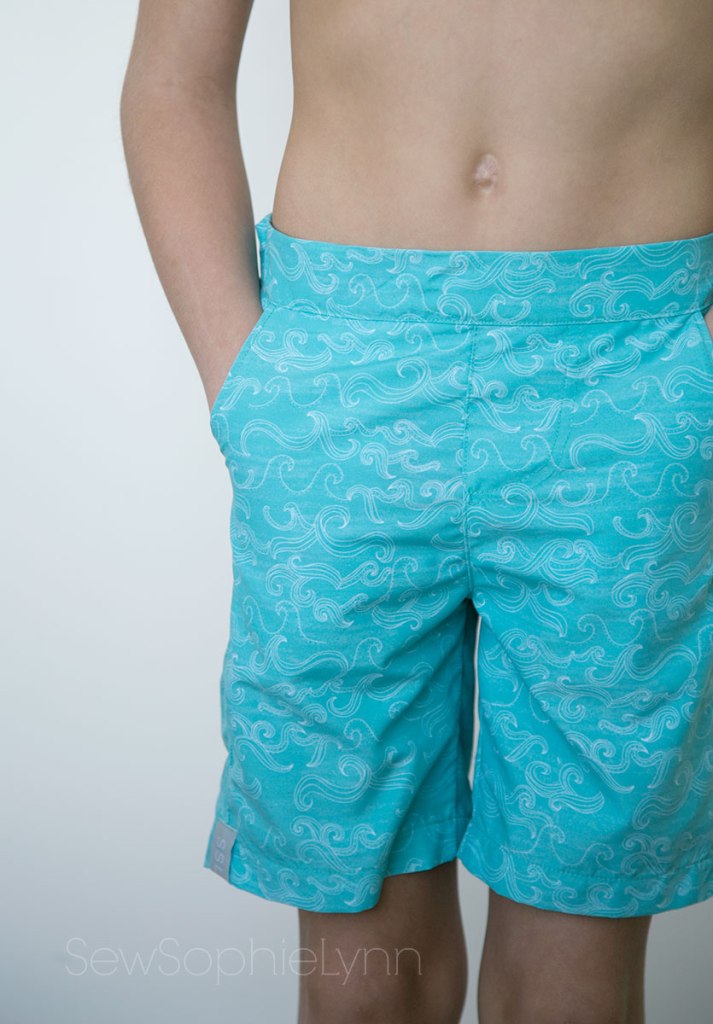
His second suit is Jennuine Designs Cobalt Boardshorts. I like the clean flat front and elastic back. He likes the pockets! I used this Teal Wave Print, another classic print that I think all of my boys would wear.

This is his “I’m not trouble, you’re trouble” look!
And this one is his “What?! I’m smiling, I promise” reaction.

I hope you’ll follow along all week as these incredible bloggers show off their new swimwear! I promise you’ll be in love!

And make sure to pick up your swim fabrics this week at 15% off with code SWIMTOUR.

Sew Mary Mac  Merritts Makes  Wild + Wanderful  Call Ajaire

Made by Kates  Violet and Jewels  Sweet Mama Life  All Things Katy!

Intensely Distracted  Pins & Pinot  My Heart Will Sew On  The Petite Sewist

All My Spare Time  Kara Metta  Handcrafted by RED  Sincerely, Shantelle

Replicate Then Deviate  That’s Sew Kari  Desert Blooms  Boo + Lu


Titchy Threads  Sew A Little Seam  Simple Life Pattern Co.  Pattern for Pirates  Ellie and Mac  

Lowland Kids  Gingham Hive  Striped Swallow Designs  Honeydew Kisses  Little Lizard King  

Jennuine Designs  Greenstyle Creations  Made for Mermaids  Call Ajaire  Hey June  Boo Designs! 

  Sofiona Designs  Love Notions  Lil Luxe Collection  Jalie  Sweet Red Poppy


Project Run and Play Summer Fun Digital Designs

It’s no secret I love me a good graphic tee! Getting creative and firing up my Cricut makes me so happy. I had the chance to sit down and design six graphics for the latest Project Run and Play collection and boy, was it a blast!

I was designing these graphics as winter was coming to an end and spring was in the air. Dreaming of sunshine and long summer days was the perfect respite for those dreary days. Throw in a pandemic and these sayings and graphics really got me through.

The whole digital design collection is fifteen super fun warm weather themed graphics that work great for the whole family. I can’t wait to grab some of the other designs to make some cute tees for the summer.

My designs are Sun Squad, Beach Bum, Take Me To The Ocean, Life is better at the beach, Good Vibes, and Sunshine and Daydreams. I was going for a real 80’s laid back summer vacation vibe while creating them. I couldn’t help but think back to my youth and the carefree, easy days of summer. Oh, to be a kid during summer break again! No worries or cares in the world…

Fabric for the tees was provided by Raspberry Creek Fabrics. I love their white cotton lycra- it’s not too thick, but it’s opaque and the perfect base for creating. My vinyl was all from my local vinyl shop, Vinyl Outlet, and I used Iron-On Turbo Flex vinyl because I LOVE the colors it came in. Super fun pastels that totally matched my retro vision.

The tee is the Lemon Tee from the Project Watercolor Beach collection. It’s such a great basic unisex tee that is full of fun color blocking options too. I did the banded sleeves for a ringer tee look that really added to the vintage feel of the graphics. I sized up one for my middle daughters for a relaxed fit but the others are true to their measurements. And yes, I made sizes 8, 9, and 10… crazy that they’re years apart but similar in chest sizes!

These shots are some of my favorites of my kiddos! They just epitomize the summer kid life to me and I know I’ll treasure these pics forever!

Thanks for stopping by and letting me share all this cuteness! Hop on over to the Project Run and Play shop and get creating!

Personalized Gifts with Cricut

This is a sponsored conversation written by me on behalf of Cricut. The opinions and text are all mine.


A couple of weeks ago I shared these personalized family Christmas pajamas with you.  Today I’ve got a round up of more personalized holiday projects using your Cricut and Cricut supplies plus I’m getting a little sentimental with y’all!

Package

Every year growing up, we opened up a new pair of pajamas on Christmas Eve.  It was a tradition my mom never missed and one that my siblings and I always looked forward to.  As a child, we moved often and by the time I was married at 23 I had moved 17 times.  I think stable traditions like this take on a whole new meaning when your outside world is constantly changing.  We learned to cling to each other and to celebrate as a family no matter where we were in the country.  New pajamas were just a small comfort that came to mean so much to me.

Girls2

Now with my own children, I love to carry on that tradition.  This year instead of going all matching, I was able to use my Cricut Maker to create pj’s that matched their personalities and interests to a tee.  I love being able to create gifts that mean a little more to the recipient and personalization is key.  From grandma’s and grandpa’s to teachers and neighbor gifts, our Cricut gets a workout this time of year.

Kids2

Here’s a roundup of 25 projects that will get your holiday kicked off right!

Tote Bag with the Tattooed Quilter

A Swiss Alps Holiday with Oh Happy Day

Personalized Ornaments with Phat Quarters

Holiday Pajamas with Sookee Designs

Teacher Tote Bag with Sew Much Ado

DIY Teacher Mug with Sew Much Ado

Personalized Name Coasters with The Quiet Grove

Monogram Journals with See Kate Sew

Reusable Gift Bags with Jordan’s Easy Entertaining

Debossed Foil Gift Wrap with Proper

Bird Coasters with Crafting in the Rain

Personalized Color Your Own Gift Bags with Happy Go Lucky

Gift Basket for a Sewer with Heather Handmade

Fridge Magnets with The Country Chic Cottage

Personalized Stockings with Not So Cli-Shea

Personalized Stationery with Just My Little Mess

Baking Set with Hey Let’s Make Stuff

Personalized Ornaments with 5 Little Monsters

Christmas Countdown with Ameroonie Designs

Rainbow Glitter Tumblers with Happiness is Homemade

DIY Placemats for the Holidays with Fleece Fun

Christmas Eve Bag with Suburban Wife City Life

Hostess Gifts with Pineapple Paper Co.

Baking Gift Idea with the Idea Room

Personalized Christmas Sign with Polka Dot Chair

So many great ideas!  I can’t wait to get crafting!

Pin5

Pin3

Personalized Christmas Jammies with Cricut Maker, EasyPress 2, and EasyPress Mini

This is a sponsored conversation written by me on behalf of Cricut. The opinions and text are all mine.


Main1

How many of you have the tradition of fresh new pajamas for Christmas morning?  It was a tradition in my home growing up and one that I’ve loved carrying on with my own kids.  Some years we all sport matching sets, sometimes they’re a mix of store-bought and handmade, and sometimes the littles get cozy footie pajamas while the rest of us are happy with new flannel pj pants.  This year I’m excited to be ahead of the game and my kids are thrilled with their new jammies that match their personalities to a tee.  This post is sponsored by both Cricut and Raspberry Creek Fabrics to really bring their visions to life.

Kids4

We broke out all things Cricut for this post and I can’t wait to share all about them.  We used the new Infusible Ink products, some fun Iron-On Designs, Everyday Iron-On with my Cricut Maker, EasyPress 2, and EasyPress Mini.  Having the right products and materials made it so easy to create looks that this crew really loves.

Kids3

The first thing we did was head to Raspberry Creek to pick their fabric.  My younger three are all about the CLUB fabrics.  I try to keep them in CLUB pajamas for every season.  The CLUB fabric bases are so soft and comfortable and are their absolute favorites.  I loved that they immediately found prints they loved and that they went for three different base fabrics- the famous cotton lycra, double brushed polyester, and the new sweatshirt fleece.  My big boys wanted flannel bottoms and you can’t go wrong with any of the Robert Kaufman flannels in the shop.  They are so soft and fluffy and wash up better and softer with each wash.  I have a pair from many years ago that still look brand new even after constant washing during the colder months.

With their fabrics picked, we found the perfect matches for their personalized tops.  My big boys wanted simple designs so we tried out a couple of Infusible Ink papers.  My oldest daughter loves buffalo plaid and we just had to do the matching Infusible Ink.  My spunky younger daughter fell for the perfect Iron-On Design and my little man went with easy Everyday Iron-On.

Charlie2

My littlest was very insistent he needed this adorable Christmas Cactus print for his pj’s.  He sat on my lap and scrolled through DesignSpace with me and just cracked up at this design he picked.  Boy, does it suit him!  He’s sweet to the bone but his curiosity can get the best of him.  We used Kelly Green Everyday Iron-On for a simple tee that we both love!  I used the Titchy Threads Rowan tee for his top and Sew A Little Seam (free) Movie Night Pj’s for his bottoms.

Payton1

This little miss loved this bright and fun Iron-On Design.  I let her cut it all out and place it on her tee how she wanted.  We used our favorite raglan pattern, Hey June’s Camden, and leggings pattern, Love Notions free Leggins’ to create an easy set.  I wouldn’t be surprised if these pieces made their way into her everyday wardrobe too.  This striped double brushed polyester is one of my favorites from the fall collection and I can always count on my go-to mustard dots to coordinate with just about everything.

Sophie3

It’s no surprise that this daughter of mine picked something I totally want for myself!  I would live in those cozy fleece joggers!  We used this buffalo plaid sweatshirt fleece for a pair of Made for Mermaids Lexi and Lou Loungers (with added elastic in the waist) that I’m sure she’ll wear every chance she gets.  How fun is it that this Infusible Ink matches so good?!! Perfection!  She picked this darling deer head from DesignSpace for a look that is so on trend.  We used a Cricut blank tee as the base and we were both in awe as we watched the Infusible Ink melt into it.  It was shocking to see how bright and smooth it came out!  We were both mesmerized by it and are already planning more projects with it so we can see the magic again.

Alex2

This kid is the ultimate sports fan.  His room is decorated floor to ceiling with all things Broncos, Jazz, Yankees, and soccer.  It was no surprise he wanted a simple Utah Jazz note on his tee.  We used Infusible Ink and a Cricut blank tee paired with his cozy Patterns for Pirates Walk the Plank pj pants (another free pattern!).

Tanner3

My oldest is a senior this year and spends all his free time playing soccer.  We found this cool silhouette in Design Space that looks soooo much like him- it was perfect!  I added his school name and graduation year to really personalize it.  He also got a pair of Walk the Plank bottoms.

GirlsEasyPressMini1

For the front designs, I used my big EasyPress 2.  I love the even, smooth results I get every time!  I couldn’t live without my EasyPress!  I was so excited to get the EasyPress Mini.  I used iron-on size tags in almost all our handmades (it makes hand-me-downs easier and also helps my kiddos find the back, lol!).  The EasyPress Mini is going to live in my sewing space and makes adding those little tags so.dang.easy.  It heats up fast and is the perfect size to get in the neckline.  My mind was blown!

Pin1Pin2Pin3Pin4

A HUGE thank you to Cricut and Raspberry Creek Fabrics for providing all the supplies for this post.  I love that we were able to spend time together creating the perfect jammies for each of my kiddos.  The memories of that day are just as special as the pj’s!  That’s what the holidays are all about!

Retro Tees with the Cricut Easy Press 2

retrogroup

This post is sponsored by Cricut.  I received the Cricut Easy Press 2 in exchange for promotion.  All thoughts in this post are my own.

It’s no secret that we’re huge Cricut fans in our house.  We’ve all gotten spoiled and love to create looks that we dream up ourselves.  As a seamstress, I love to create clothes and pick out pattern and fabric combos that suit both me and my children.  The Cricut Maker, Easy Press 2, and sewing products help us take our handmade wardrobe to the next level.

legendary2

I’ve been absolutely loving all the rainbow and vintage vibe tees and sweatshirts that are everywhere these days.  It was so much fun to come up with our own sayings and designs and use our handy Cricut tools to create looks that fit their personalities.

main

The Cricut EasyPress 2 makes ironing on your vinyl designs such a breeze.  I’m loving the new vibrant color and three different sizes that will suit all your needs.  The small 6″x7″ size works great for baby clothes and little projects.  The medium 9″x9″ size is super versatile and a great all-purpose machine.  The large 12″x10” has been fantastic for our family.  It’s great for youth and adult clothing and has been getting a work out at our house.

The EasyPress 2 is easy to use and is so quick and handy.  It heats up so fast and the ceramic coated plate produces smooth, even heating (something my iron sure lacked!).  I use mine on my kitchen table and I know that it’s protected from the heat by the insulated safety base and the EasyPress Mat.  It gets up to 400 degrees and irons on your designs in no time.  The easy to read digital display makes it easy to set the temperature and timer to suit your iron-on material and fabric.  And I love that it’s easy to store on my shelf and is light and portable.  Phew!  So many great qualities!  I honestly don’t know how I lived without mine.

ezpress

When creating these looks I turned to Cricut Design Space and the loads of fonts at my finger tips!  You can create this look for yourself here.  I used the Playroom Sampler pack, with Kelly, Orange, and Sky but I think it’d look amazing in an array of Glitter Iron-On as well.

I’m a Cricut Iron-On convert.  After using different brands I’ve been thrilled with how well our Cricut brand makes have held up.  Cricut has introduced the StrongBond guarantee that will give you the confidence and peace of mind that your iron-on projects will last and last.  The StrongBond guarantee means that if your Cricut iron-on products are used as directed and you’re not completely satisfied, Cricut will replace it for free.  Cricut Iron-on products are made to last 50+ wash and dry cycles and I’m here to testify that ours have taken a beating and still look amazing.  That’s a big deal with kids- their favorites can stick around until they’re outgrown!

dreamer2

I used the Samson Sweater from Love Notions sized up one and with an extra wide bottom band to give it that oversized look.  This french terry from Raspberry Creek is one of my favorite fabrics for fall.  (I love it so much I used it for my little guys joggers too!)  It’s nice and thick and worked wonderfully with the iron-on.

legendary1

This Legendary tee was another fun design.  This kiddo has certainly reached ‘legend’ status at our house so this tee was just too perfect for him.  I used the Boho Sampler pack of Everyday Iron-On for this look.  I used the #121 Ringer Raglan pattern from Thread Faction- I can’t get enough of that slim fit!

legendary3

I used the Lexi and Lou Loungers from Made for Mermaids for his pants.  I added a long vinyl stripe down the side and in the pocket for a touch of color.  The large EasyPress made ironing on the stripe simple and easy!  One bonus of making a garment is that you can iron things on flat, before they get completely sewn together.  I sewed up the pockets and side seam, EasyPressed the stripes on, then continued with the construction.

good-times2

This design is a trial and error look.  I’m always trying to come up with new ways to use my Iron-On materials and this one was a fun one.  I took strips of each color and taped them together using transfer tape on the plastic backing.  I cut the design out in white iron-on and applied it to the sweatshirt.  I then cut the design out of my rainbow piece and applied it directly on top of the white lettering.  It’s far from perfect but that just means I get to keep trying it until I get it just right!  I love the look and used the same technique here too.  You can get this design in Design Space here.

Her top was made using the Striped Swallow Designs Apres Ski.  Those big full sleeves take this sweatshirt from boring to brilliant.

main1

I’m thrilled with this whole Retro Rainbow collection and love how quick and easy it was to make with our Cricut products.

This is a sponsored conversation written by me on behalf of Cricut. The opinions and text are all mine.

This is a sponsored conversation written by me on behalf of Cricut. The opinions and text are all mine.

https://influencers.tapinfluence.com/assets/cogs/core-v4.js var ts=document.getElementById(‘ti-pixel-tracker’); var axel = Math.random() + “”; var num = axel * 1000000000000000000; var ti=document.createElement(“img”); ti.style.display=”none”; ti.src=”https://tracking.tapinfluence.com/trk/IfFFz/qCBqj/p.png?p=zRsnp” + String.fromCharCode(38) + “i=9W3yX” + String.fromCharCode(38) + “ord=”+ num + String.fromCharCode(38) + “s=” + encodeURIComponent(document.referrer); ts.parentNode.replaceChild(ti,ts); JSON.stringify({“program_id”:”5d3784ea-9018-11e8-83a8-0632d5c66a00″,”post_id”:”548e2120-d193-11e8-ad38-06344b32889a”});

Personalizing our wardrobes with Cricut

This post is sponsored by Cricut.  I received all Cricut products in exchange for promotion.  All thoughts and projects in this post are my own.  I’m thrilled to introduce you to some fantastic new Cricut products!

summerteescollection3

I’ve got an addiction folks.  I can’t stop vinyling ALL. THE. THINGS!  I’m excited to be sharing a couple of our recent designs that are now available on Cricut Design Space!  You can also check them out over on the Cricut blog.

vacationmode3

I designed these files using Design Space and Cricut Access.  There were so many fun graphics to choose from and the hardest part was narrowing it down to these three.  This Vacation Mode design is a nod to my favorite vacation destination- a sunny beach with palm trees, sand, and a beautiful ocean view.

paradise3

This Paradise Tee was made for my flamingo loving daughter.  Flamingos just symbolize the chill, relaxed life.  They’ve got it made hanging out in the water and just soaking it all in.

summertimevibes3

The Summertime Vibes tee was the first design I did as we ushered in summer and said goodbye to the cool spring days.  Summertime means lazy days, family time, and lots of sunshine.

charlie1

For this design I was anxious to try out the new Cricut SportFlex Iron-On.  I made this rash guard for my kiddo and used my Cricut EasyPress to adhere this to the front.  To get the right settings for SportFlex and swim fabric I turned to my Cricut expert and pal Paisley Roots.

This is what she found and it’s worked perfectly:

EASYPRESS: Heat up your Easy Press to 305 Degrees and make sure to warm your garment for 10-15 seconds before laying the vinyl on top. Using medium pressure, press on top of the vinyl for 30 seconds, then turn the garment over and press the back for 15 seconds.
It’s also recommended to warm peel.
REGULAR IRON: it’s recommended to put it on Wool setting. Warm up your garment for 10-15 seconds before laying your vinyl then press the front of the garment for 50 seconds and the back for 15 seconds. Cold Peel.
He’s worn this rash guard constantly and it’s been in chlorine, splash pads, and sun.  It’s held up so well and still looks brand new!  Hooray for SportFlex!
main
I’m so excited to introduce to you all my favorite Cricut products EVER!  The original EasyPress changed my crafting life and the new EasyPress 2 machines are even better!
They now come in three different sizes- 6″x7″, 9″x9″, and 12″x10″ for all your iron-on needs.  The EasyPress is simple to use, heats up in just 60 seconds, and is a great alternative to a standard heat press.
mini2
I love how convenient it is.  I never considered a conventional heat press for safety and storage reasons and my regular household iron was not consistent.  My EasyPress addressed all those issues.  It’s easy to store and the insulated resting base protects surfaces.  I often let my kids use the EasyPress (with my supervision of course!) because it’s so easy to use and the hot surface stays away from your body.  Use the EasyPress Mat or a thick, folded towel under you project to protect your surface and to absorb the heat.  You can find all the recommended settings here.  It couldn’t be easier!
mini1
I’m loving the cute mini version.  This one is going to live in my sewing space because it is absolutely perfect for little projects like adding iron-on size tags to all my handmade garments (you can see a whole post about how I make them here).  I was blown away by how quickly this little guy heated up!  It was ready in no time at all.
large
The new 12″x10″ EasyPress is such a great addition to the line up too!  It was so nice to be able to iron-on a wide design in one pass.  Since I make a ton of personalized tees and sweatshirts for my family, this one will be heaven-sent.

I couldn’t wait to try out the new machines and whipped up some back to school tees in no time.

pair2

summerteescollection2

Whether you’re still in summer mode or planning for fall, Cricut has you covered!

This is a sponsored conversation written by me on behalf of Cricut. The opinions and text are all mine.

http://influencers.tapinfluence.com/assets/cogs/core-v4.js var ts=document.getElementById(‘ti-pixel-tracker’); var axel = Math.random() + “”; var num = axel * 1000000000000000000; var ti=document.createElement(“img”); ti.style.display=”none”; ti.src=”http://tracking.tapinfluence.com/trk/NjWWl/0ZnqQ/p.png?p=Dmruk” + String.fromCharCode(38) + “i=9W3yX” + String.fromCharCode(38) + “ord=”+ num + String.fromCharCode(38) + “s=” + encodeURIComponent(document.referrer); ts.parentNode.replaceChild(ti,ts); JSON.stringify({“program_id”:”5d3784ea-9018-11e8-83a8-0632d5c66a00″,”post_id”:”b0cd2366-9f1e-11e8-be46-0a11af595dac”});

The New Cricut Maker

maker1

If you’ve been a follower for very long you know I love my Cricut.  I recently upgraded from the Explore Air 2 to a Cricut Maker and I’m here to answer any questions you might have about the two.

This post is sponsored by Cricut.  I received the Cricut Maker, Easy Press, and Bright Pad in exchange for promotion.  While I received these products for free all thoughts and reviews on these products are my own.  I’ll do my best to highlight the pros and cons of all these products.


First, let me say that I’m a sucker for heat transfer vinyl or as Cricut calls it Iron On.  I’d say that’s what I use my machine for 90% of the time.  As a sewist, I’m all about personalizing our wardrobe.  That’s part of why I sew, to create unique, one of a kind clothing for me and my children.  The skies the limit with what we can design and iron on and the fact that it takes just minutes makes it so fun and easy.

If you’re like me and use your cutting machine primarily for vinyl then honestly the Maker just isn’t necessary.   It has lots of bells and whistles that I’ll address further down this post and the potential it has is huge.  I’m excited by what I can create knowing all the possibilities this machine has but if I was sticking with vinyl my Explore Air 2 was amazing too.

The biggest game changer for me was getting an Easy Press.

easypress1

I have a normal inexpensive iron that I was using to iron on my projects.  While it worked fine I would notice peeling after a couple of washes every now and then.  It was frustrating and always made me nervous to gift personalized tees because I was worried about the quality.  I never considered a heat press- too big and bulky, expensive, and unsafe.  My craft space is small and open so my kids are always in and out of it, just not ideal for a heat press.

The Easy Press has seriously been such a huge upgrade.  It’s so portable and easy to use.  The surface heats quickly and evenly and the temperature control and timer take all the guess-work out of it.  It comes with a handy Quick Reference Chart that I keep with it that details the exact temperature and time for your vinyl/fabric combination.


The weekend I got my Easy Press we set to work making some quick, cute Christmas presents for my daughter’s and their bff’s.  They helped me design their projects in Design Space then I had them do the rest.  They quickly weeded their sheets using the Bright Pad and I supervised as they pressed the designs to the tees.

easypress2

The Easy Press is easy to handle and the flat design makes it easy to slide from the cradle to the project.   We picked up a few tips along the way (most of these are mentioned in the user manual but I think they’re essential to getting a good result).  First, use a towel between your project and the hard surface beneath it.  The towel will absorb any moisture and protects your surface.  Second, preheat your area where you’ll be placing your vinyl with a quick press.  This will get rid of any lingering moisture and help the vinyl adhere best.  And lastly, make sure to flip your project inside out and iron from the backside as well.  This just makes it adhere even better!  Even following all these steps, you’ll have a great finished product in minutes!  I can’t say enough good things about the Easy Press and the great results you get when using it.

maker2

Let’s talk about the Maker.  It gets ALOT of use in our house.  We use our cutting machine a few times a week.  We have a big built-in desk in our main living space that the Maker sits on next to our computer making it convenient to use.  We use it for school projects, bulletin boards, Valentine’s boxes, decorations, and more, using it to cut all kinds of paper and fabric.


The Maker has so many unique features.  It is heavy-duty, with up to 10x more cutting power than other machines.  It has an Adaptive Tool System that allows you to switch between blades easily and has the potential for more tools to be added.  The Rotary Blade is what sets this machine apart from others on the market.  The Rotary Blade acts just like a rotary cutter, gliding over the surface and pivoting to make even the most intricate cuts.  It can cut anything from thin, delicate tissue paper to thick denim.  It’s amazing to watch and I was in awe as it easily cut through thick glittered felt.  My son is so excited for the knife blade to hit the market.  He had the idea to make a chipboard puzzle as a gift this Christmas and I had to tell him that the Maker would soon be able to make it happen for him.  The possibilities of this machine are what sold me.  I hate getting a product only to feel like it’s ‘old technology’ within months (hello- how many gaming consoles have we gone through?!).  The fact that this machine can grow and expand is a huge selling point.

As an apparel sewist, I have yet to really use my Maker for garment sewing.  The small cutting space (you can use a 12×24 mat) just doesn’t make it practical.  BUT I can think of a ton of small projects that will be great for it.  My daughters have been sewing and enjoy quick little makes.  Design Space is full of projects that will be perfect for them.  I know when spring break and summer vacation roll around our Maker will be busy.  They love doll clothes, small bags, hair bows, accessories, and decorations.  Design Space continues to add more of these type of projects and I’m excited to get my craft on with them!

Our Cricut products are well-loved and have become a natural part of our lives.  We love to create and are grateful to have our Maker, Easy Press, and Bright Pad to help our dreams come to live.

This is a sponsored conversation written by me on behalf of Cricut. The opinions and text are all mine.

http://influencers.tapinfluence.com/assets/cogs/core-v4.js var ts=document.getElementById(‘ti-pixel-tracker’); var axel = Math.random() + “”; var num = axel * 1000000000000000000; var ti=document.createElement(“img”); ti.style.display=”none”; ti.src=”http://tracking.tapinfluence.com/trk/5ckXD/DATzX/p.png?p=b5EIz” + String.fromCharCode(38) + “i=9W3yX” + String.fromCharCode(38) + “ord=”+ num + String.fromCharCode(38) + “s=” + encodeURIComponent(document.referrer); ts.parentNode.replaceChild(ti,ts); JSON.stringify({“program_id”:”8b1a7330-fcc6-11e7-b475-22000af436a0″,”post_id”:”7cf18a68-0708-11e8-9267-22000af436a0″});

Love Notions Sloane Blog Tour Day Three- free Cut File

sloanegrey4

Here we are on day three and I’ve got another women’s Sloane for you.  This is inspired by a J. Crew sweatshirt I found on Pinterest

inspiration

It’s no longer available and I guarantee that I would cringe at the price.  Basic sweatshirts with a little embellishment are an easy DIY and usually carry a hefty price tag off the rack.

sloanegrey3

For this version I sized up to a medium.  The inspiration pic looks really roomy and I wanted to keep that look.  I used one of my go-to fabrics- this light heather grey french terry from Raspberry Creek Fabric.  It’s a cotton spandex blend that’s medium weight with great stretch and recovery.  I did a basic view B without any of the bells and whistles.

sloanegrey2

For my floral embellishments, I used my Cricut.  I knew I could achieve the look of the velvet flowers on the original with a black flocked heat transfer vinyl.  I love flocked vinyl and use it all the time.  It lends a retro vibe to graphic tees and holds up so well in the wash.  It mimicked the velvet so perfectly for this project too!

I’m not a graphics girl by any means so my flowers were done with a little trial and error.  I found a few free floral clip arts online and traced them in Design Space.  I copy and pasted them to get multiple sizes to get a good variety to play with.  I had fun laying them out on my top and playing around with placement.  You really can’t go wrong.  Use as few or as many flowers as you’d like.

You can make your own with these free files using your cutting machine:

PDF

PNG

SVG

I think they’d look great in a metallic or a subtle monocramatic color on color too!

sloanegrey1

I love this quick embellishment project!  So easy and adds so much to a boring old sweatshirt.

sloanegrey5

You can check out all the other stops on the Sloane Tour this week here and stick around for my official post tomorrow!

Monday: Sew Shelly Sew, The Wholesome Mama, Ruby Rue Creations

Tuesday: Third Shift Creations, Sew Like a Sloth, Four Seasons and a Roadtrip


Cricut Sewing Blog Tour

This is a sponsored paid post courtesy of Cricut.  All thoughts and projects are my own!

I’ve got a new addiction folks!  Me and My Cricut Explore Air 2 are now joined at the hip.  I’m excited to share what we’ve made so far and a simple-but-oh-so-useful tutorial that just may change your life (ok, maybe not truly but it certainly will make laundry day a bit easier).

main

I’m lucky enough to be joining the Cricut Sewing Blogger Tour.   Cricut generously set us up with EVERYTHING we’d need to create to our hearts content.  Our package included the Cricut Explore Air 2, the Essential Tool Kit, a mat multi-pack, and the most gorgeous assortment of heat transfer vinyl ever!

package

You only get a quickie cell phone shot because I didn’t waste any time before digging in to all this good stuff.  My kids and I spent the evening perusing all the designs available on Cricut Design Space.  We had a stack of tees from good ‘ol Target just waiting to be spiffed up. The hardest part was narrowing down our choices- with over 60,000 images at our fingertips, you can imagine that the possibilities seemed endless.  It was so fun finding images to match their personalities and current obsessions (just look at all these cute flamingo images!).  My son was also able to easily create a graphic tee featuring his newfound favorite tv show, The Office.

tees

Let’s just say we sufficiently broke in our new machine and got comfortable with how easy it is!

tags1

I had a little ah-ha moment a couple weeks ago.  How fantastic would it be to make vinyl size tags for all our handmades?!! My kids just might not put their tees on backwards anymore and Dad will be able to tell front from back too!  Our handmades are starting to be passed down to cousins and it would sure be nice for them to have a size inside.

After playing around just a bit, I knew this would be an easy, fun solution and save my sanity while sorting laundry and outgrown clothes too!  I’ve got an easy tutorial on how to make your own and all my tips I’ve learned in the process.

tag4

Setting up your cut file is a breeze.  I found it easiest to type each number and letter in it’s own text box, placing at least one space between each character.  So all my S’s are in one text box, etc.  Try to pick a thicker font since we will be cutting these fairly small, you can always ‘BOLD’ a font to thicken it up.  I like them between 3/4″ and 1″ tall.  I spaced each line at least 1/4″ apart also.  Once you’ve got each line how you’d like it, select all and attach the lines together.  This will keep your spacing as is when you go to cut.  You can also easily duplicate your lines and groups this way too.

tags

For my file, I cut my kids current sizes, my current size, and my girls initials.  My girls wear the same size in many things and can be super picky about sharing all their things.  This helps me so much at laundry time when I’m sorting their clean clothes.  I put their initials on their ready-to-wear things too- think underwear, pj’s, you name it!

I cut each line with my portable trimmer then roughly cut out each character.  You’ll want to leave each piece fairly big- this will make it easier to stick it on your garment later.

holder1

I found a plastic jewelry organizer that works perfectly for sorting and storing all my tags.  It’s clear and easy to see exactly what I’m looking for.

tag1

I love how easy it is to apply these.  I always do one last good press when I finish a sewing project and that’s the perfect time to take the 20 seconds to apply the tag.  I love that they melt right into the fabric leaving it soft and smooth.  Hooray for no itchy woven tags!

tag3

I have a few patterns that I use in multiple sizes depending on fabric and the fit I’m after.  I can never remember which size I used for each garment though and this will be a huge help later on when I go to remake a pattern.

sandbridge

I think my favorite tag I did was this little hidden ‘Rock Star’ tag in my first ever denim project.  I feel like this was such a huge, fun accomplishment and wanted to celebrate that in my own little way.  I think it’ll be fun to do this in future projects- a little personalized tag for special makes.  Maybe that special first day of school outfit, Halloween costumes, Holiday dresses- it’s just a cute way to commemorate and remember why and when each piece was made.

There are so many amazing sewing bloggers joining in this fun tour.  I have been blown away by their creativity and my list of projects has grown with each post I read.  You won’t want to miss a single one!  Make sure you enter to win your very own Cricut Explore Air 2.  It’s been so fun having one of my own and I can’t wait for you to get one too!

Enter to Win a Cricut Explore Air 2 HERE

Week One: July 19th

Week Two: July 26th

tee
Thanks for joining us and thank you Cricut for making our lives easier, more colorful, and definitely more fun!

I was invited to participate in the Cricut Party Blogger Program Kickoff.

This experience is based strictly on my opinion. Others may have a different opinion or experience with the product listed above. I was provided the sample free of charge by the company or PR agency and I have given my honest opinion.

This is a sponsored conversation written by me on behalf of Cricut. The opinions and text are all mine.

https://influencers.tapinfluence.com/assets/cogs/core-v4.js var ts=document.getElementById(‘ti-pixel-tracker’); var axel = Math.random() + “”; var num = axel * 1000000000000000000; var ti=document.createElement(“img”); ti.style.display=”none”; ti.src=”https://tracking.tapinfluence.com/trk/zRbMy/e9wnO/p.png?p=NURSV” + String.fromCharCode(38) + “i=9W3yX” + String.fromCharCode(38) + “ord=”+ num + String.fromCharCode(38) + “s=” + encodeURIComponent(document.referrer); ts.parentNode.replaceChild(ti,ts); JSON.stringify({“program_id”:”ea3aef68-5cfb-11e7-8c3c-22000a66c666″,”post_id”:”f607e5f2-628d-11e7-aa1f-22000a7d00a4″});